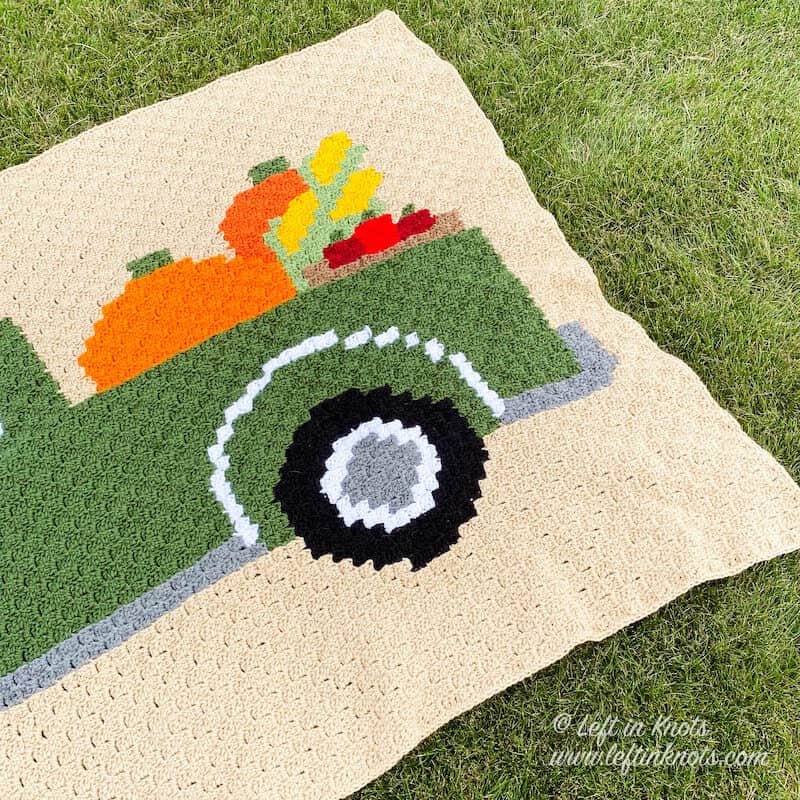
This Vintage Fall Truck Blanket feature an image of a vintage truck packed with pumpkins, corn and apples to give you all the Autumn vibes. This blanket is constructed with the C2C stitch, and there is a video tutorial to help you learn. Keep reading for the free crochet pattern.
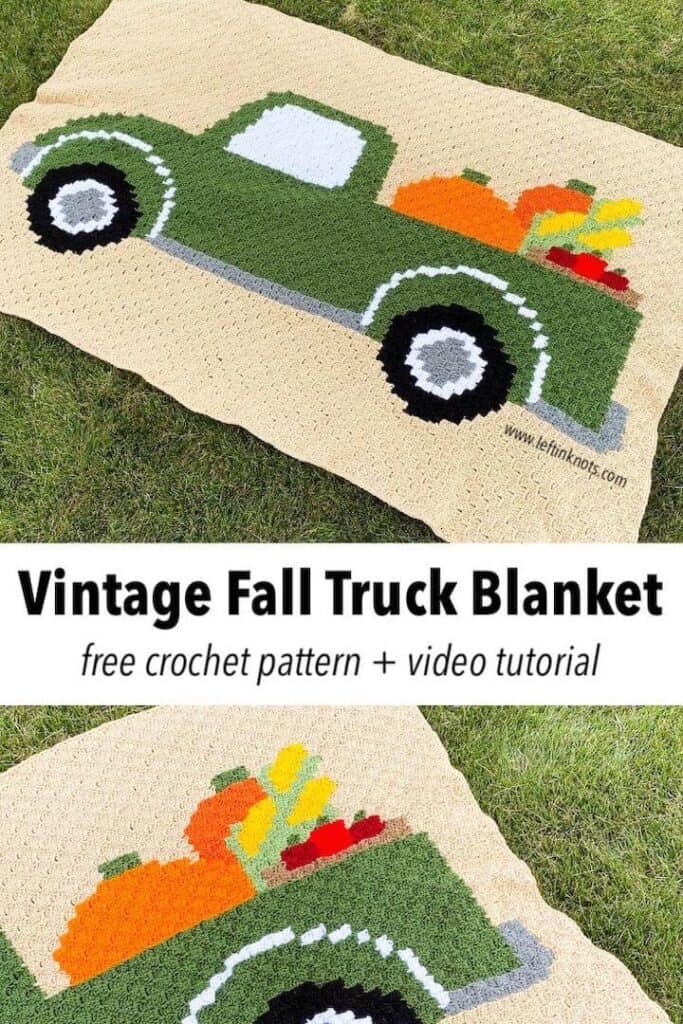
Vintage Pickup Truck Blanket
Our Fall CAL is here! If you loved my Vintage Christmas Tree Truck, Vintage Spring Flower Truck and my Vintage Summer Lake Truck blanket patterns I've released earlier this year; you won’t want to miss the Vintage Fall Truck Blanket! Check out this color palette that just SCREAMS pumpkin spice and apple picking.
What is C2C (corner to corner) Crochet?
The Vintage Fall Truck Blanket will be created with the C2C stitch. C2C (corner to corner) crochet has been a popular crochet method for creating blankets, pillows and other projects with pictures on them for several years now. The C2C crochet stitch is super easy to learn and I have a video tutorial to help you every step of the way. The pattern for the Vintage Fall Truck Blanket is available in both chart form and in written color changes.

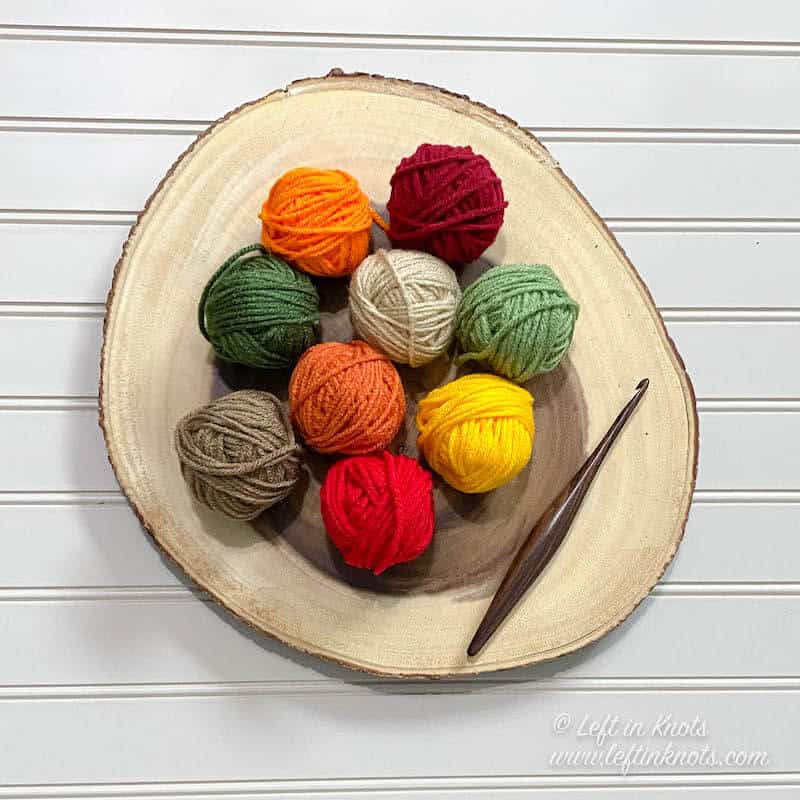
Choose Your Fall Color Palette
I love the versatility of C2C patterns like this because, even though you are following my chart, it doesn’t mean you have to follow the exact colors that I used. And that means that, overall, this truck blanket is a great scrap buster pattern because many of the colors require less than one skein of yarn. I chose colors that scream fall to me. If you have scraps of leftover oranges, reds and gold that aren’t exactly the same as mine that is totally fine! Your blanket will still look great.
Share your work!
Don’t forget to share pictures of your projects with me in my Facebook Group or by tagging @leftinknots on Instagram. I can’t wait to see what you make!
C2C Fall Truck Blanket - Free Crochet Pattern
Supplies:
- This blanket was made with Red Heart Super Saver though any worsted weight yarn will work. Please feel free to sub yarn though I do recommend sticking with one brand for consistency. Knit Picks/WeCrochet Brava worsted weight yarn would also work great for this project!:
- Red Heart Super Saver ‘Burgundy’ - 10 yds.
- Red Heart Super Saver ‘Cherry Red’ - 10 yds.
- Red Heart Super Saver ‘Cafe Latte’ - 15 yds.
- Red Heart Super Saver ‘Carrot’ - 25 yds.
- Red Heart Super Saver ‘Saffron’ - 25 yds.
- Red Heart Super Saver ‘Tea Leaf’ - 30 yds.
- Red Heart Super Saver ‘Pumpkin’ - 70 yds.
- Red Heart Super Saver ‘Gray Heather’ - 95 yds.
- Red Heart Super Saver ‘Black’ - 130 yds.
- Red Heart Super Saver ‘White’ - 180 yds.
- Red Heart Super Saver ‘Medium Thyme’ - 690 yds.
- This color is primarily used for the main color of the truck. If you decide to make your truck a different color - that’s fine! Just make sure you have about 10 yds. of this color or a dark green as well.
- Red Heart Super Saver ‘Buff’ - 2000 yds.
- This color is used for the blanket background. You can change this to any background color that suits your preference.
- 5.5mm crochet hook - I love Clover Amour
- Scissors - I always keep these travel scissors in my hook case
- Yarn needle
Take time to learn C2C with this video tutorial
Right Handed:
Left Handed:
Gauge
5 squares x 5 squares = 4” square in DC C2C
Finished Size (approx.):
- Width = 66”
- Length = 43”
Abbreviations (U.S. Terms)
ch: chain
sl st: slip stitch
SC: single crochet
DC: double crochet
C2C Stitch Instructions
This blanket it constructed with the Double Crochet Corner to Corner stitch (C2C).
Starting row of C2C: Ch 5, DC in third ch from the hook and in the next two ch sts (3 DC). This makes your first "pixel" square.
C2C Increasing Row: Ch 5, DC in third ch from the hook and in the next two ch sts, *sl st into the next ch 2 space from the previous row, ch 2 and work 3 DC into the ch 2 space of the previous row. Repeat from * across until you have worked 3 DC into each ch 2 space from the previous row. Each row will increase by one pixel (e.g. Row 2 = 2 pixels, Row 3 = 3 pixels, etc.)
C2C Maintaining Row: "maintaining" rows are what I like to call rows that maintain their stitch count over several rows. This allows you to create a rectangular piece with the C2C stitch. In this pattern, you will continue to increase on the left side (by one square), but you will decrease on the right side (by one square)
C2C Decreasing Row: this portion of the pattern uses decreasing rows. Your "square" count will decrease by one each row. In part two, you made "maintaining" rows by increasing on one side of the project and decreasing on the other. Now, you will decrease on both sides of the project.
Special Notes
• You can choose to work with multiple skeins/bobbins or you can opt to "carry" your yarn throughout your project.
• If you choose to follow the written color changes PLEASE reference the chart also as you go. It is always much easier to catch mistakes right away instead of a few rows past it.
For the written instructions, odd rows are worked "left to right" and even rows are worked "right to left" in reference to the chart.
• Color Key:
• Blk: ‘Black’
• Brgy: ‘Burgundy’
• Brn: ‘Cafe Latte’
• Buff: ‘Buff’
• Crt: ‘Carrot’
• Grn: ‘Tea Leaf’
• Gry: ‘Dusty Gray’
• Pmkn: ‘Pumpkin’
• Red: ‘Cherry Red’
• Sage: ‘Medium Thyme’
• Wht: ‘White’
• Ylw: ‘Saffron'
Instructions (CLICK HERE to purchase an ad-free printable of the complete pattern and chart.)
→ Row 1: Buff (1 stitch)
← Row 2: (Buff) x 2 (2 stitches)
→ Row 3: (Buff) x 3 (3 stitches)
← Row 4: (Buff) x 4 (4 stitches)
→ Row 5: (Buff) x 5 (5 stitches)
← Row 6: (Buff) x 6 (6 stitches)
→ Row 7: (Buff) x 7 (7 stitches)
← Row 8: (Buff) x 8 (8 stitches)
→ Row 9: (Buff) x 9 (9 stitches)
← Row 10: (Buff) x 10 (10 stitches)
→ Row 11: (Buff) x 11 (11 stitches)
← Row 12: (Buff) x 12 (12 stitches)
→ Row 13: (Buff) x 13 (13 stitches)
← Row 14: (Buff) x 14 (14 stitches)
→ Row 15: (Buff) x 15 (15 stitches)
← Row 16: (Buff) x 16 (16 stitches)
→ Row 17: (Buff) x 17 (17 stitches)
← Row 18: (Buff) x 18 (18 stitches)
→ Row 19: (Buff) x 19 (19 stitches)
← Row 20: (Buff) x 3, (Gry) x 2, (Buff) x 15 (20 stitches)
→ Row 21: (Buff) x 15, (Gry) x 3, (Buff) x 3 (21 stitches)
← Row 22: (Buff) x 3, (Gry) x 4, (Buff) x 15 (22 stitches)
→ Row 23: (Buff) x 15, (Gry) x 2, Sage, (Gry) x 2, (Buff) x 3 (23 stitches)
← Row 24: (Buff) x 3, (Gry) x 2, (Sage) x 2, (Gry) x 2, (Buff) x 15 (24 stitches)
→ Row 25: (Buff) x 15, (Gry) x 2, (Sage) x 3, Gry, (Buff) x 4 (25 stitches)
← Row 26: (Buff) x 5, (Sage) x 4, (Gry) x 2, (Buff) x 15 (26 stitches)
→ Row 27: (Buff) x 15, (Gry) x 2, (Sage) x 5, (Buff) x 5 (27 stitches)
← Row 28: (Buff) x 5, (Sage) x 6, (Gry) x 2, (Buff) x 15 (28 stitches)
→ Row 29: (Buff) x 10, (Blk) x 4, Buff, Sage, Wht, (Sage) x 7, (Buff) x 5 (29 stitches)
← Row 30: (Buff) x 5, (Sage) x 7, Wht, (Sage) x 2, (Blk) x 6, (Buff) x 9 (30 stitches)
→ Row 31: (Buff) x 9, (Blk) x 7, (Sage) x 2, Wht, (Sage) x 7, (Buff) x 5 (31 stitches)
← Row 32: (Buff) x 5, (Sage) x 7, Wht, (Sage) x 2, (Blk) x 8, (Buff) x 9 (32 stitches)
→ Row 33: (Buff) x 9, (Blk) x 3, (Wht) x 3, (Blk) x 3, (Sage) x 2, Wht, (Sage) x 7, (Buff) x 5 (33 stitches)
← Row 34: (Buff) x 5, (Sage) x 7, Wht, (Sage) x 2, (Blk) x 3, (Wht) x 4, (Blk) x 2, (Buff) x 10 (34 stitches)
→ Row 35: (Buff) x 10, (Blk) x 2, Wht, (Gry) x 3, Wht, (Blk) x 2, (Sage) x 11, (Buff) x 5 (35 stitches)
← Row 36: (Buff) x 5, (Sage) x 8, Wht, (Sage) x 2, (Blk) x 2, Wht, (Gry) x 4, Wht, (Blk) x 2, (Buff) x 10 (36 stitches)
→ Row 37: (Buff) x 11, (Blk) x 2, Wht, (Gry) x 3, Wht, (Blk) x 2, (Sage) x 3, Wht, (Sage) x 8, (Buff) x 5 (37 stitches)
← Row 38: (Buff) x 6, (Sage) x 11, (Blk) x 2, Wht, (Gry) x 4, Wht, (Blk) x 2, (Buff) x 11 (38 stitches)
→ Row 39: (Buff) x 12, (Blk) x 2, Wht, (Gry) x 3, Wht, (Blk) x 2, (Sage) x 3, Wht, (Sage) x 7, Brn, (Buff) x 6 (39 stitches)
← Row 40: (Buff) x 6, (Brn) x 2, (Sage) x 10, (Blk) x 2, Wht, (Gry) x 4, Wht, (Blk) x 2, (Buff) x 12 (40 stitches)
→ Row 41: (Buff) x 13, (Blk) x 2, Wht, (Gry) x 3, Wht, (Blk) x 2, (Sage) x 3, Wht, (Sage) x 6, (Brn) x 2, (Buff) x 7 (41 stitches)
← Row 42: (Buff) x 8, Brgy, Brn, (Sage) x 6, Wht, (Sage) x 3, (Blk) x 2, (Wht) x 4, (Blk) x 3, (Buff) x 13 (42 stitches)
→ Row 43: (Buff) x 14, (Blk) x 3, (Wht) x 3, (Blk) x 3, (Sage) x 9, Brn, (Brgy) x 2, (Buff) x 8 (43 stitches)
← Row 44: (Buff) x 9, (Brgy) x 2, Brn, (Sage) x 5, Wht, (Sage) x 3, (Blk) x 8, (Buff) x 15 (44 stitches)
→ Row 45: (Buff) x 15, Sage, (Blk) x 7, (Sage) x 3, Wht, (Sage) x 5, Brn, Red, Brgy, Sage, (Buff) x 9 (45 stitches)
← Row 46: (Buff) x 11, (Red) x 2, Brn, (Sage) x 9, (Blk) x 6, (Sage) x 2, (Buff) x 15 (46 stitches)
→ Row 47: (Buff) x 15, Gry, (Sage) x 2, (Blk) x 4, (Sage) x 5, Wht, (Sage) x 4, Brn, (Red) x 3, (Buff) x 11 (47 stitches)
← Row 48: (Buff) x 11, Grn, (Red) x 2, Brgy, Brn, (Sage) x 4, Wht, (Sage) x 10, Wht, Gry, (Buff) x 15 (48 stitches)
→ Row 49: (Buff) x 15, (Gry) x 2, Wht, (Sage) x 9, Wht, (Sage) x 4, Brn, (Brgy) x 2, Red, Sage, Grn, (Buff) x 11 (49 stitches)
← Row 50: (Buff) x 10, (Ylw) x 3, (Grn) x 2, (Brgy) x 2, Brn, (Sage) x 4, Wht, (Sage) x 8, Wht, Sage, (Gry) x 2, (Buff) x 15 (50 stitches)
→ Row 51: (Buff) x 15, (Gry) x 2, (Sage) x 2, Wht, (Sage) x 7, Wht, (Sage) x 4, (Brn) x 2, Brgy, Sage, Grn, (Ylw) x 4, (Buff) x 10 (51 stitches)
← Row 52: (Buff) x 11, (Ylw) x 4, (Grn) x 3, Brn, Grn, (Sage) x 4, (Wht) x 2, (Sage) x 5, Wht, (Sage) x 3, (Gry) x 2, (Buff) x 15 (52 stitches)
→ Row 53: (Buff) x 15, (Gry) x 2, (Sage) x 4, (Wht) x 2, (Sage) x 2, (Wht) x 2, (Sage) x 5, Pmpkn, (Grn) x 11, (Buff) x 9 (53 stitches)
← Row 54: (Buff) x 10, (Grn) x 10, (Pmpkn) x 2, (Sage) x 6, (Wht) x 3, (Sage) x 6, (Gry) x 2, (Buff) x 15 (54 stitches) → Row 55: (Buff) x 15, (Gry) x 2, (Sage) x 15, (Pmpkn) x 3, Grn, (Ylw) x 4, Grn, (Ylw) x 4, (Buff) x 10 (55 stitches)
← Row 56: (Buff) x 10, (Ylw) x 4, Grn, (Ylw) x 4, Grn, (Pmpkn) x 4, (Sage) x 15, (Gry) x 2, (Buff) x 15 (56 stitches)
You will now crochet C2C Maintaining Rows. Odd rows will start with an increase. Even rows will start with a decrease.
→ Row 57: (Buff) x 15, (Gry) x 2, (Sage) x 15, (Pmpkn) x 4, Crt, Grn, (Ylw) x 3, Crt, Grn, (Ylw) x 3, (Buff) x 10
← Row 58: (Buff) x 11, (Grn) x 2, (Crt) x 3, (Grn) x 2, Crt, (Pmpkn) x 5, (Sage) x 15, (Gry) x 2, (Buff) x 15
→ Row 59: (Buff) x 15, (Gry) x 2, (Sage) x 15, (Pmpkn) x 5, (Crt) x 7, (Buff) x 12
← Row 60: (Buff) x 11, Sage, (Crt) x 6, (Pmpkn) x 6, (Sage) x 15, (Gry) x 2, (Buff) x 15
→ Row 61: (Buff) x 15, (Gry) x 2, (Sage) x 15, (Pmpkn) x 6, Buff, (Crt) x 5, (Sage) x 2, (Buff) x 10
← Row 62: (Buff) x 10, (Sage) x 2, (Crt) x 4, Buff, (Pmpkn) x 7, (Sage) x 15, (Gry) x 2, (Buff) x 15
→ Row 63: (Buff) x 15, (Gry) x 2, (Sage) x 15, (Pmpkn) x 7, (Buff) x 2, (Crt) x 3, Buff, Sage, (Buff) x 10
← Row 64: (Buff) x 17, (Pmpkn) x 7, (Sage) x 15, (Gry) x 2, (Buff) x 15
→ Row 65: (Buff) x 15, (Gry) x 2, (Sage) x 15, (Pmpkn) x 8, (Buff) x 16
← Row 66: (Buff) x 16, (Pmpkn) x 8, (Sage) x 15, (Gry) x 2, (Buff) x 15
→ Row 67: (Buff) x 15, (Gry) x 2, (Sage) x 15, (Pmpkn) x 8, Sage, (Buff) x 15
← Row 68: (Buff) x 14, (Sage) x 2, (Pmpkn) x 7, Buff, (Sage) x 15, (Gry) x 2, (Buff) x 15
→ Row 69: (Buff) x 15, (Gry) x 2, (Sage) x 15, (Buff) x 2, (Pmpkn) x 6, (Sage) x 2, (Buff) x 14
← Row 70: (Buff) x 14, Sage, (Buff) x 2, (Pmpkn) x 4, (Buff) x 2, (Sage) x 16, (Gry) x 2, (Buff) x 15
→ Row 71: (Buff) x 15, (Gry) x 2, (Sage) x 17, (Buff) x 22
← Row 72: (Buff) x 21, (Sage) x 18, (Gry) x 2, (Buff) x 15
→ Row 73: (Buff) x 15, (Gry) x 2, (Sage) x 19, (Buff) x 20
← Row 74: (Buff) x 19, (Sage) x 20, (Gry) x 2, (Buff) x 15
→ Row 75: (Buff) x 10, (Blk) x 4, Buff, Sage, Wht, (Sage) x 15, (Wht) x 2, (Sage) x 4, (Buff) x
18
← Row 76: (Buff) x 17, (Sage) x 4, (Wht) x 3, (Sage) x 14, Wht, (Sage) x 2, (Blk) x 6, (Buff) x 9
→ Row 77: (Buff) x 9, (Blk) x 7, (Sage) x 2, Wht, (Sage) x 13, (Wht) x 4, (Sage) x 4, (Buff) x 16
← Row 78: (Buff) x 15, (Sage) x 4, (Wht) x 5, (Sage) x 12, Wht, (Sage) x 2, (Blk) x 8, (Buff) x 9
→ Row 79: (Buff) x 9, (Blk) x 3, (Wht) x 3, (Blk) x 3, (Sage) x 2, Wht, (Sage) x 11, (Wht) x 6, (Sage)
x 4, (Buff) x 14
← Row 80: (Buff) x 14, (Sage) x 3, (Wht) x 7, (Sage) x 10, Wht, (Sage) x 2, (Blk) x 3, (Wht) x 4, (Blk) x 2, (Buff) x 10
→ Row 81: (Buff) x 10, (Blk) x 2, Wht, (Gry) x 3, Wht, (Blk) x 2, (Sage) x 13, (Wht) x 8, (Sage) x 3, (Buff) x 13
← Row 82: (Buff) x 13, (Sage) x 2, (Wht) x 9, (Sage) x 9, Wht, (Sage) x 2, (Blk) x 2, Wht, (Gry) x 4, Wht, (Blk) x 2, (Buff) x 10
→ Row 83: (Buff) x 11, (Blk) x 2, Wht, (Gry) x 3, Wht, (Blk) x 2, (Sage) x 3, Wht, (Sage) x 8, (Wht) x 9, (Sage) x 3, (Buff) x 12
← Row 84: (Buff) x 12, (Sage) x 2, (Wht) x 10, (Sage) x 11, (Blk) x 2, Wht, (Gry) x 4, Wht, (Blk) x 2, (Buff) x 11
You will now crochet C2C Decreasing Rows.
→ Row 85: (Buff) x 11, (Blk) x 2, Wht, (Gry) x 3, Wht, (Blk) x 2, (Sage) x 3, Wht, (Sage) x 7, (Wht) x 10, (Sage) x 2, (Buff) x 12 (55 stitches)
← Row 86: (Buff) x 12, (Sage) x 2, (Wht) x 10, (Sage) x 10, (Blk) x 2, Wht, (Gry) x 4, Wht, (Blk) x 2, (Buff) x 10 (54 stitches)
→ Row 87: (Buff) x 10, (Blk) x 2, Wht, (Gry) x 3, Wht, (Blk) x 2, (Sage) x 3, Wht, (Sage) x 6, (Wht) x 10, (Sage) x 2, (Buff) x 12 (53 stitches)
← Row 88: (Buff) x 12, (Sage) x 2, (Wht) x 10, (Sage) x 6, Wht, (Sage) x 3, (Blk) x 2, (Wht) x 4, (Blk) x 3, (Buff) x 9 (52 stitches)
→ Row 89: (Buff) x 9, (Blk) x 3, (Wht) x 3, (Blk) x 3, (Sage) x 9, (Wht) x 10, (Sage) x 2, (Buff) x 12 (51 stitches)
← Row 90: (Buff) x 12, (Sage) x 2, (Wht) x 9, (Sage) x 6, Wht, (Sage) x 3, (Blk) x 8, (Buff) x 9 (50 stitches)
→ Row 91: (Buff) x 8, Sage, (Blk) x 7, (Sage) x 3, Wht, (Sage) x 7, (Wht) x 8, (Sage) x 2, (Buff) x 12 (49 stitches)
← Row 92: (Buff) x 12, (Sage) x 2, (Wht) x 6, (Sage) x 13, (Blk) x 6, (Sage) x 2, (Buff) x 7 (48 stitches)
→ Row 93: (Buff) x 7, (Sage) x 2, (Blk) x 4, (Sage) x 5, Wht, (Sage) x 10, (Wht) x 4, (Sage) x 2, (Buff) x 12 (47 stitches)
← Row 94: (Buff) x 12, (Sage) x 2, (Wht) x 3, (Sage) x 6, Buff, (Sage) x 4, Wht, (Sage) x 10, Wht, (Buff) x 6 (46 stitches)
→ Row 95: (Buff) x 5, Gry, Wht, (Sage) x 9, Wht, (Sage) x 4, (Buff) x 3, (Sage) x 9, (Buff) x 12 (45 stitches)
← Row 96: (Buff) x 12, (Sage) x 7, (Buff) x 5, (Sage) x 4, Wht, (Sage) x 8, Wht, (Gry) x 2, (Buff) x 4 (44 stitches)
→ Row 97: (Buff) x 4, (Gry) x 2, Wht, (Sage) x 7, Wht, (Sage) x 4, (Buff) x 7, (Sage) x 5, (Buff) x 12 (43 stitches)
← Row 98: (Buff) x 13, Sage, (Buff) x 10, (Sage) x 4, (Wht) x 2, (Sage) x 5, Wht, (Gry) x 3, (Buff) x 3 (42 stitches)
→Row 99:(Buff)x3,(Gry)x3,(Wht)x2, (Sage) x 2, (Wht) x 2, (Sage) x 5, (Buff) x 24 (41 stitches)
← Row 100: (Buff) x 24, (Sage) x 6, (Wht) x 3, (Sage) x 2, (Gry) x 2, (Buff) x 3 (40 stitches)
→ Row 101: (Buff) x 3, Gry, (Sage) x 11, (Buff) x 24 (39 stitches)
← Row 102: (Buff) x 25, (Sage) x 9, (Buff) x 4 (38 stitches)
→ Row 103: (Buff) x 5, (Sage) x 7, (Buff) x 25 (37 stitches)
← Row 104: (Buff) x 26, (Sage) x 4, (Buff) x 6 (36 stitches)
→ Row 105: (Buff) x 35 (35 stitches)
← Row 106: (Buff) x 34 (34 stitches)
→ Row 107: (Buff) x 33 (33 stitches)
← Row 108: (Buff) x 32 (32 stitches)
→ Row 109: (Buff) x 31 (31 stitches)
← Row 110: (Buff) x 30 (30 stitches)
→ Row 111: (Buff) x 29 (29 stitches)
← Row 112: (Buff) x 28 (28 stitches)
→ Row 113: (Buff) x 27 (27 stitches)
← Row 114: (Buff) x 26 (26 stitches)
→ Row 115: (Buff) x 25 (25 stitches)
← Row 116: (Buff) x 24 (24 stitches)
→ Row 117: (Buff) x 23 (23 stitches)
← Row 118: (Buff) x 22 (22 stitches)
→ Row 119: (Buff) x 21 (21 stitches)
← Row 120: (Buff) x 20 (20 stitches)
→ Row 121: (Buff) x 19 (19 stitches)
← Row 122: (Buff) x 18 (18 stitches)
→ Row 123: (Buff) x 17 (17 stitches)
← Row 124: (Buff) x 16 (16 stitches)
→ Row 125: (Buff) x 15 (15 stitches)
← Row 126: (Buff) x 14 (14 stitches)
→ Row 127: (Buff) x 13 (13 stitches)
← Row 128: (Buff) x 12 (12 stitches)
→ Row 129: (Buff) x 11 (11 stitches)
← Row 130: (Buff) x 10 (10 stitches)
→ Row 131: (Buff) x 9 (9 stitches)
← Row 132: (Buff) x 8 (8 stitches)
→ Row 133: (Buff) x 7 (7 stitches)
← Row 134: (Buff) x 6 (6 stitches)
→ Row 135: (Buff) x 5 (5 stitches)
← Row 136: (Buff) x 4 (4 stitches)
→ Row 137: (Buff) x 3 (3 stitches)
← Row 138: (Buff) x 2 (2 stitches)
→ Row 139: Buff (1 stitch)
Finishing
SC evening around the outside of the blanket. My sample blanket has one round of SC for edging. If you add more you will need to account for that when purchasing yarn.
Weave in all ends.
More Free Crochet Patterns You'll Love
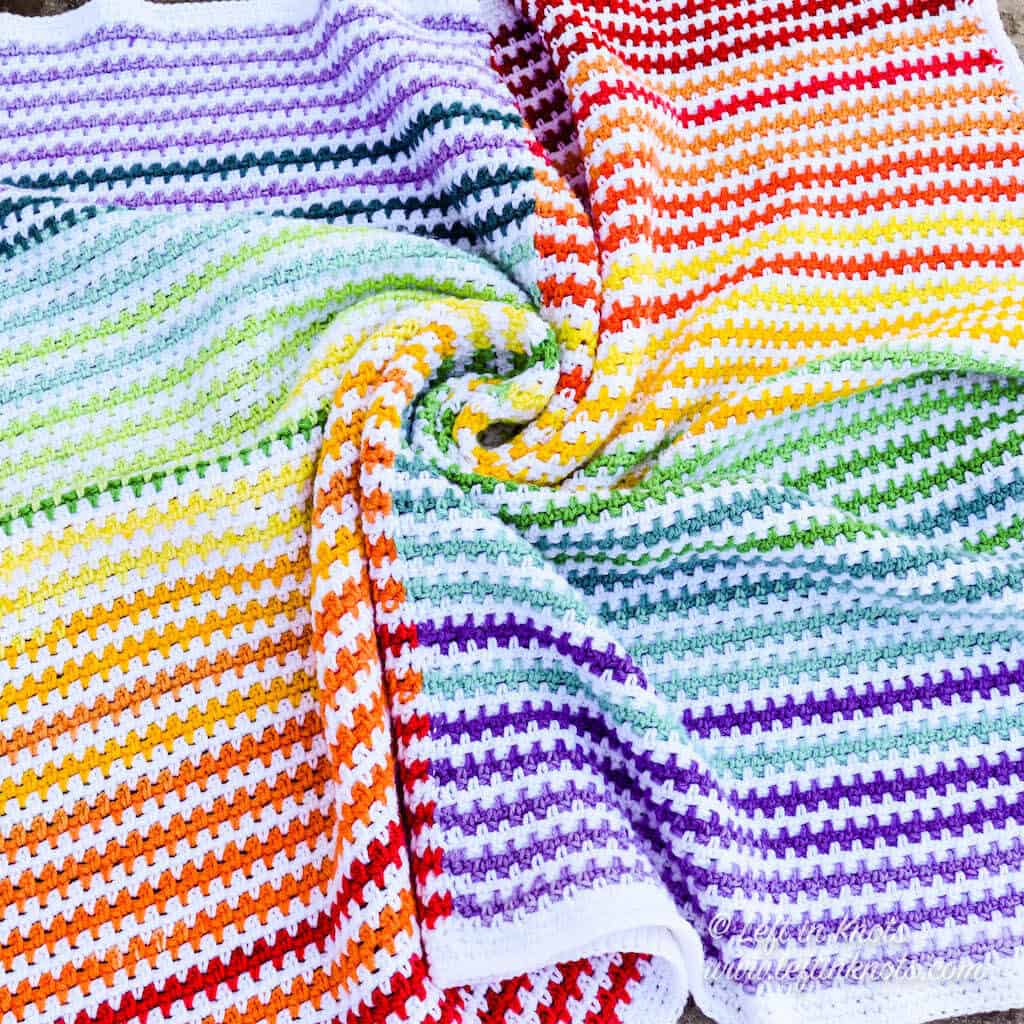
Find all FREE CROCHET PATTERNS here
Now the legal stuff...You may sell items made from this pattern, but please credit me as the original designer. Also, please do not share the written pattern in print or electronically. The photos on this webpage belong to Megan Meyer of Left in Knots and may not be used for product sales/product listings. You may share a link back to my blog if you would like someone else to see or work with this pattern. Thank you for your cooperation and if you have any questions please feel free to contact me!
This post contains affiliate links. I receive a small commission for any purchases made through these links at no additional charge to you.