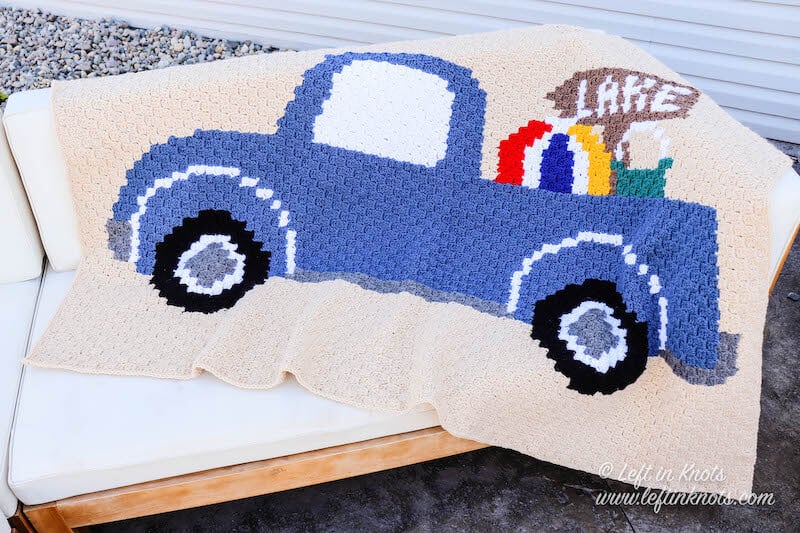
Use this printable C2C crochet pattern chart and C2C video tutorial to make a vintage lake house truck blanket perfect for the cabin! This farmhouse inspired blanket will bring some cheer and color to your spring and summer decor, and would make a great gift for anyone cabin bound. Keep reading for the free crochet pattern.
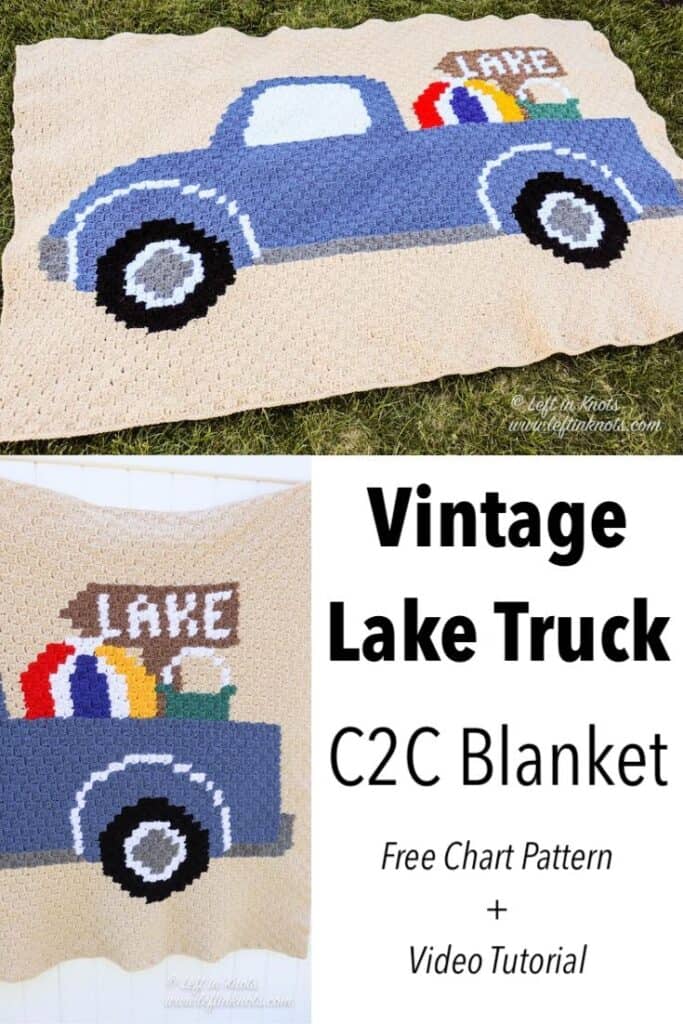
Vintage Lake House Truck C2C Blanket
My inspiration for this pattern was pretty simple. Vintage-style pickup truck decor is wiggling its way into just about every season. I’m pretty sure that it started with the Christmas tree truck decorations that have been popular for the past couple of years. But since that has been done in several different ways already. I made my first vintage truck blanket for spring, and it was such a hit that I decided to design a truck for each season! The lake truck is the perfect vintage truck for for those who are lucky enough to be packing up and heading to the lake or beach for some rest and relaxation.
What is C2C (corner to corner) Crochet?
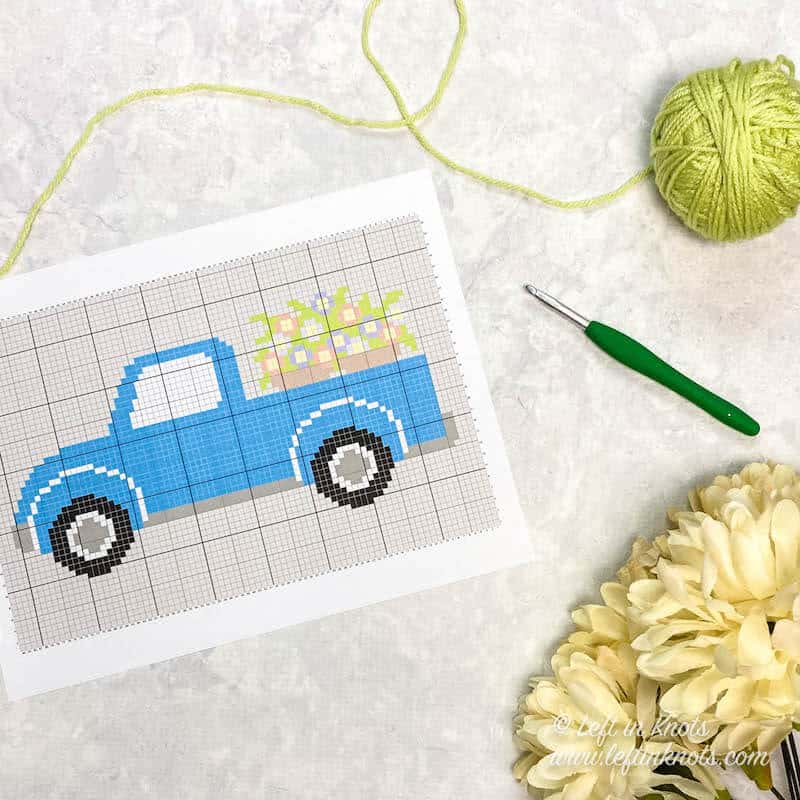
C2C (corner to corner) crochet has been a popular crochet method for creating blankets, pillows and other projects with pictures on them for several years now. My first C2C project was a modern blanket with an arrow print, and this year I decided to tackle something a bit more detailed. But have no fear! The C2C crochet stitch is super easy to learn. After you get the hang of following a chart and changing colors - this blanket will be a perfect project for you to work on at home. I’ve even got a video tutorial to teach you EVERY step of the C2C process you will need to know when making this blanket.
Don’t Let Weaving in the Ends Phase You
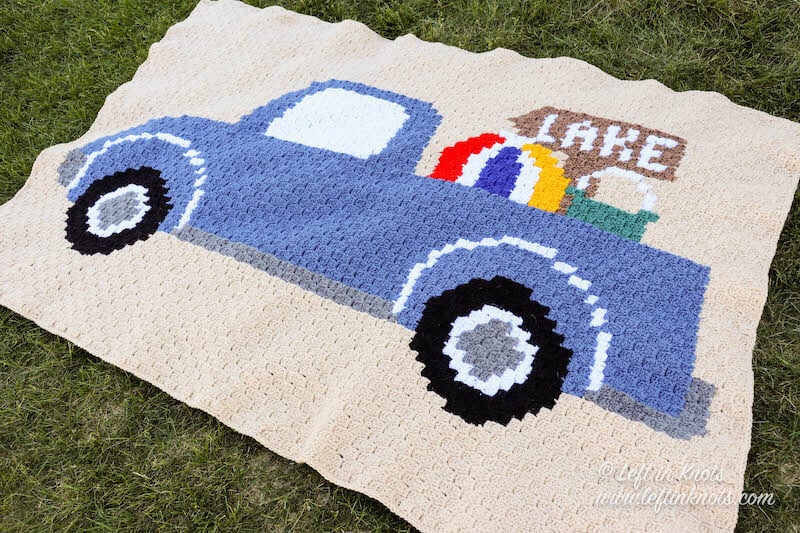
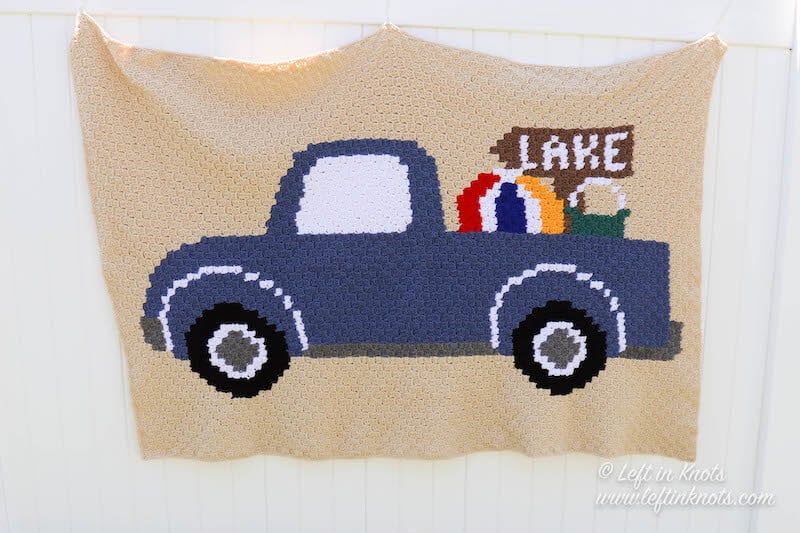
This Vintage Lake Truck C2C Blanket reminds me a lazy summer days spent swimming and playing as a kid! The bucket, beach ball and lake sign give it the perfect summer vibe. However, this is my official PSA about this project: YOU WILL HAVE ENDS TO WEAVE IN. This blanket is so cute and colorful that it is absolutely worth it. Weave them in as you go along OR save them all for the end of the project like me. Ha!
Choose Your Color Palette
I love the versatility of C2C patterns like this because, even though you are following my chart, it doesn’t mean you have to follow the exact colors that I used. And that means that, overall, this truck blanket is a great scrap buster pattern because many of the colors require less than one skein of yarn. I chose colors that gave me a summer/beach vibe and I think it will look adorable in a lake cabin or as a beach picnic blanket
Show off Your Crochet Projects
Don’t forget to share pictures of your projects with me in my Facebook Group or by tagging @leftinknots on Instagram. I can’t wait to see what you make!
C2C Lake Truck Blanket - Free Crochet Pattern
Supplies:
- Yarn (Loops and Threads is available at Michaels)
- Loops and Threads Impeccable ‘Sunny Day’ - 20 yd
- Loops and Threads Impeccable ‘Red Hot’ - 20 yd
- Loops and Threads Impeccable ‘Royal’ - 20 yd
- Loops and Threads Impeccable ‘Teal’ - 20 yd
- Vanna’s Choice ‘Taupe’ - 65 yd
- Loops and Threads Impeccable ‘True Gray’ - 95 yd
- Loops and Threads Impeccable ‘Black’ - 130 yd
- Loops and Threads Impeccable ‘White’ - 225 yd
- Loops and Threads Impeccable ‘Blue Moon’ - 670 yd
- Loops and Threads Impeccable ‘Classic Gray’ - 2,000 yd
- 5.5mm crochet hook - I love Clover Amour
- Scissors - I always keep these travel scissors in my hook case
- Yarn needle
Abbreviations (written in U.S. terms):
- ch: chain
- sl st: slip stitch
- DC: double crochet
- C2C: corner to corner (see instructions for how to crochet this stitch)
Gauge
5 squares x 5 squares = 4” square in DC C2C
Finished Size (approx.):
- Width = 66”
- Length = 43”
Pattern Notes
- You can choose to work with multiple skeins/bobbins (as I have pictured) or you can opt to "carry" your yarn throughout your project. It is a personal preference and I demonstrate both methods in the video tutorial.
- If you choose to follow the written color changes PLEASE reference the chart also as you go. It is always much easier to catch mistakes right away instead of a few rows past it. For the written instructions, odd rows are worked "left to right" and even rows are worked "right to left" in reference to the chart.
- Color Key:
- Blk: ‘Black’
- Blue: ‘Blue Moon’
- Brn: ‘Taupe’
- Gry: ‘True Gray’
- Hthr: ‘Heather’
- Red: ‘Red Hot’
- Ryl: ‘Royal’
- Teal: ‘Teal’
- Wht: ‘White’
- Ylw: ‘Sunny Day'
Video Tutorials
Complete Right Handed C2C Video Tutorial. Watch the whole thing, or use the provided time index in the video to advance to the areas you need help with. Find the LEFT HANDED version of this video tutorial here.
Follow along with the video tutorial by using the sample pixel chart you can find here.
Stitch Instructions
If you prefer step by step row instructions, you can purchase the complete written instructions on Etsy or Ravelry.
Starting row of C2C: Ch 5, DC in third ch from the hook and in the next two ch sts (3 DC). This makes your first "pixel" square.
Increase row of C2C (Rows 2-56) : Ch 5, DC in third ch from the hook and in the next two ch sts, *sl st into the next ch 2 space from the previous row, ch 2 and work 3 DC into the ch 2 space of the previous row. Repeat from * across until you have worked 3 DC into each ch 2 space from the previous row. Each row will increase by one pixel (e.g. Row 2 = 2 pixels, Row 3 = 3 pixels, etc.)
C2C Maintaining Row (Rows 57-84): "maintaining" rows are what I like to call rows that maintain their stitch count over several rows. This allows you to create a rectangular piece with the C2C stitch. In this pattern, you will continue to increase on the right side (by one square), but you will decrease on the left side (by one square)
C2C Decreasing Row (Rows 85-139): this portion of the pattern uses decreasing rows. Your "square" count will decrease by one each row. In part two, you made "maintaining" rows by increasing on one side of the project and decreasing on the other. Now, you will decrease on both sides of the project.
Finishing: SC evening around the outside of the blanket. My sample blanket has one round of SC for edging. If you add more you will need to account for that when purchasing yarn.
More Free Crochet Patterns You'll Love
Find all FREE CROCHET PATTERNS here
Now the legal stuff...You may sell items made from this pattern, but please credit me as the original designer. Also, please do not share the written pattern in print or electronically. The photos on this webpage belong to Megan Meyer of Left in Knots and may not be used for product sales/product listings. You may share a link back to my blog if you would like someone else to see or work with this pattern. Thank you for your cooperation and if you have any questions please feel free to contact me!
This post contains affiliate links. I receive a small commission for any purchases made through these links at no additional charge to you.