Fall is in the air, readers! It is my favorite time of year in the midwest. I love the cooler temps, the changing leaves, cozy sweaters, and especially Halloween!
I think I like Halloween as an adult more than I actually liked it as a child. I was such a shy little kid, that the idea of asking all my neighbors for candy made me a bit anxious! I was much more comfortable with a group of children at the door so that my timid "trick-or-treat" was covered by the louder, more exuberant statements of most children.
Also, having grown up in Minnesota, there was always a chance of snow on Halloween! That meant putting a jacket on over my costume, and in the most extreme cases snow pants, hats and mittens. I remember one year in particular; there had been an unseasonal early blizzard right before Halloween. It was the year that my grandma had hand made my special princess dress costume. It was a beautiful turquoise, and the fabric was so soft that I was convinced it was made of fine silk (disclaimer: it was standard "prom dress" satin, haha)
So that snowy night when I got ready to trick or treat, the layers went like this: long sleeve shirt, short-sleeved princess dress, pants, snow pants, jacket, boots, hat, gloves. I was so bundled up that all you could see of my beautiful costume was the skirt sticking out from the bottom of my jacket! So off I went with my dad, my snow gear, and my paper trick-or-treat bag that the grocery store had been handing out the week before. I marched from house to house, trekking through several feet of snow (uphill both ways 😉 ), asking my timid "trick-or-treat". I made these "sacrifices" as a child because the excitement of collecting that precious Halloween candy was just too appealing!
And just as I was going to the last houses in our neighborhood, I looked down and my sugar inspired dreams shattered. My paper bag had been dragged through the snow all night as I stomped through the snow banks, and when paper bags get wet, they tear. I had been trailing my Halloween candy behind me all around the block. And the snow was so deep that there was no hope of recovery! I was crushed!
Now I don't exactly remember what happened after that (proof that they experience didn't scar me too badly). I'm sure my mom gave me some of our own candy, and she probably made my older siblings share with me as well. BUT I do know that was the last time I ever used a paper bag for trick or treating. Every year after that I was sent out with a pillow case - certain not to leak 🙂
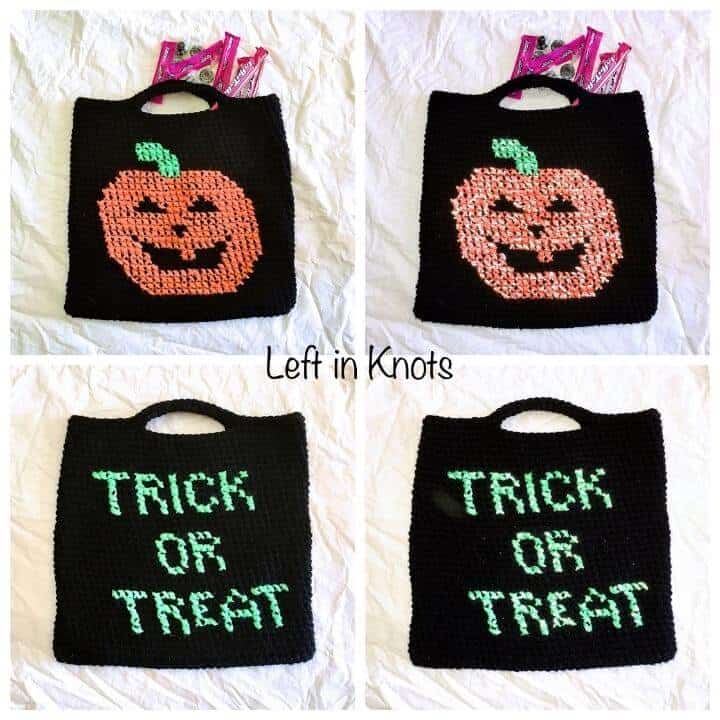
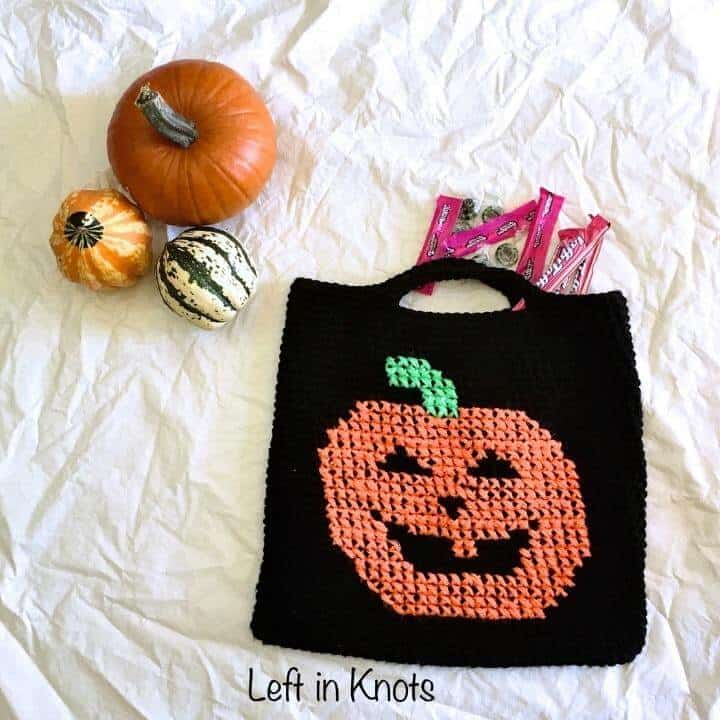
Now, as I prepare for my daughter's first Trick-or-Treat trip around the neighborhood, I want to make sure that she too will not have to live in fear of losing her candy. I decided that I wanted something a little more exciting than a pillow case, AND I had some Red Heart Reflective yarn. And that is when I decided to make her a special trick-or-treat bag that we can use from year to year without fear of lost candy! I also loved the idea of a reusable bag because it is much easier to store than those plastic pumpkin buckets.
By using the Red Heart Reflective yarn, this bag also becomes a safety mechanism that your kids won't complain about. See how it lights up with the flash of a light!? Someone driving a car in the dark would DEFINITELY be able to see this bag!
The construction of this bag is simple. A basic SC bag pattern. I opted to cross-stitch on crochet for the embellishment, but if you would prefer to treat it as a tapestry crochet pattern I'm sure it would work just as well like that. BUT cross-stitch on crochet is super fun, and I have a video tutorial for you if you need to learn how to do it HERE.
Supplies
- Worsted weight yarn (I used Red Heart with Love in Black)
- Red Heart Reflective Yarn in 'Neon Orange' and 'Neon Green'
- 9.0 mm Hook (I used Clover Amour)
- Yarn needle
- Scissors (I just got these Fiskars Travel Scissors and I love them!)
Abbreviations
- Sl St: slip stitch
- Ch: chain
- SC: single crochet
Special Notes:
- The end of each round is attached to the first stitch of the round using a sl st.
- Chain stitches at the beginning of each round do NOT count as a stitch. The first stitch of the round should be worked into the first stitch of the previous round
- Gauge is not important for this project
- The bag is constructed with double strands of yarn
Instructions

Ch 69 (using two strands of black yarn)
Round 1: SC in second ch from the hook and continue to the end of the ch. Work 2 SC into the last st of the ch. Continue with SC along the back side of the ch, working 2 sts into the last ch st. (70)
Round 2-36: Ch 1, SC around (70)
Round 37: Ch 1, SC in 17, ch 13, skip 13, SC in 22, ch 13, skip 13, SC 5 (70)
Round 38: Ch 1, SC around, working 15 SC into each ch 13 space (74). Tie off and weave in ends.
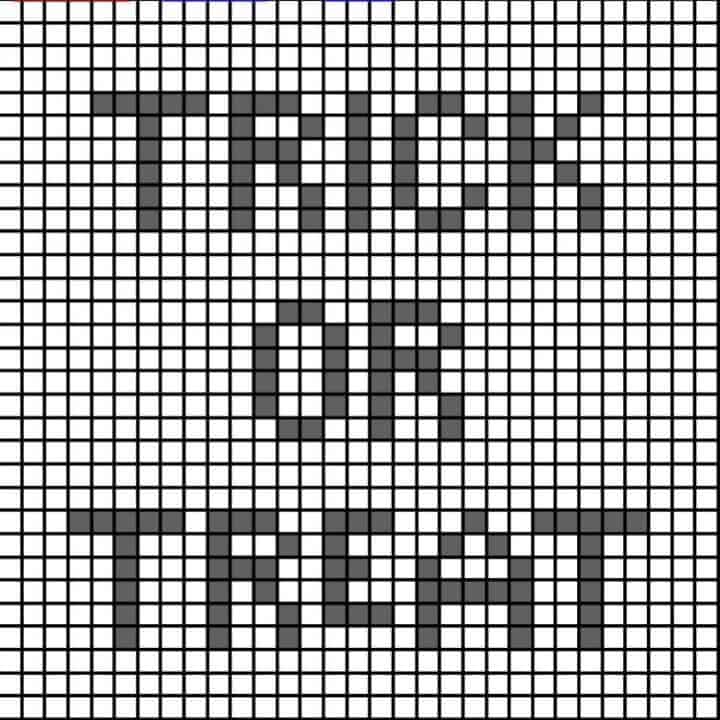
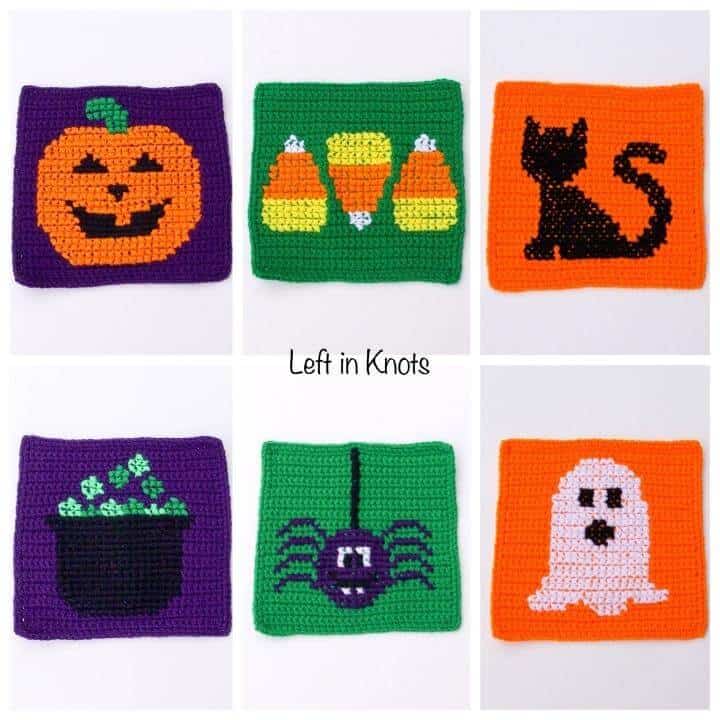
Now, using a plastic yarn needle, cross stitch the following patterns on each side of the bag.
Here is a quick video tutorial if you need instructions for cross-stitching on crochet.
Now dress up, bundle up, and take your little monsters trick or treating without fear of losing candy! Maybe you can even sneak some after they are in bed 🙂
Need a smaller bag for your littlest monsters? Get the toddler-sized bag here with addition graphs you can mix and match 🙂
More Free Crochet Patterns You'll Love
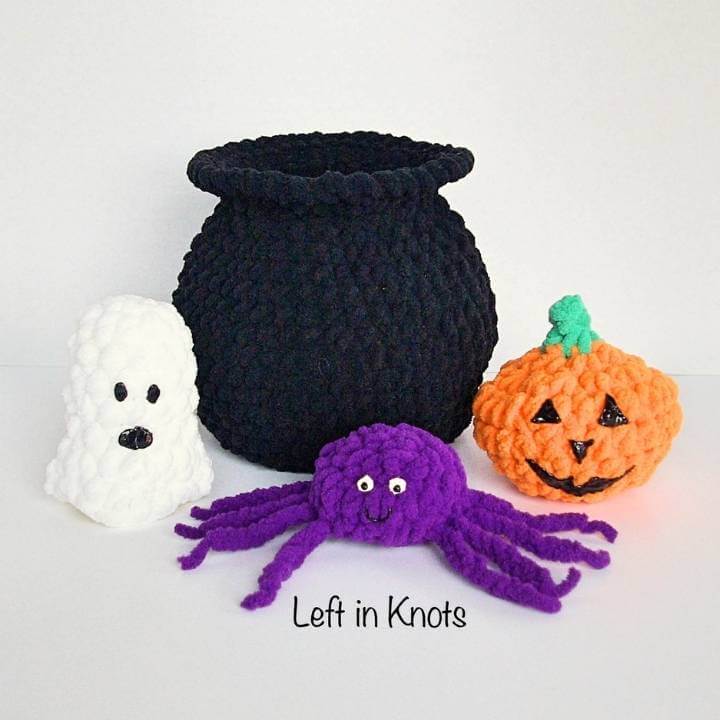

Find all FREE CROCHET PATTERNS here
Now the legal stuff...You may sell items made from this pattern, but please credit me as the original designer. Also, please do not share the written pattern in print or electronically. The photos on this webpage belong to Megan Meyer of Left in Knots and may not be used for product sales/product listings. You may share a link back to my blog if you would like someone else to see or work with this pattern. Thank you for your cooperation and if you have any questions please feel free to contact me!
This post contains affiliate links. Thank you for supporting free patterns and yarn deals from Left in Knots!