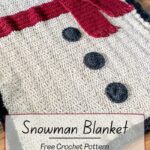
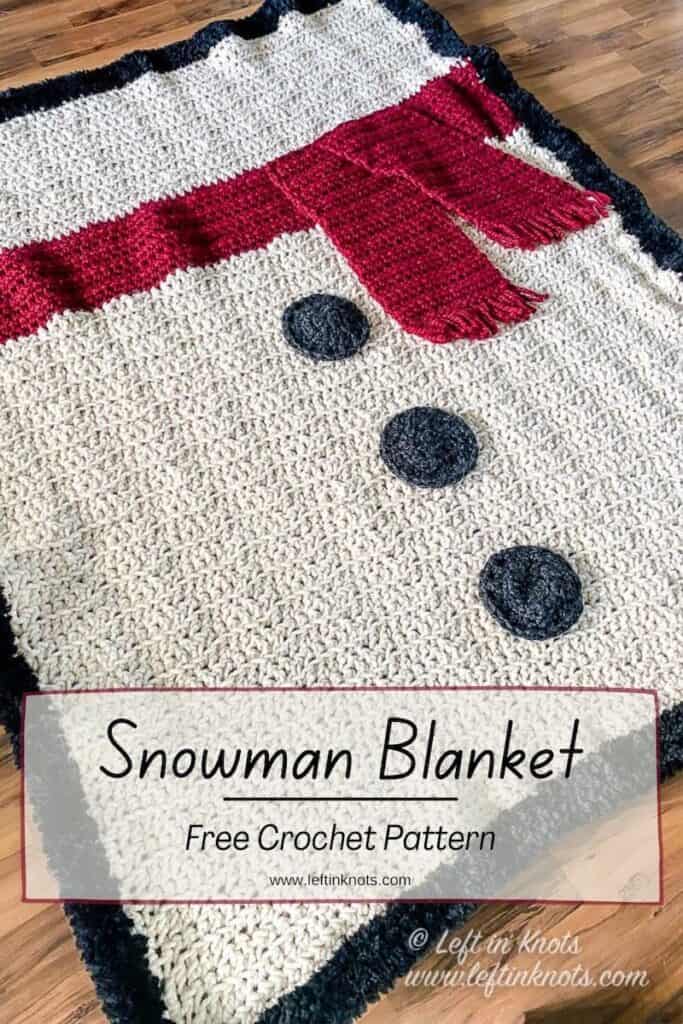
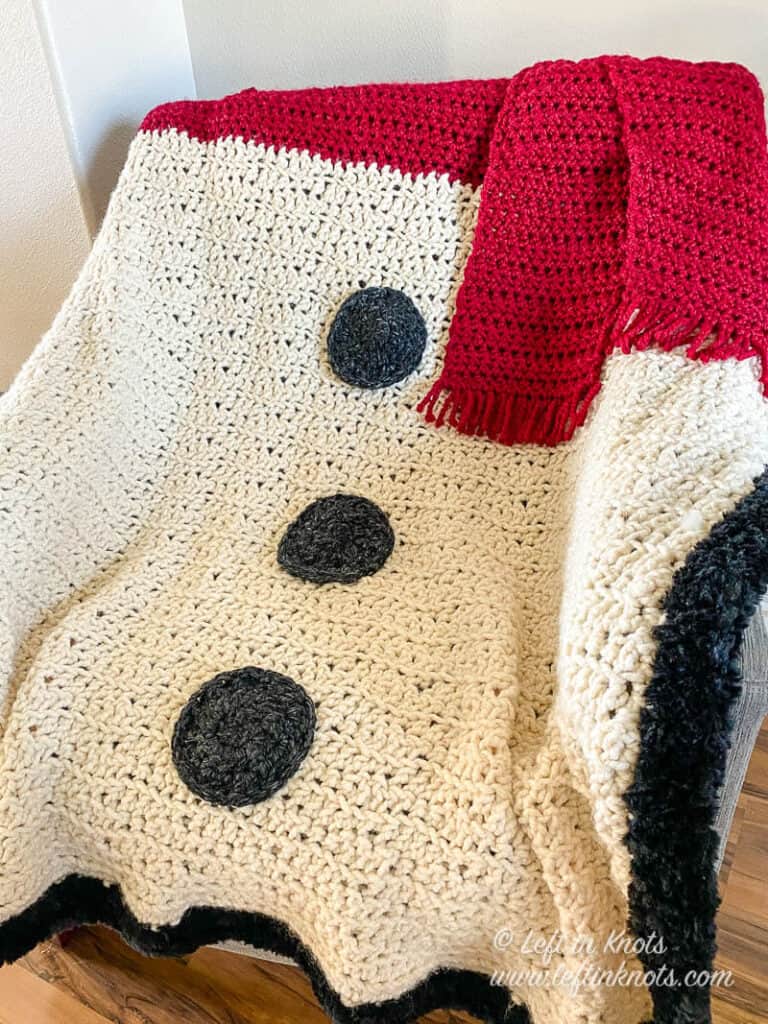
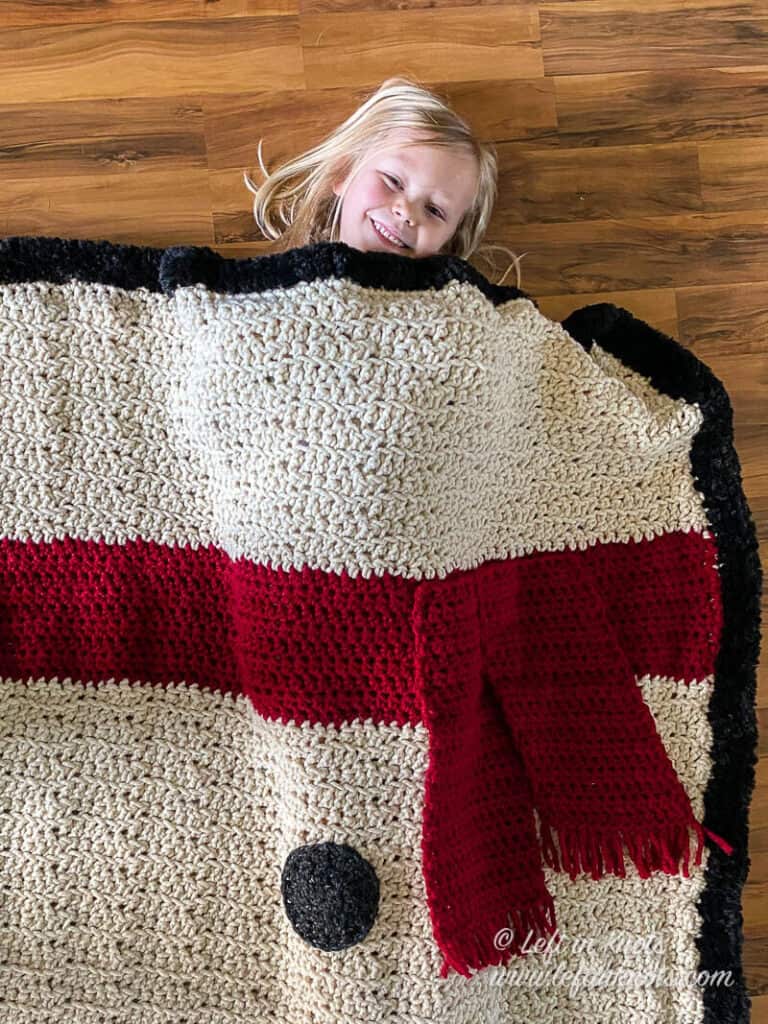
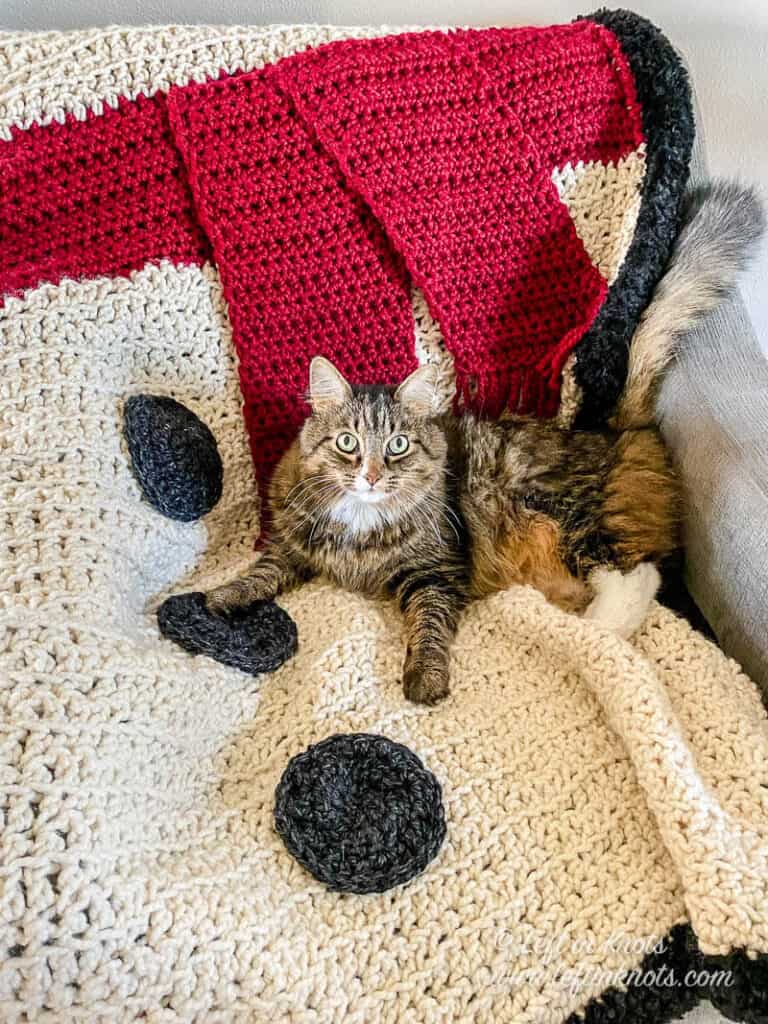
Crochet this Snowman Blanket for Christmas or winter with this free pattern. This farmhouse inspired blanket will accent your classic and traditional Christmas decor perfectly! You can crochet this beautifully textured blanket quickly in time to set out with your Christmas decor. Keep reading for the free crochet pattern.
Christmas Snowman Crochet Inspiration
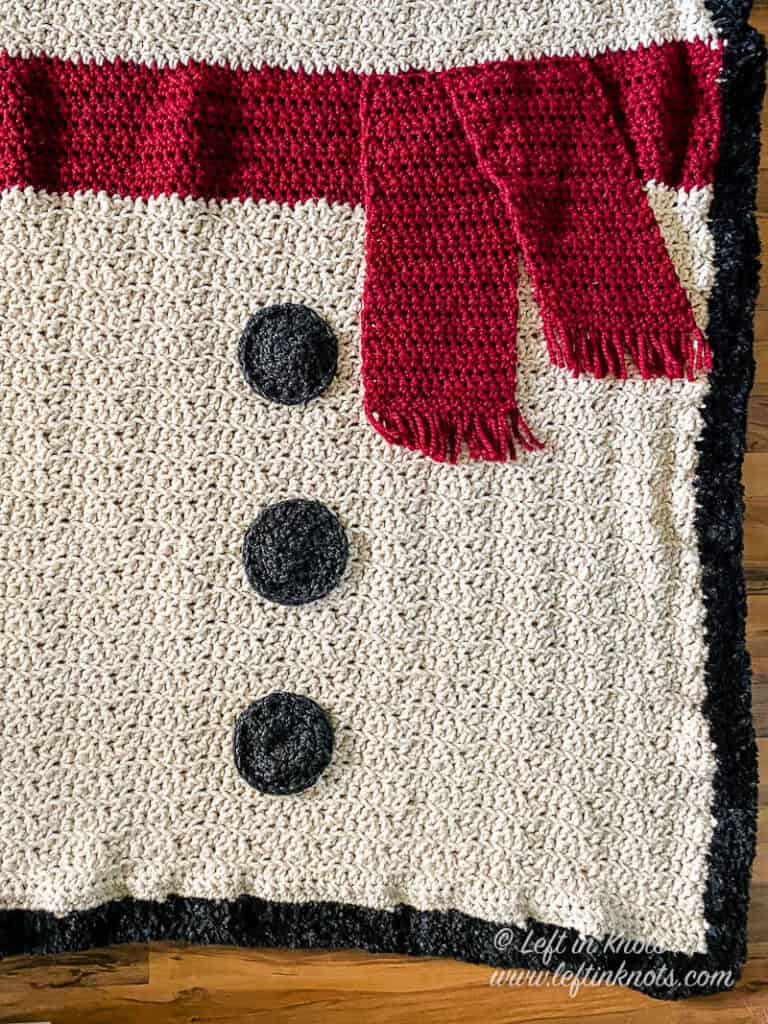
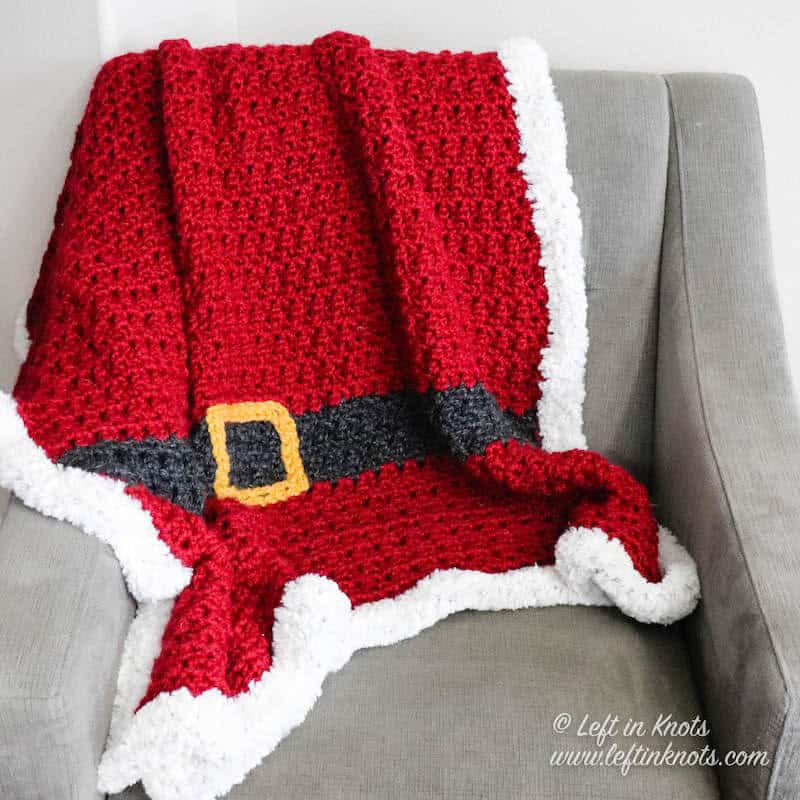
Last holiday season I made Santa's Blanket and it was a total hit! I'm so glad y'all loved it. Next came Elf's Blanket, and now we are adding Snowman's Blanket to the collection. I LOVE the simple but specific details of this one. The snowman scarf with fringe is the perfect touch!
Use Bulky Yarn to Crochet a Winter Snowman Blanket
The other thing I love about this crochet Snowman Blanket is that it doesn't have to be specifically for Christmas. Feel free to change the scarf and/or fur border color to match your winter decor!
Make this an Everyday Blanket with an Easy Modification
Too pressed for time right now? Not into Christmas decor? Don’t celebrate Christmas? No worries! You can easily modify this blanket pattern to be a gorgeous, everyday throw by using just one color throughout the pattern and leaving off the embellishments. So whether you are making this for Christmas or not - get planning and find your yarn!
Show off Your Crochet Projects
I can’t wait to see your Snowman blanket or your everyday variation of this pattern - come share pictures with me in my Facebook group or tag me on Instagram with #leftinknots.
Snowman Blanket with fur trim - Free Crochet Pattern
Supplies:
- Lion Brand Wool Ease Thick and Quick in 'Fisherman’ (900 yds), ‘Charcoal’ (40 yds), and ‘Cranberry’ (260 yds)
- Lion Brand Go for Faux Thick and Quick ‘Black Panther’ (120 yds)
- 10mm crochet hook - I love Clover Amour
- Scissors - I always keep these travel scissors in my hook case
- Yarn needle
- Long pins
Abbreviations (written in U.S. terms):
- ch: chain
- sl st: slip stitch
- ch: chain
- BLO: back loop only
- SC: single crochet
- HDC: half double crochet
- HDC2Tog: half double crochet two together
- DC: double crochet
Related Video Tutorials
How to Crochet in BLO - Left Handed (right handed video loads with the page)
Gauge
6 sts x 5 rows = 4” square in HDC
Finished Size:
- Width = 42”
- Length = 48”
Pattern Notes
- Chain stitches at the beginning of rows do not count as a stitch
- Chain stitches at the beginning of rows do not count as a stitch
- The pictured blanket has 2 rounds of faux fur SC border. If your border is too wavy, you may need to adjust your hook size, tension, or skip some stitches (at even intervals) when crocheting around your blanket.
- The last st of each button round is attached to the first st of the round with a sl st.
Instructions
ch 79 (using Fisherman)
Row 1: HDC in the second ch from the hook and HDC across (78). Turn.
Row 2: ch 1, *SC, HDC, DC in 2, HDC, SC, repeat from * across. Turn.
(Start working in BLO)
Row 3: ch 2, *DC, HDC, SC in 2, HDC, DC, repeat from * across. Turn.
Row 4-41: repeat Row 2 on even rows and Row 3 on odd rows. Turn.
(switch to Cranberry)
Row 42-50: ch 2, HDC across. Turn.
(switch to Fisherman)
Row 51-63: repeat Row 2 on even rows and Row 3 on odd rows. Turn.
Row 64: ch 2, HDC across. Do not tie off.
Adding the Border
Ch 1 and SC evenly around the edge, chaining 2 at each corner. Join with a sl st when you reach the beginning of your round. Switch to faux fur yarn and join it in any corner. Ch 1 and SC 2 more rounds of border; working a (SC, ch 2, SC) into each ch 2 corner from the previous round. Join with a sl st at the beginning of the round.
Making the Buttons (make 3 using Charcoal)
Start with a magic circle
Round 1: ch 2, work 8 DC into the magic circle (8)
Round 2: ch 2, 2 DC in each st around (16)
Round 3: ch 2, *2 DC, DC, repeat from * around (24). Tie off and leave a long (20”) tail.
Making the Scarf (using Cranberry)
Straight Panel
ch 14
Row 1: HDC in the second ch from the hook and HDC across (13). Turn.
Row 2-23: ch 1, HDC across. Turn.
Tie off yarn and weave in ends.
Angled Panel
ch 14
Row 1: HDC in the second ch from the hook and HDC across (13). Turn.
Row 2: ch 1, 2 HDC in first st, HDC in 10, HDC2Tog. Turn.
Row 3: ch 1, HDC across. Turn.
Row 4-19: Repeat Row 2 on even rows and Row 3 on odd rows.
Assembling the Blanket
Place your button circles evenly spaced along the vertical center of the blanket below the scarf.
Pin the buttons in place. Using the tail from the last round, sew the center button in place. Adjust the top or bottom buttons if needed to remain in line with the center button. Use the tails to sew on the remaining two buttons.
Start with the straight panel to attach the scarf. Line the top of the panel up along the top row of the scarf rows of the blanket. Pin in place.
Place the angled panel along the top row of the scarf so that it overlaps half of the straight panel. Using Cranberry yarn and a yarn needle, sew around the edges of the two scarf panels only where they lay on the scarf rows of the blanket. Leave the bottom of the scarf panels loose. Add fringe.
Weave in all ends.
More Free Crochet Patterns You'll Love
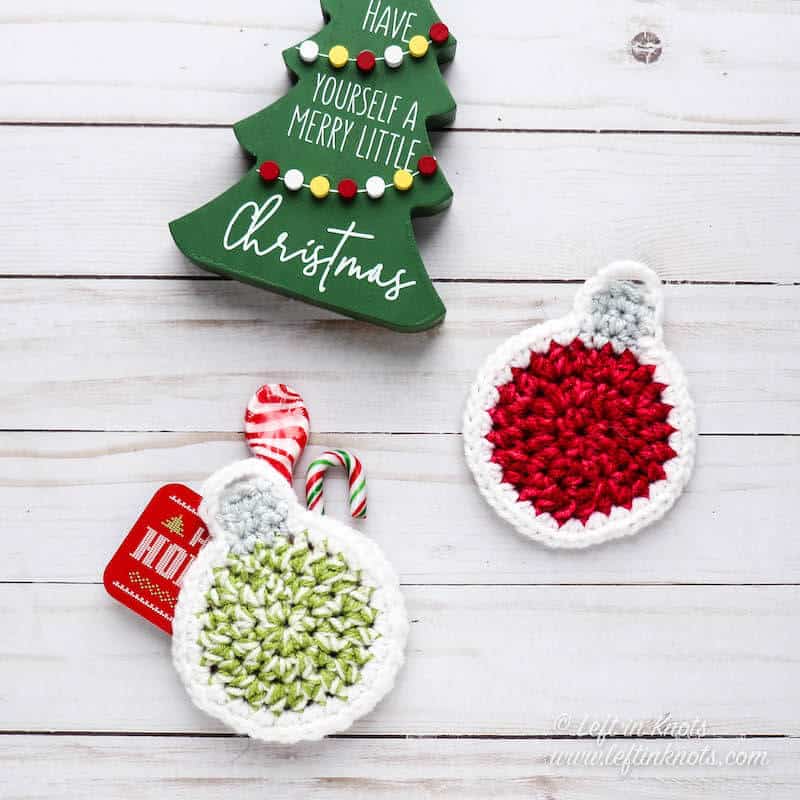
Find all FREE CROCHET PATTERNS here
Now the legal stuff...You may sell items made from this pattern, but please credit me as the original designer. Also, please do not share the written pattern in print or electronically. The photos on this webpage belong to Megan Meyer of Left in Knots and may not be used for product sales/product listings. You may share a link back to my blog if you would like someone else to see or work with this pattern. Thank you for your cooperation and if you have any questions please feel free to contact me!
This post contains affiliate links. I receive a small commission for any purchases made through these links at no additional charge to you.