Make a soft, sensory crochet picnic basket toy with this free pattern. Babies and toddlers will love playing with this fun stuff and spill toy. Keep reading for the free crochet pattern.

A Crochet Picnic Basket Toy to Stuff and Spill
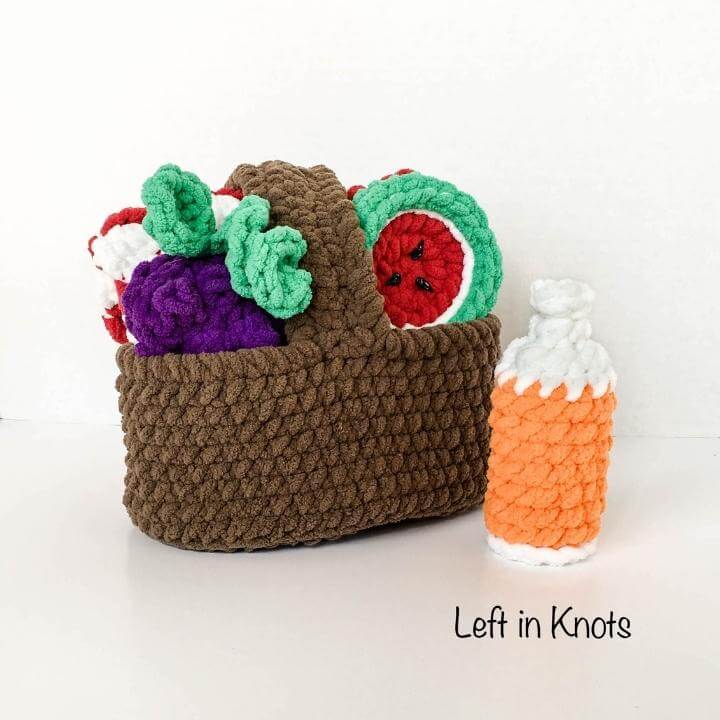
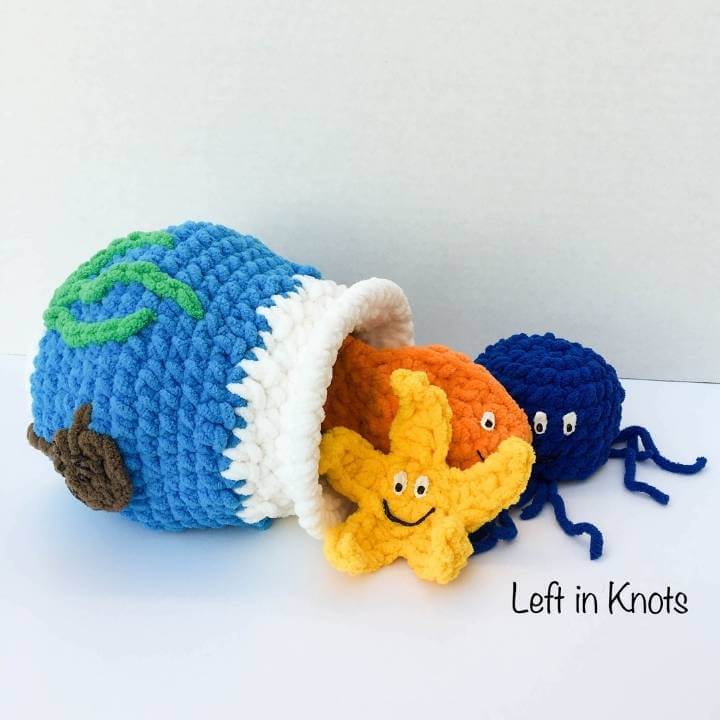
Today, I have my second Stuff and Spill pattern for you. The Stuff and Spill Picnic Basket! If you liked my Stuff and Spill Fish Bowl, this one will be perfect for you as well! It is a super fast, super cute, crochet toy that is perfect for little hands. Babies will enjoy the soft plushiness of the yarn and bright colors, and toddlers will love using this for a "stuff and spill" activity as well as pretend play! I think that either of these Stuff and Spill patterns would make a great baby gift if you want to deviate from the baby blanket route
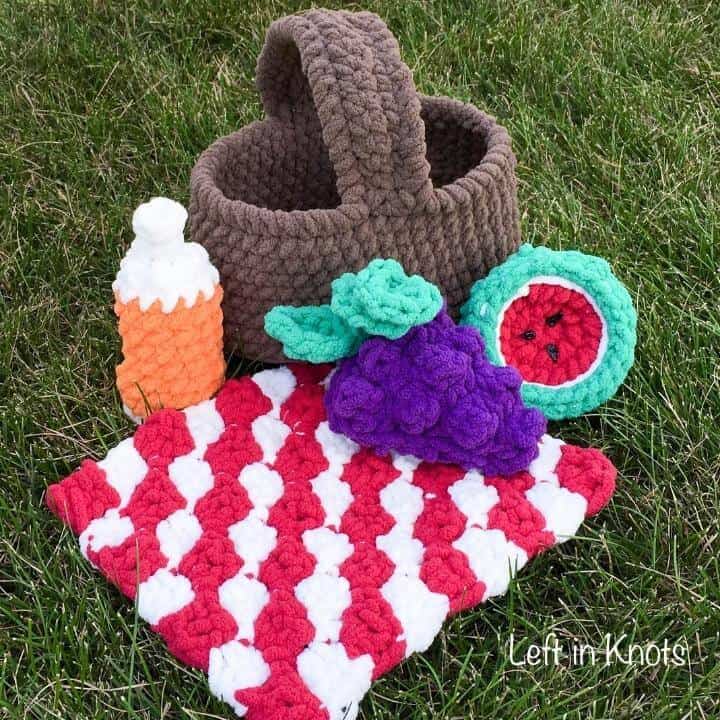
(In a singsong voice) A tisket, a tasket, a plushy picnic basket!
I may be listening to my daughter's music in the car too often...sorry, I couldn't help myself!
I am sneaking just a little bit more summer into my next few patterns before the shift to fall! I know that back to school has already happened in some areas, and in others it is right around the corner. But to me, summer is still "summer" until Labor Day.
Show off Your Crochet Projects
Don’t forget to share pictures of your projects with me in my Facebook Group or by tagging @leftinknots on Instagram. I can’t wait to see what you make!
Yet again, this pattern features Bernat Blanket yarn. I just can't get enough of these brights, and I am really hoping that they will be more widely available soon! Have you seen the solid colors of Bernat Blanket Brights in store near you? If so, I'd love to know where!
Show off Your Crochet Projects
Don’t forget to share pictures of your projects with me in my Facebook Group or by tagging @leftinknots on Instagram. I can’t wait to see what you make!
Crochet Picnic Basket Toy - Instructions
Supplies
- Bernat Blanket Yarn in colors: White, Taupe, Race Car Red, Carrot Orange, Go Go Green, and Pow Purple
- Size N/P (10.0 mm) crochet hook (I used Clover Amour)
- Plastic Yarn Needle
- Non-toxic puffy paint in black
Abbreviations (US Terms)
- Ch: chain
- sl st: slip stitch
- SC: single crochet
- SC2TOG: Single crochet two together
- DC: Double crochet
- Bobble stitch (bobble): YO, insert hook and pull yarn through st from previous row, YO, pull through 2 loops on the hook, YO, insert hook into same stitch and pull through, YO, pull through 2, YO, insert hook into same stitch and pull through, YO, Pull through 2, YO, Pull through the 4 remaining loops on the hook.
- BLO: Back loop only
- RSC (crab stitch): Reverse single crochet
Pattern Notes:
- Ch sts at the beginning of rows or rounds do not count as a stitch.
- When working in rounds, the last st of a round is attached to the first st of the same round with a sl st.
- Gauge is not important for the finished product, however, tight stitches help the yarn hold its shape better. If you are having trouble getting your stitches tight enough, use a smaller crochet hook.
Instructions:
Basket (using color ‘Taupe’)
Ch 9
Round 1: Starting in second ch from hook, SC down the ch. Work 3 SC in the last ch st and continue to SC down the back of the ch. when you reach the first ch st, work 2 more SC into that stitch (18)
Round 2: Ch 1, 2 SC, SC in next 6, 2 SC in next 3, SC in next 6, 2 SC in next 2 (24)
Round 3: Ch 1, 2 SC, SC in next 9, 2 SC in next 3, SC in next 9, 2 SC in next 2 (30)
Round 4: Ch 1, 2 SC in next 2, SC in next 10, 2 SC in next 5, SC in next 10, 2 SC in next 3 (40)
Round 5: Ch 1, 2 SC in next 2, SC in next 15, 2 SC in next 5, SC in next 15, 2 SC in next 3 (50)
Round 6-7: Ch 1, SC around (50)
Round 8: Ch 1, in BLO, SC around (50)
Round 9-15: Ch 1, SC around (50) Tie off.
Basket Handle
Ch 26
Row 1: SC in second ch from hook. SC across (25) Turn
Row 2-3: SC across. (25) Do not tie off yet
With a sl st (on the inside of the basket) attach one end of the handle in sts 12-14 of round 15. Cut and tie off yarn. Attach the other end of the handle in sts 37-39. Do not tie off. Continue to crab stitch (RSC) around the rim of the basket and handle. Attach to the first RSC with sl st. Tie off yarn. Attach with sl st to the other side of the handle and RSC around. Attach to the first RSC of the round. Tie off and weave in ends.
Watermelon Half (Race Car Red, Go Go Green, White)
For the rind: Start with Magic Circle (in ‘Go Go Green’)
Round 1: Ch 1, work 8 SC into magic circle
Round 2: Ch 1, 2 SC in each st around (16)
Round 3, Ch 1, *2 SC, SC, repeat from *around (24)
Round 4-6: Ch 1, SC around (24). Cut and tie off yarn
For the fruit: Start with Magic Circle (in ‘Race Car Red’)
Round 1: Ch 1, work 8 SC into magic circle
Round 2: Ch 1, 2 SC in each st around (16)
Round 3: Ch 1, *2 SC, SC, repeat from *around (24)
Round 4: *switch to color ‘White’, sl st around row 3 (24)
Place this circle in the rind portion of the watermelon and, working through BLO of the white and both loops of the green rind, sl st around to attach them. Tie off and weave in ends.
Decorate seeds with non-toxic puffy paint
Grapes (Pow Purple, Go Go Green)
Grape Bunch (Pow Purple-make 2)
Ch 10
Row 1: Start in third ch from the hook, *bobble, SC, repeat from * across (4 bobbles, 4 SC)
Row 2: Ch 1, SC2TOG, SC in 4, SC2TOG (6)
Row 3: Ch 2, *bobble, SC, repeat from * across (3 bobbles, 3 SC)
Row 4: Ch 1, SC2TOG, SC in 2, SC2TOG (4)
Row 5: Ch 2, *bobble, SC, repeat from *across (2 bobbles, 2 SC)
Row 6: Ch 1, SC2TOG across (2)
Row 7: Ch 1, bobble, sc
*For the first half* Ch 1 and SC around the raw edge working one st into each row. *For the second half* place the wrong side of each grape half together and sl st around working through both pieces. This will create a 3 dimensional bunch of grapes
Leaf: Attach the color Go Go Green to the top of the bunch 1 with sl st. Ch 6. Working in the second ch from the hook: sl st, SC, DC, DC, SC. Now working along the back side of the chain: Ch 1, SC, DC, DC,SC, sl st. This will bring you back to the point of the leaf. Tie off yarn and weave in ends.
Vine: Attach the color Go Go Green in the same stitch as the leaf. Ch 8. Start in the second ch from the hook. Work 3 SC into each ch stitch to create a spiral. When you reach the beginning of the ch, tie off and weave in ends.
Orange Juice (Carrot Orange, White)
Start with Magic Circle (in ‘Carrot Orange’)
Round 1: Work 6 SC into magic circle. Pull tight (6)
Round 2: Ch 1, 2 SC in each st around (12)
Round 3: Ch 1, in BLO-SC around (12)
Round 4-11: Ch 1, SC around (12)
Round 12: *Switch to ‘White’* Ch 1, SC around (12)
Round 13: Ch 1, *SC2TOG, SC, repeat from * around (6)
Round 14: Ch 1, *SC2TOG, SC, repeat from * around (3)-This will essentially “close” the top of the bottle without actually stitching it shut
Round 15: Ch 1, 2 SC in each st around (6). Tie off.
To make the bottom rim of the bottle, attach ‘White’ with a slip stitch to the front loop of round 2. Sl st around. Tie off and weave in ends.
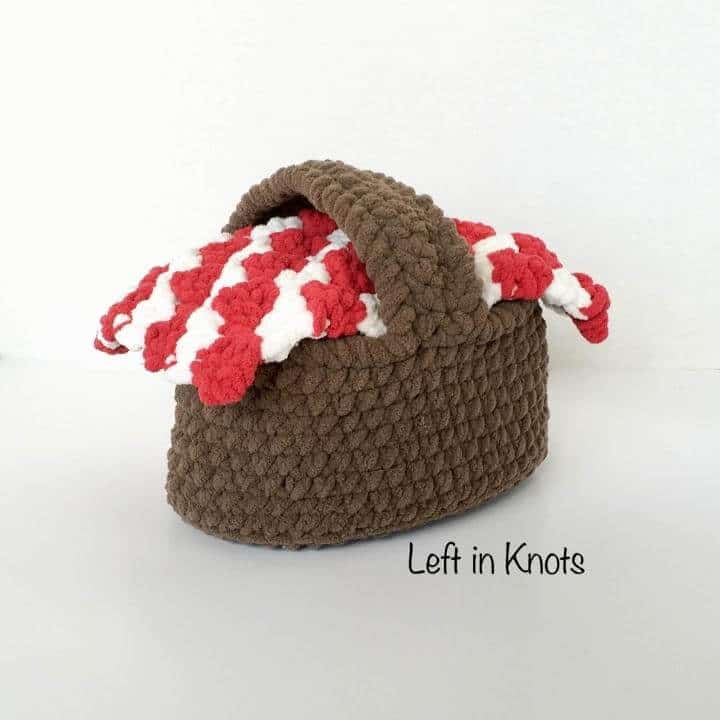
Picnic Blanket (Race Car Red, White)
This is a basic c2c blanket, alternating colors each row.
More Free Crochet Patterns You'll Love
Find all FREE CROCHET PATTERNS here
Now the legal stuff...You may sell items made from this pattern, but please credit me as the original designer. Also, please do not share the written pattern in print or electronically. The photos on this webpage belong to Megan Meyer of Left in Knots and may not be used for product sales/product listings. You may share a link back to my blog if you would like someone else to see or work with this pattern. Thank you for your cooperation and if you have any questions please feel free to contact me!
This post contains affiliate links. Thank you for supporting free patterns and yarn deals on Left in Knots!