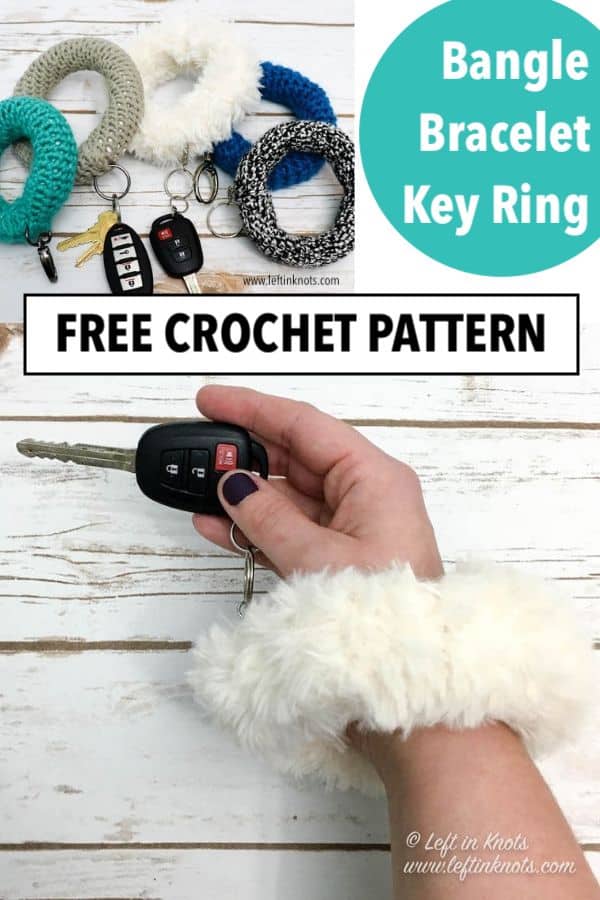
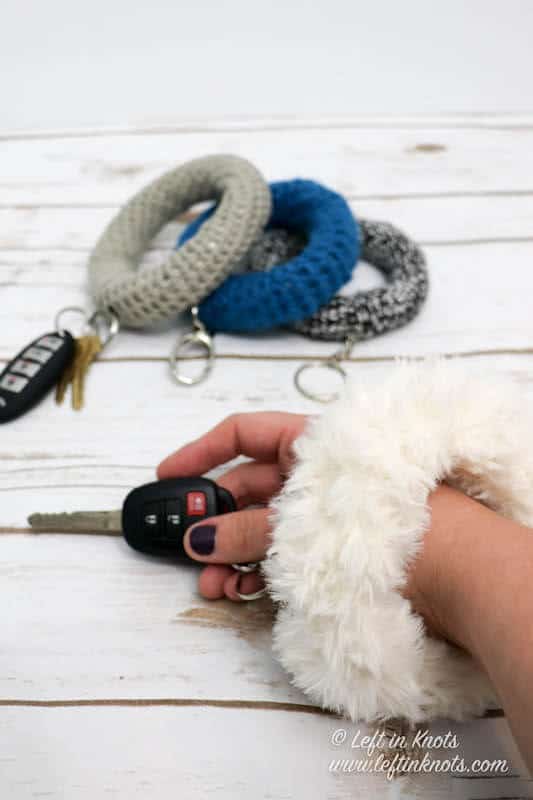
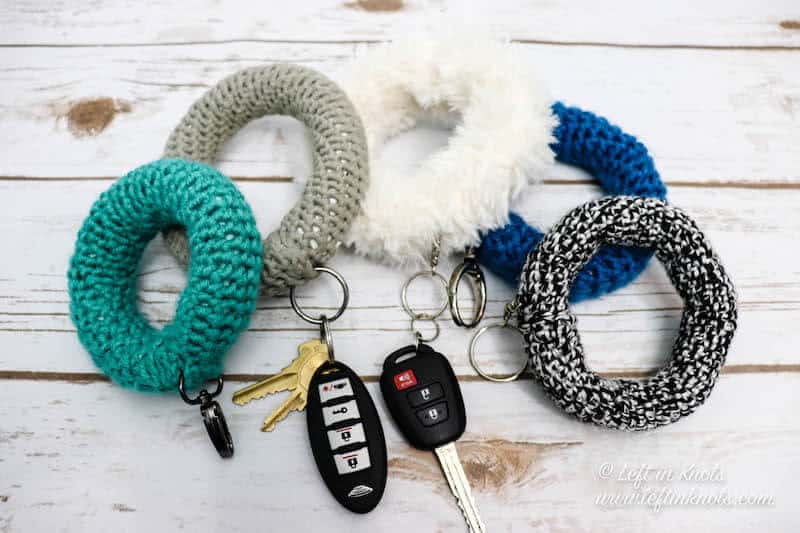
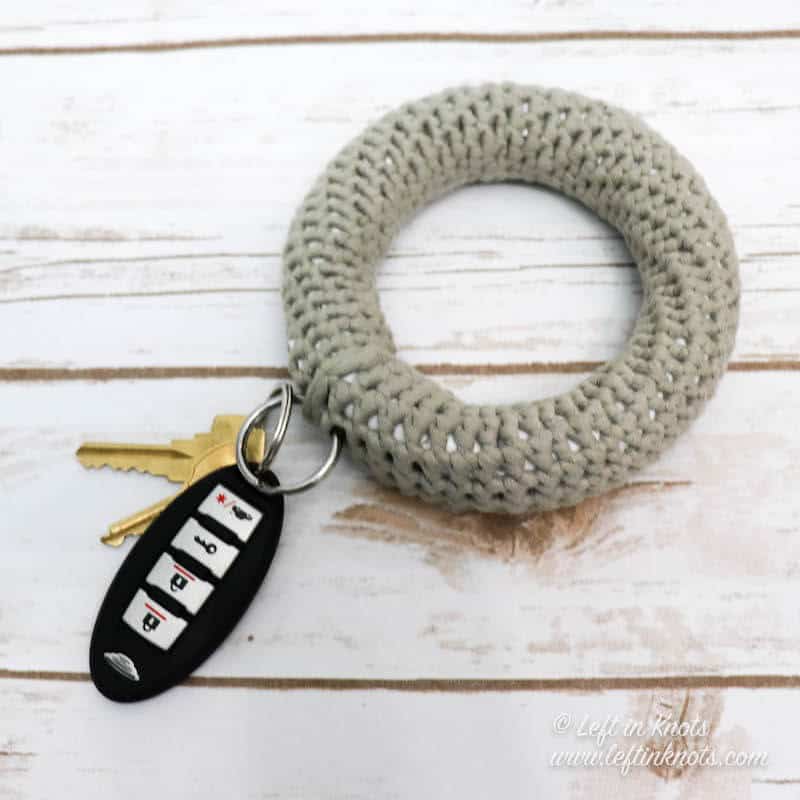
The Crochet Bangle Bracelet Key Ring is a fast scrap buster pattern that is a perfect DIY make for gifts or craft fairs. Use faux fur yarn, bulky yarn, worsted yarn - or anything else you’ve got leftover in your yarn stash. This crochet bracelet key ring is a game changer when it comes to keeping track of your keys and will be loved by busy moms everywhere! Keep reading for the step-by-step tutorial and crochet pattern.
Busy Moms Need and Bangle Bracelet Key Ring
I’m just going to be bold here and say that busy moms (or dad who want to rock a bangle) NEED a bangle bracelet keyring. I designed this crochet pattern about a month ago and - though I know its really simple - it is a total game changer for me while I am juggling my 4 year old, my 1 year old a diaper bag and everything else I need to remember whenever we leave the house.
I always feel like I am forgetting something and I am admittedly pretty scatterbrained. I have locked my keys in my car several times throughout my driving-life and now as a mom that thought has always terrified me! My bottomless diaper bag was never a good place for my keys because I was always digging for them and spending way too much time finding my keys just to make sure they were there. Sometimes I wear jeans and pockets worked alright, but let’s be real. I’m a work at home mom. I pretty much live in yoga pants out of practicality alone. Why am I telling you this? Because there are only a few of my designs that I can say have changed something significant in my life (like my Crochet Water Balloons) and this is now one of them.
A Completely Customizable Crochet Pattern
Ok, I’ll get off my soap box now and tell you a little bit about the pattern. Like I mentioned above, this free crochet pattern is a perfect scrap buster project and is super customizable! Prefer a removable clip on your keys? Go for it! Want to use double strands? Be my guest. Need it bigger or smaller? You can do that. Basically, once you have your supplies you will be able to work one of these up in about an hour (give or take depending on the yarn you use).
Crochet a DIY Gift for Women, Teens and College Students
I think these would make a fabulous crochet gift for moms, teenagers, college students, you name it! With the holidays coming up, I know that some of you out there will be wanting some fast, last minute DIY gift ideas - add this one to your list!
Show off Your Crochet Projects
Don’t forget to share pictures of your projects with me in my Facebook Group or by tagging @leftinknots on Instagram. I can’t wait to see what you make!
Bangle Bracelet O Key Ring - Free Crochet Pattern
Supplies:
- Yarn - small amount of any yarn you prefer to use. I used Lion Brand Go For Faux, Lion Brand Color Made Easy, Lion Brand Basic Stitch, and Bernat Maker Home Dec for the pictured samples.
- Crochet hook suitable for your selected yarn - I love Clover Amour
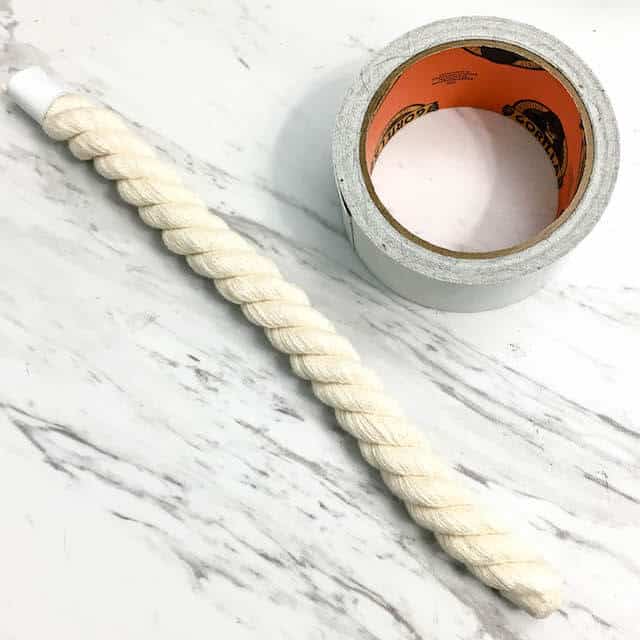
- 3/4” cotton rope or piping cord
- Scissors
- Yarn needle
- Keychain hardware (such as key rings or clips)
- Heavy duty duct tape - I used Gorilla Tape
Abbreviations (written in U.S. terms):
- sl st: slip stitch
- ch: chain
- SC
Gauge
Not important
Finished Size:
- adjustable depending on the length of rope you use
Instructions
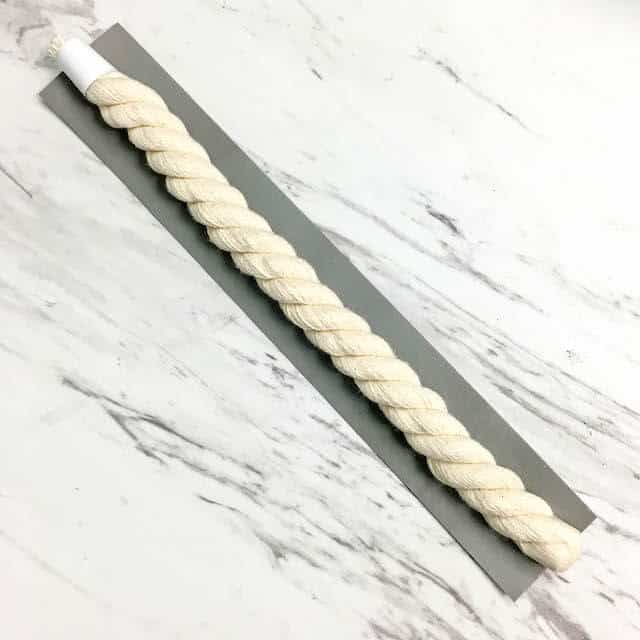
Step 1: Cut a length of rope approx. 13-15” long (or whatever your desired length may be). I taped the ends of my rope to reduce unraveling.
Step 2: Cut a length of duct tape the same length as your rope. Lay the rope in the middle of the tape and wrap it tightly around. You will likely still have some rope exposed at this point
*Side Note: I used white duct tape, but you can use any color you want! I think it would be fun to use something brightly colored or patterned with a yarn that leaves gaps to see through the stitches.
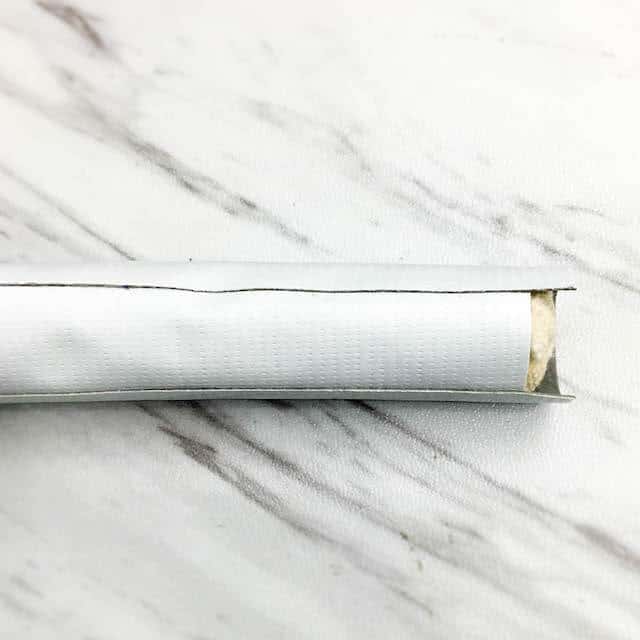
Step 3: Tape around the other side of your rope so that the whole length of rope is covered in duct tape.
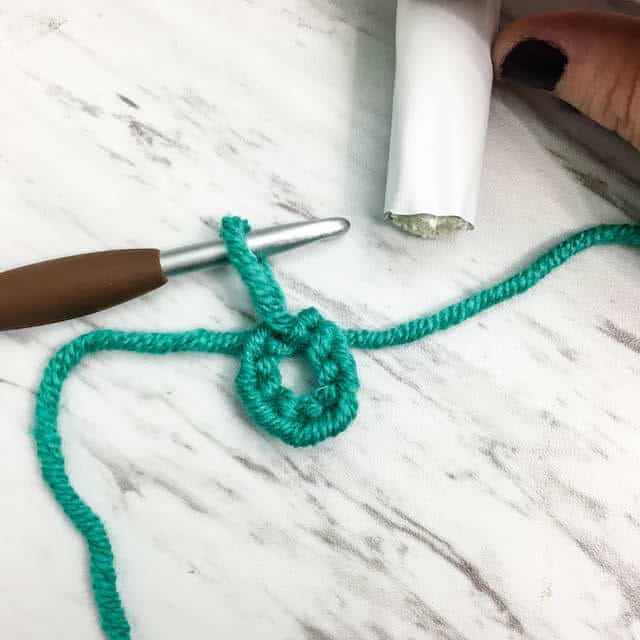
Step 4: Crochet chain stitches to fit tightly around your rope. This will differ depending on the weight of the yarn you select and the size hook you are using. Attach the last ch st to the first ch st with a sl st. You will now crochet around in continuous rounds using SC stitches.
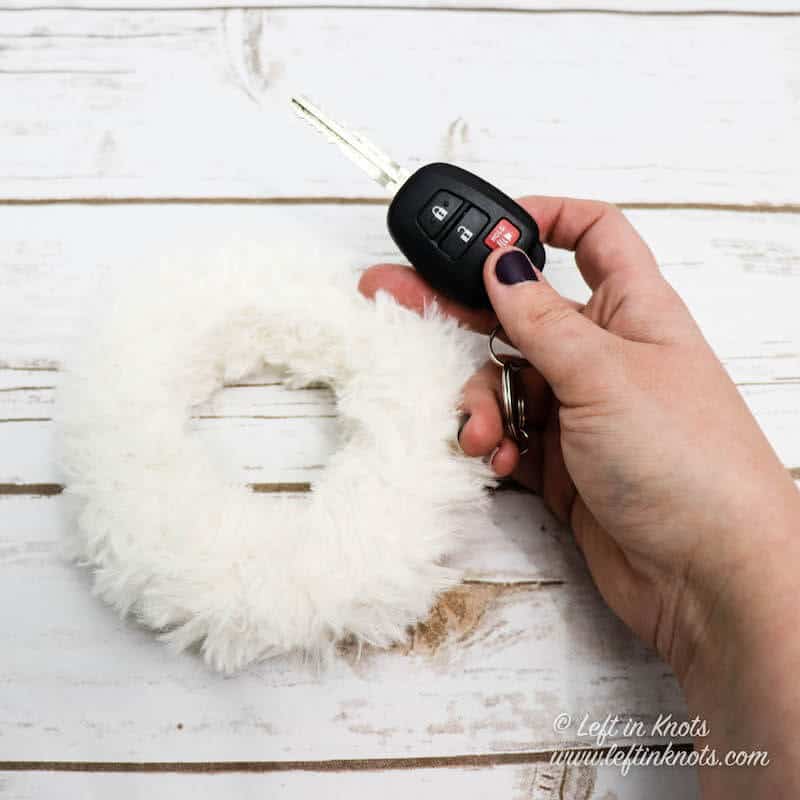
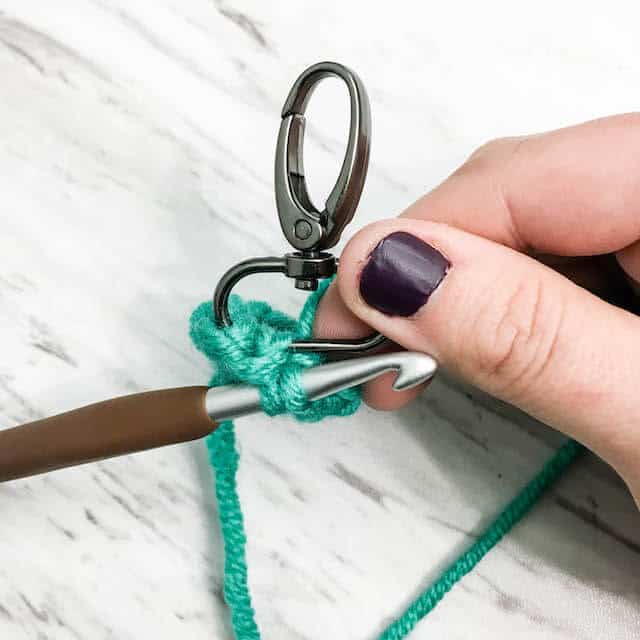
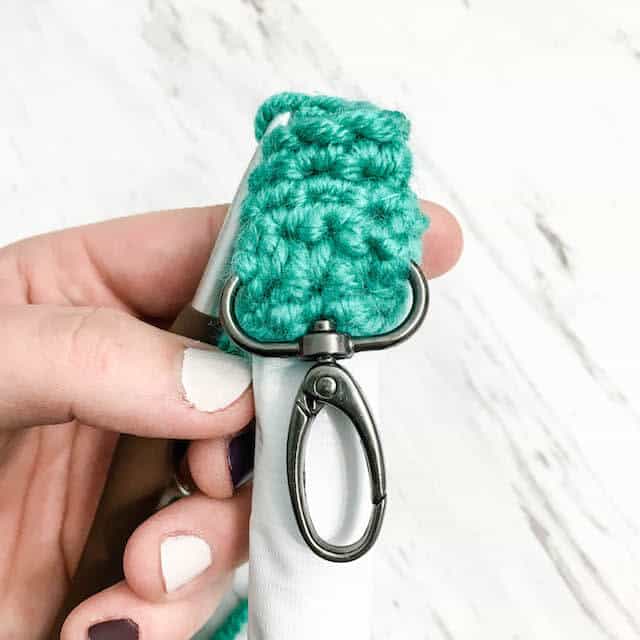
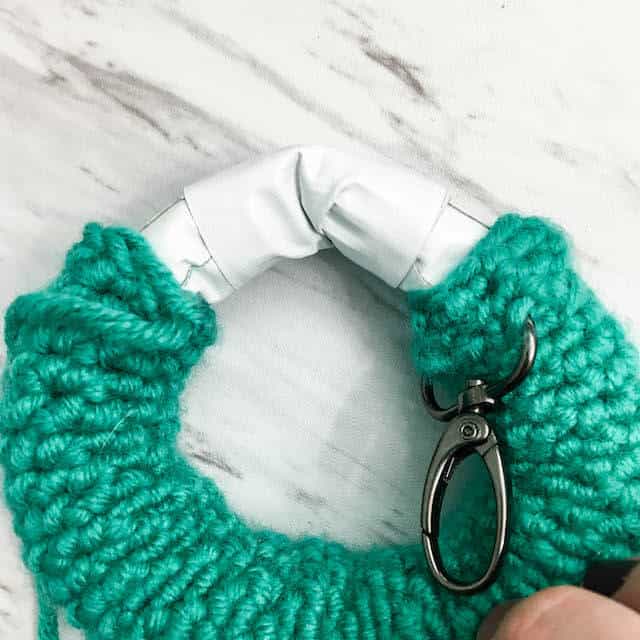
Step 5: After you have crocheted a few rounds, crochet around your key ring or clip with 3-4 SC stitches.
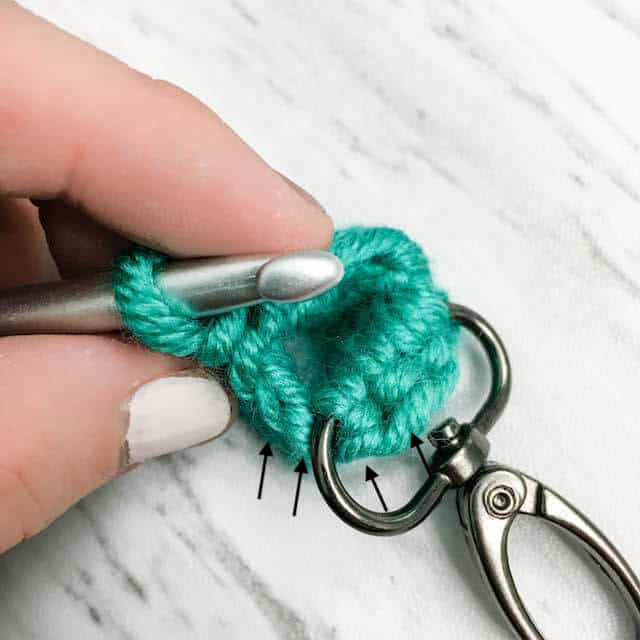
Step 6: Continue crocheting in continuous rounds. After adding the key ring, make sure your piece is right side out and you crochet so that your key ring will also be on the outside of your piece (see photos below).
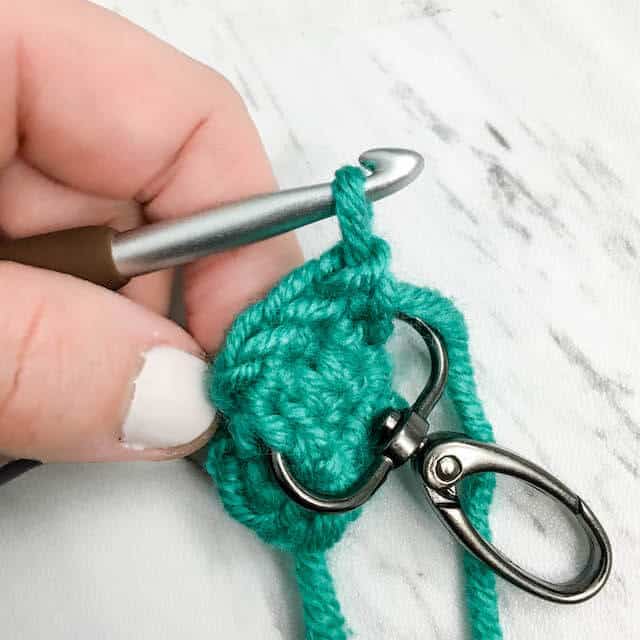
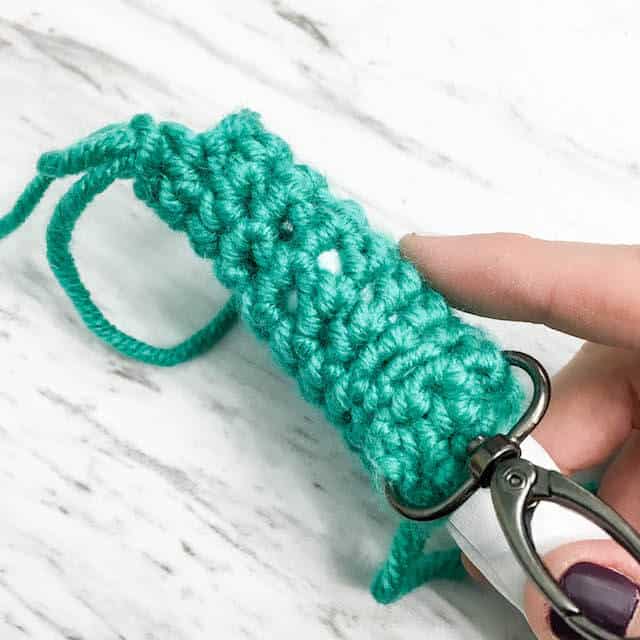
Step 7: After you have crocheted about an inch or two, slip the tube you are crocheting over the end of your taped rope. Continue crocheting and working the tube down the rope as you go.
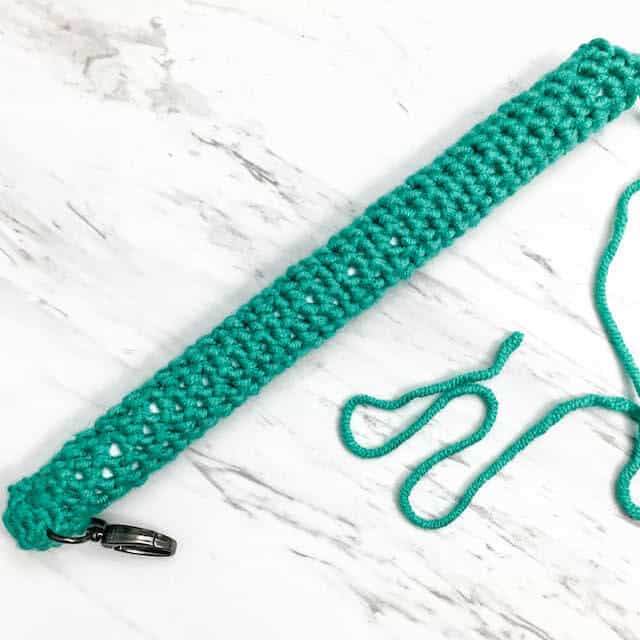
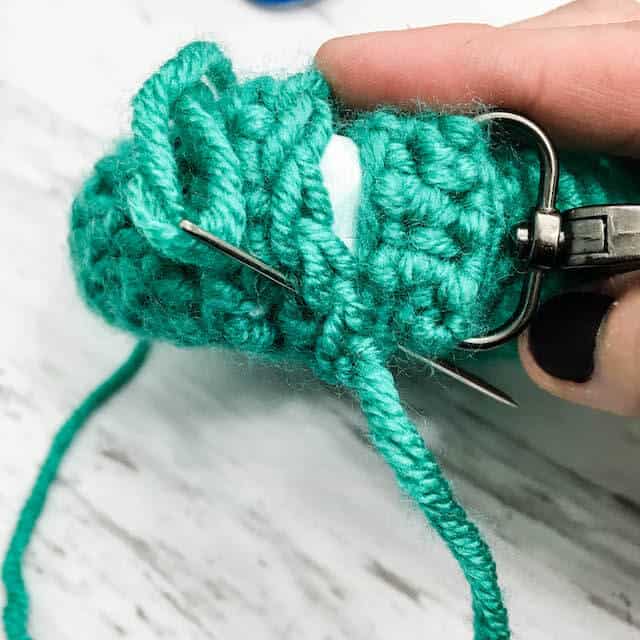
Step 8: Crochet the entire length of your rope. Cut and tie off your yarn leaving a long tail. Push the crocheted tube to expose the ends of the rope. Bend the rope into a circle and tape the ends together. Be sure to use enough tape to secure the connection.
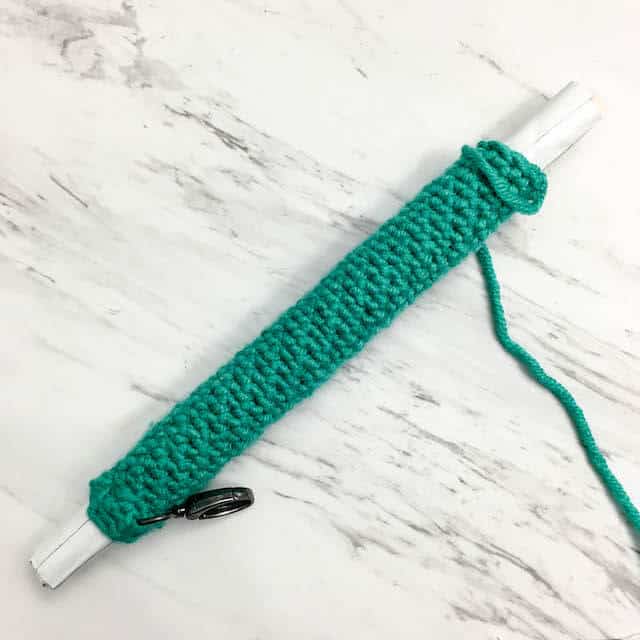
Step 9: Use the tail of your yarn to sew the ends of your piece together. Weave in ends and you’re done!
More Free Crochet Patterns You'll Love
Find all FREE CROCHET PATTERNS here
Now the legal stuff...You may sell items made from this pattern, but please credit me as the original designer. Also, please do not share the written pattern in print or electronically. The photos on this webpage belong to Megan Meyer of Left in Knots and may not be used for product sales/product listings. You may share a link back to my blog if you would like someone else to see or work with this pattern. Thank you for your cooperation and if you have any questions please feel free to contact me!
This post contains affiliate links. I receive a small commission for any purchases made through these links at no additional charge to you.