This crochet backpack toy was made quickly with bulky blanket yarn. I whipped it up so that my daughter can play pretend school around the house. Keep reading for the free crochet pattern!
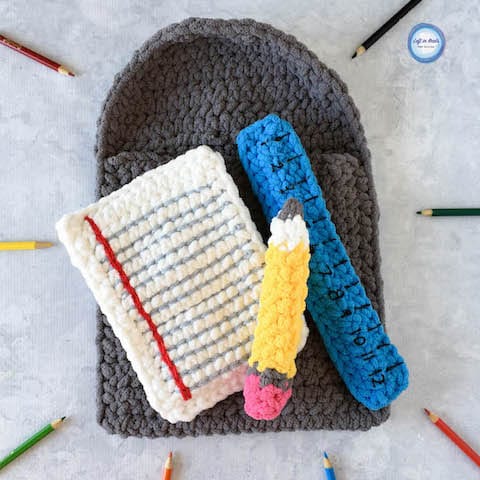
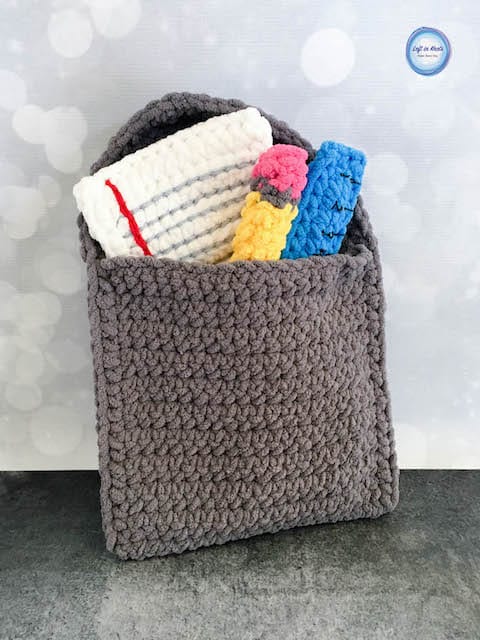
This Stuff and Spill Backpack is a lot like my other Stuff and Spill patterns. It is designed to be a totally baby safe toy to encourage pretend play for babies and toddlers. As a stay-at-home mom I am always looking for fun ways to keep my daughter engaged and these toys have always been a hit with her! Babies can practice their motor skills taking the pieces out of the backpack and putting them back in. Toddlers can use their imaginations and come up with games and activities using these toys that our adult brains probably can't even imagine right now. My daughter has had a lot of fun writing "shopping lists" with the paper and pencil.
I make my Stuff and Spill toys using Bernat Blanket yarn for a couple reasons. One-it is super bulky and makes them work up so quickly! Two-it is so soft and cuddly and it's nice for babies to hold. But I know that some of you may not have lots of Bernat Blanket yarn in your stash...no worries! This pattern can also be worked up using 3 strands of worsted weight acrylic held together. One of my testers made hers this way and it still worked into an adorable piece 🙂
Show off Your Crochet Projects
Don’t forget to share pictures of your projects with me in my Facebook Group or by tagging @leftinknots on Instagram. I can’t wait to see what you make!
Stuff and Spill Backpack - Free Crochet Pattern
Supplies:
- Bernat Blanket Yarn in the following colors/approx. amount: Dark Grey/100 yds, White/50 yds, School Bus Yellow/20 yds, Busy Blue/20 yds, Pixie Pink/10 yds -OR- you can work 3 strands of worsted weight yarn together in similar colors
- Any worsted weight yarn in light blue and red (less than 25 yds each)
- 8.0mm crochet hook (I used Clover Amour)
- I/5.5mm crochet hook
- Scissors
- Yarn needle
- Non-toxic puffy paint in black (optional)
- Poly-fil (optional)
Abbreviations:
- sl st: slip stitch
- ch: chain
- MC: magic circle
- SC: single crochet
- FLO: front loop only
- SC2Tog: single crochet two together
- SC3Tog: single crochet three together
Gauge
9 sts x9 rows = 4” square in SC
Finished Sizes (approx.):
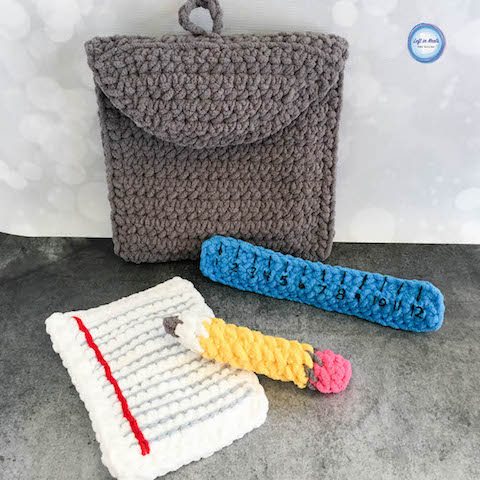
Backpack = 10” x 10”
Paper = 8” x 5.5”
Ruler = 2” x 10”
Pencil = 7” x 1.5”
Pattern Notes
- ch stitches at the beginning of rows/rounds do NOT count as a stitch
- To make this pattern truly baby safe, I did not add straps or button closures to the backpack
- 2-3 strands of worsted weight yarn may be substituted for this pattern if you choose, but your finished size/overall appearance may be different. My tester who made hers this way suggested using a slightly looser tension.
- At the end of each round of the pencil, attach to the first st of that round with a sl st.
Instructions
Backpack (Dark Grey)
ch 21
Row 1: SC in second ch from the hook and SC across. Turn. (20)
Row 2-44: ch 1, SC across. Turn. (20)
Row 45: ch 1, FLO SC across. Turn. (20)
Row 46: ch 1, SC across. Turn. (20)
Row 47: ch 1, FLO SC across. Turn. (20)
Row 48: ch 1, SC2Tog, SC in 16, SC2Tog. Turn (18)
Row 49: ch 1, SC2Tog, SC in 14, SC2Tog. Turn (16)
Row 50: ch 1, SC2Tog, SC in 12, SC2Tog. Turn (14)
Row 51: ch 1, SC2Tog, SC in 10, SC2Tog. Turn (12)
Row 52: ch 1, SC2Tog, SC in 8, SC2Tog. Turn (10)
Row 53: ch 1, SC2Tog, SC in 6, SC2Tog. Turn (8)
Row 54: ch 1, SC2Tog, SC in 4, SC2Tog. Turn (6). Tie off yarn.
To finish the backpack:
Fold the piece so that Row 1 and Row 44 overlap. Starting at a bottom corner (at the fold), SC through both layers to seam them together. When you get to the point where Row 1 and Row 44 meet, continue to SC around the edge of Rows 45-54. When you reach the other side of the backpack where Row 1 and Row 44 overlap, SC through both layers back down to the other side of the fold. Tie off yarn.
To add a loop:
ch 8, leaving a long tail on both sides of the ch sts. Use the long tails to tie the loop to the top of the bag in the center (with the flap closed, the top is Row 46). Weave in all ends.
Lined Paper (White) - Make 2
ch 13
Row 1: SC in second ch from the hook and SC across. Turn. (12)
Row 2-15: ch 1, SC across. Turn (12)
Adding paper lines (See video tutorial if you are unfamiliar with the surface slip stitch - I added lines to one piece only):
With a light blue worsted weight yarn and 5.5mm hook, surface sl st between each of rows 1-13.
Next with red yarn, surface sl st between the first and second st of each row to make the vertical red line.
Finishing the Paper:
After adding your lines to one (or both) of your white rectangles, lay one rectangle on top of the other so that the “raw” side of the paper lines and all the tails are on the inside. SC around the outer edge of the rectangles working through both layers, (sc, ch 1, sc) at each corner to turn. Attach to the first st of the border with a sl st. Tie off yarn and weave in ends.
Ruler (Busy Blue) - Make 2
ch 23
Row 1: SC in second ch from the hook and SC across. Turn. (22)
Row 2: ch 1, SC across (22)
Lay one rectangle on top of the other. SC around the outer edge of the rectangles working through both layers, (sc, ch 1, sc) at each corner to turn. Attach to the first st of the border with a sl st. Tie off yarn and weave in ends.
Use non-toxic puffy paint to add lines/numbers.
Pencil (School Bus Yellow, Pixie Pink, Dark Grey & White)
Round 1 (Pink): start with a MC, 6 SC in MC and pull tight (6)
Round 2-3: ch 1, SC around (6)
Round 4 (Grey): ch 1, SC around (6)
Round 5-13 (Yellow): ch 1, SC around (6)
Round 14 (White): ch 1, SC around (6)
**You may want to add some Poly-fil (or scrap yarn) to your pencil at this point to help it keep it’s shape. Also make sure that it is right side out.**
Round 15 (still using White): ch 1, SC2Tog around (3)
Round 16 (Grey): ch 1, SC3Tog (1) **this is a bit tricky with the bulky yarn, but it makes a nice “point” of the pencil. If it is giving you trouble, stop at Round 15 and tie off your yarn with a long tail. Use the tail to sew the tip of your pencil shut instead.
More Free Crochet Patterns You'll Love

Find all FREE CROCHET PATTERNS here
Now the legal stuff...You may sell items made from this pattern, but please credit me as the original designer. Also, please do not share the written pattern in print or electronically. The photos on this webpage belong to Megan Meyer of Left in Knots and may not be used for product sales/product listings. You may share a link back to my blog if you would like someone else to see or work with this pattern. Thank you for your cooperation and if you have any questions please feel free to contact me!
This post contains affiliate links. Thank you for supporting free patterns and yarn deals from Left in Knots!