This crochet alpine stitch hat uses texture and color to create a denim blue hat that you will want for your fall and winter wardrobe. Use Lion Brand Jeans yarn if you want to replicate the denim look of the hat that I made. Or if you prefer, substitute your favorite Category 4 yarn and make this hat in any combination of neutrals or brights.
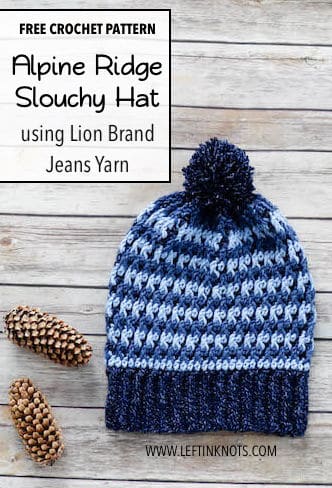
A Denim-look Hat with Lion Brand Jeans Yarn
I have had Lion Brand Jeans yarn in my stash FOREVER and I finally decided that this hat was the perfect project to use it for. It seemed perfect to use my Lion Brand Jeans yarn to make a blue hat pattern in honor their #hatnothate event. Aside from that - I LOVE the denim-y blues and the texture they help to create in this hat. This hat screams fall to me and I can totally see myself wearing it to a pumpkin patch with jeans and a cozy sweater.
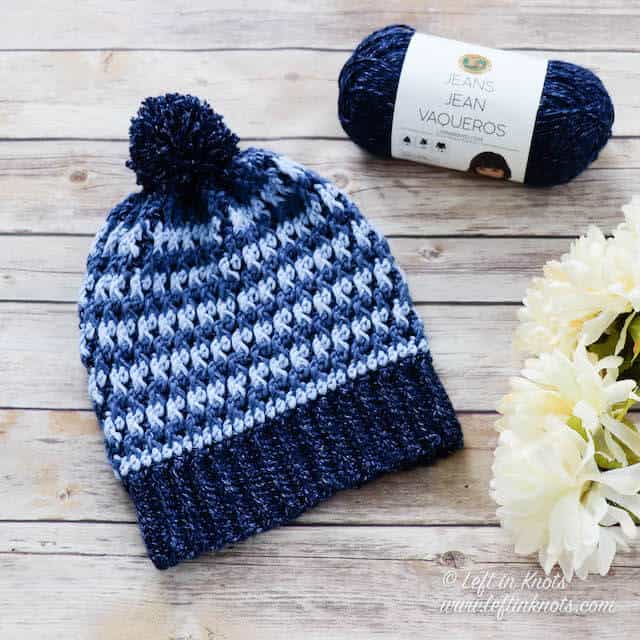
Make this Slouch Hat in Solids or Colors
It’s always so difficult for me to make my patterns in only one yarn/color combination. I love how this hat turned out using the Jeans yarn - but there are so many other possibilities, too! I think it would be so much fun with a neutral/bright color combo to really make a color pop statement, and I also think it would be just as fabulous is a monochromatic neutral. The texture of the stitches shine no matter what!
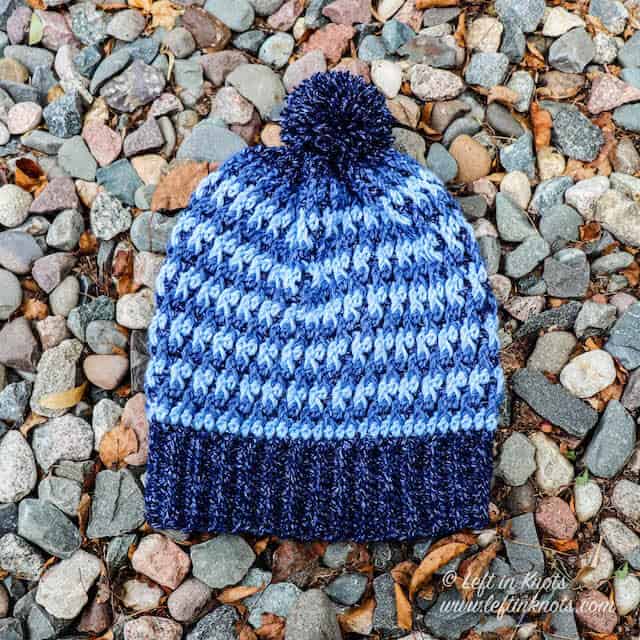
An Alpline Stitch Crochet Hat for Adults
And speaking of the texture of the stitch - this beauty is called the Alpine Stitch and I WILL be using it again. I am always a lover of texture and this stitch fits the bill!
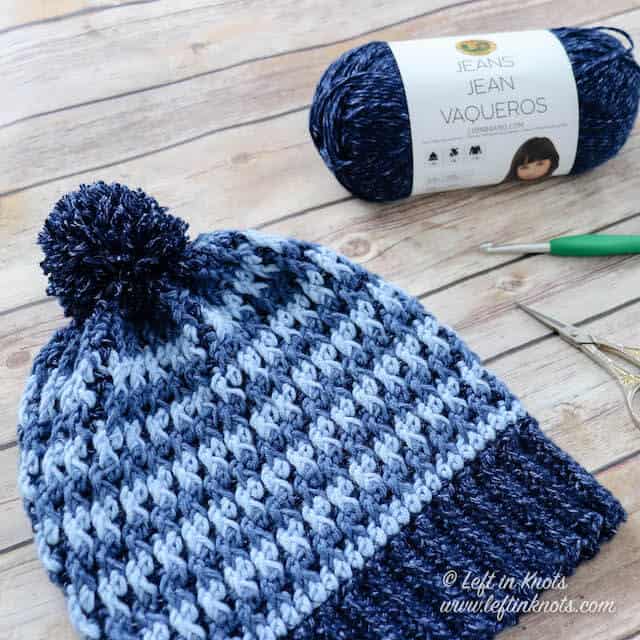
Show off Your Crochet Projects
Don’t forget to share pictures of your projects with me in my Facebook Group or by tagging @leftinknots on Instagram. I can’t wait to see what you make!
Alpine Ridge Slouchy Hat - Free Crochet Pattern
Supplies:
- Approx. 130 yards of Color A (Lion Brand Jeans ’Brand New’), 60 yards of Color B (Lion Brand Jeans ‘Faded’), 60 yards of Color C (Lion Brand Jeans ‘Stonewashed’)
- I/5.5mm crochet hook - I love Clover Amour
- Scissors - I always keep these travel scissors in my hook case
- Pom pom maker or a faux fur pom
- Yarn needle
Abbreviations (written in U.S. terms):
- YO: yarn over
- ch: chain
- sl st: slip stitch
- BLO: back loop only
- SC: single crochet
- DC: double crochet
- FPDC: front post double crochet
Gauge
10 sts x 8 rows = 2” square in BLO SC
Finished Size (adult):
- Width = 9”
- Height = 10.5”
Pattern Notes
- Chain stitches at the beginning of rows/rounds do not count as a stitch
- The end of each round is attached to the first st of the round with a sl st
- ALL FPDC stitches are worked around the post of the DC st 2 rows prior. (e.g., FPDC stitches in Round 4 will be worked around the posts of the DC stitches in Round 2.)
Instructions
Bottom Ribbing - Working in Rows
Using Color A
ch 12
Row 1: SC in the second ch from the hook and SC across (11). Turn
Row 2-60: ch 1, working in BLO, SC across (11). Turn.
When you finish the ribbed band, fold it so that Row 1 and 60 are on top of one another. Working through the back loop of Row 60 and the front loop of Row 1, seam the two rows together by slip stitching across. Do not cut your yarn. Continue on to work in rounds along the “raw” edge of ribbed band.
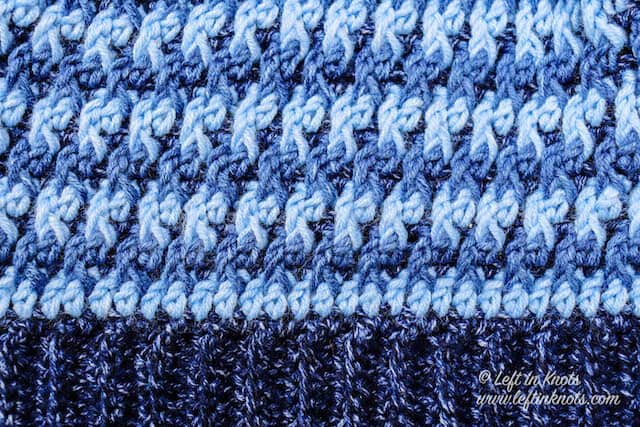
Round 1: ch 1, SC around the top of the band working one stitch per row (60). Attach to first SC of the round with a sl st.
Switch to Color B
Round 2: ch 2, DC in each st around (60). Attach to first DC of the round with a sl st.
Switch to Color A
Round 3: ch 1, SC in each st around (60). Attach to first SC of the round with a sl st.
Switch to Color C
Round 4: ch 2, DC in the first st, FPDC around next st in Round 2 (see pattern notes for a detailed explanation), *DC in the next st, FPDC around the next st 2 rounds below, repeat from * around (60). Attach to first DC of the round with a sl st.
Switch to Color A
Round 5: ch 1, SC in each st around (60). Attach to first SC of the round with a sl st.
Switch to Color B
Round 6: ch 2, FPDC around the first st 2 rounds below, DC in the next st, *FPDC around the next st 2 rounds below, DC in the next st, repeat from * around (60). Attach to first DC of the round with a sl st.
Switch to Color A
Round 7: ch 1, SC in each st around (60). Attach to first SC of the round with a sl st.
Switch to Color C
Round 8: ch 2, DC in the first st, FPDC around next st 2 rounds below, *DC in the next st, FPDC around the next st 2 rounds below, repeat from * around (60). Attach to first DC of the round with a sl st.
Switch to Color A
Round 9: ch 1, SC in each st around (60). Attach to first SC of the round with a sl st.
Switch to Color B
Round 10: ch 2, FPDC around the first st 2 rounds below, DC in the next st, *FPDC around the next st 2 rounds below, DC in the next st, repeat from * around (60). Attach to first DC of the round with a sl st.
Switch to Color A
Round 11: ch 1, SC in each st around (60). Attach to first SC of the round with a sl st.
Switch to Color C
Round 12: ch 2, DC in the first st, FPDC around next st 2 rounds below, *DC in the next st, FPDC around the next st 2 rounds below, repeat from * around (60). Attach to first DC of the round with a sl st.
Switch to Color A
Round 13: ch 1, SC in each st around (60). Attach to first SC of the round with a sl st.
Switch to Color B
Round 14: ch 2, FPDC around the first st 2 rounds below, DC in the next st, *FPDC around the next st 2 rounds below, DC in the next st, repeat from * around (60). Attach to first DC of the round with a sl st.
Switch to Color A
Round 15: ch 1, SC in each st around (60). Attach to first SC of the round with a sl st.
Switch to Color C
Round 16: ch 2, DC in the first st, FPDC around next st 2 rounds below, *DC in the next st, FPDC around the next st 2 rounds below, repeat from * around (60). Attach to first DC of the round with a sl st.
Switch to Color A
Round 17: ch 1, SC in each st around (60). Attach to first SC of the round with a sl st.
Switch to Color B
Round 18: ch 2, FPDC around the first st 2 rounds below, DC in the next st, *FPDC around the next st 2 rounds below, DC in the next st, repeat from * around (60). Attach to first DC of the round with a sl st.
Switch to Color A
Round 19: ch 1, SC in each st around (60). Attach to first SC of the round with a sl st.
Switch to Color C
Round 20: ch 2, DC in the first st, FPDC around next st 2 rounds below, *DC in the next st, FPDC around the next st 2 rounds below, repeat from * around (60). Attach to first DC of the round with a sl st.
Switch to Color A
Round 21: ch 1, SC in each st around (60). Attach to first SC of the round with a sl st.
Switch to Color B
Round 22: ch 2, FPDC around the first st 2 rounds below, DC in the next st, *FPDC around the next st 2 rounds below, DC in the next st, repeat from * around (60). Attach to first DC of the round with a sl st.
Switch to Color A
Round 23: ch 1, SC in each st around (60). Attach to first SC of the round with a sl st.
Switch to Color C
Round 24: ch 2, DC in the first st, FPDC around next st 2 rounds below, *DC in the next st, FPDC around the next st 2 rounds below, repeat from * around (60). Attach to first DC of the round with a sl st.
Switch to Color A
Round 25: ch 1, SC in each st around (60). Attach to first SC of the round with a sl st.
Round 26: ch 2, DC2Tog around (30). Attach to first DC of the round with a sl st.
Round 27: ch 2, DC2Tog around (15). Attach to first DC of the round with a sl st.
Tie off leaving a long (approx. 12”) tail of yarn. Using a yarn needle, weave the yarn back and forth through the stitches of Round 27. Pull tight to cinch the top of the hat closed. Make and attach a pom pom if desired. Weave in all ends
Now the legal stuff...You may sell items made from this pattern, but please credit me as the original designer. Also, please do not share the written pattern in print or electronically. The photos on this webpage belong to Megan Meyer of Left in Knots and may not be used for product sales/product listings. You may share a link back to my blog if you would like someone else to see or work with this pattern. Thank you for your cooperation and if you have any questions please feel free to contact me!
This post contains affiliate links. I receive a small commission for any purchases made through these links at no additional charge to you.
