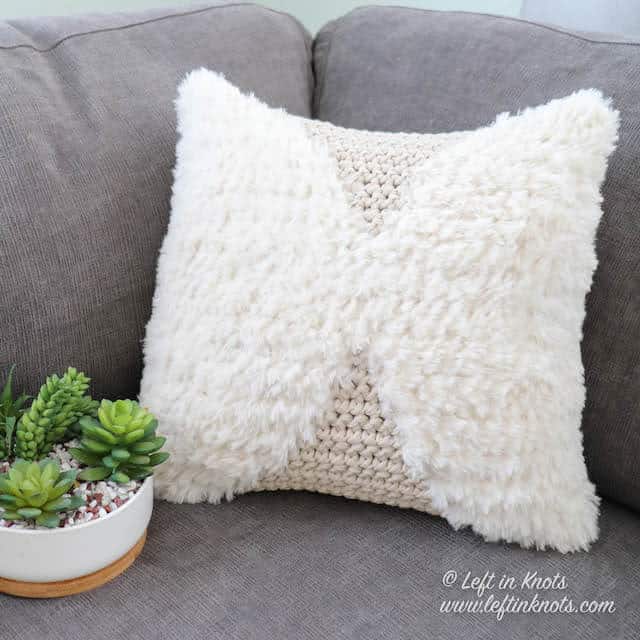
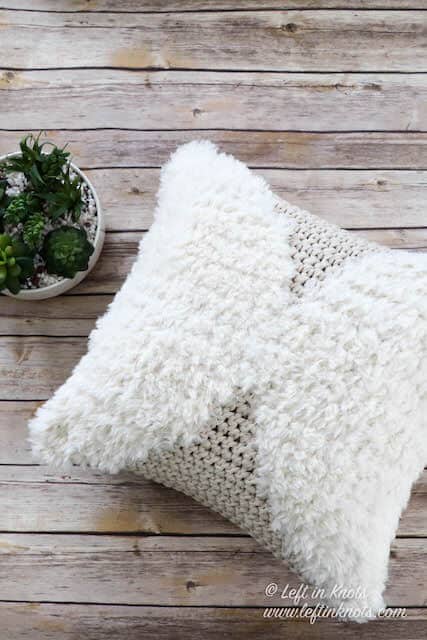
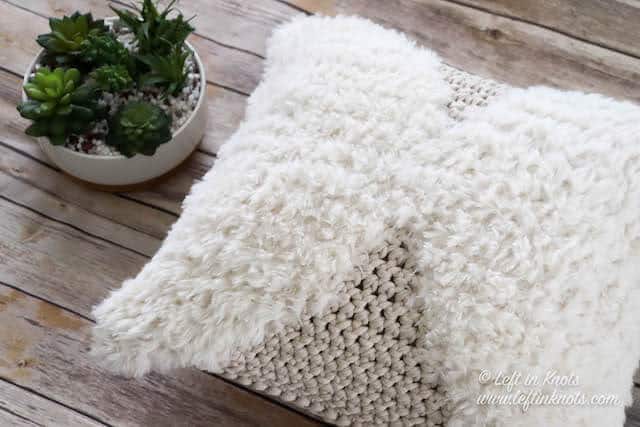
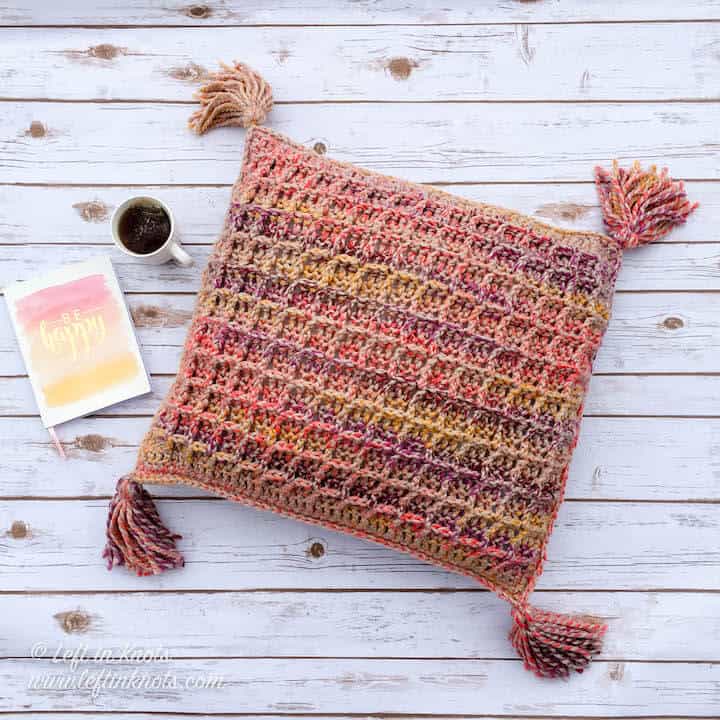
This crochet faux fur pillow combines cotton yarn, faux fur yarn and tapestry crochet techniques to create a modern throw pillow for any decor. Made with simple single crochet stitches and double strands of yarn, this pillow is fast to make and easy enough for a beginner. Keep reading for the free crochet pattern.
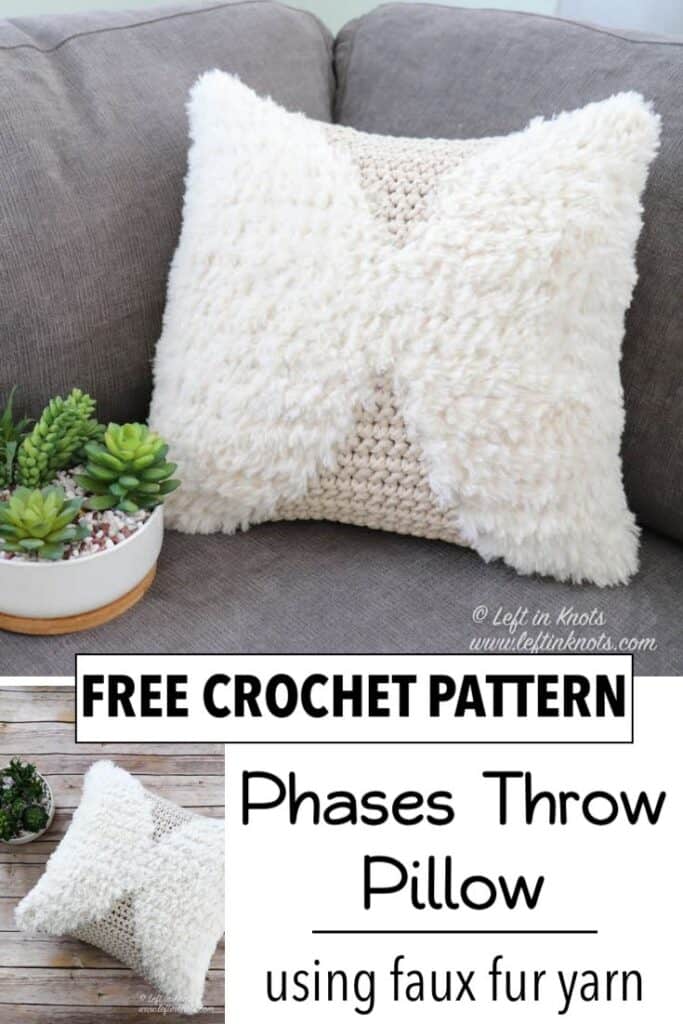
Crochet Faux Fur Pillow with Tons of Texture
When I design patterns I usually like to stay within one “brand” of yarn, mostly to maintain consistency in tension and gauge. However, there are certain designs that just beg for specific yarns to be mixed and the Phases Throw Pillow is one of them!
For this pillow I combined Lion Brand Yarn Go For Faux with Bernat Maker Home Dec to make a modern, sturdy, yet oh-so-soft throw pillow that I can’t stop touching and my kids love to snuggle! Using the Bernat Maker Home Dec give the pillow really nice structure that won’t stretch out or get all lumpy. Using it as a strand with the Lion Brand Go For Faux also made crocheting with fuzzy yarn SO much easier.
Tapestry Crochet in Solids or Colors
I know that some people will say that they hate crocheting with fuzzy yarn, but I would argue
”look how pretty!”. I love that it makes such a noticeable and fabulous change in texture and design while remaining monochromatic throughout. That being said, if you just can’t convince yourself to give the mixed textures a try, this pattern would look equally lovely as a two-toned pillow using all one type of yarn.
Whichever way you decide to make it, this pillow is made using a simple chart and the tapestry crochet technique. Since it is worked double stranded, I carried one strand of Bernat Maker Home Dec yarn throughout the entire piece and then switched back and forth between my second strand of Bernat Maker Home Dec and Go For Faux yarn as needed.
Phases Throw Pillow - Why the name?
When I asked on Instagram for naming suggestions for this pattern, I had a lot of people suggest that it looks like angel wings, butterfly wings, moon phases, and an hour glass. I opted to name this the Phases Throw Pillow because it seemed quite fitting right now in my life.
My husband is currently being treated for brain cancer, and we are definitely in a transition phase of life. You know the kind? Where you are pretty sure that life will feel “normal” again one day but your aren’t quite there yet? Whatever this pillow looks like to you/reminds you of, I can’t wait to see your finished projects!
Show off Your Crochet Projects
Don’t forget to share pictures of your projects with me in my Facebook Group or by tagging @leftinknots on Instagram. I can’t wait to see what you make!
Phases Throw Pillow - Free Crochet Pattern
Supplies:
- Yarn - the pictured sample used 2 skeins of Bernat Maker Home Dec in ‘Cream’ and 2 skeins of Lion Brand Go For Faux in ‘Baked Alaska’
- 9.0mm crochet hook - I love Clover Amour
- Scissors - I always keep these travel scissors in my hook case
- 18” Pillow Form
- Yarn needle - for these particular yarns I recommend working with a plastic needle
Abbreviations (written in U.S. terms):
- ch: chain
- st: stitch
- SC: single crochet
Gauge
9 sts x 9 rows= 4” square in SC using two strands of Bernat Maker Home Dec
Finished Size:
- Width = 16”
- Height = 16”
Pattern Notes
- Chain stitches at the beginning of rows do not count as a stitch
- In my sample, Yarn A = Bernat Maker Home Dec ‘Cream’; Yarn B = Lion Brand Go For Faux ‘Baked Alaska’
Instructions

Front Panel
Start by chaining 35 with two strands of Yarn A. Starting on Row 1, gray squares indicate you should SC with one strand of Yarn A and one strand of Yarn B. White squares indicate you should SC with two strands of Yarn A. In Row 1 you will work your first st into the second ch from your hook when you turn. Each row will have 34 stitches across.
Back Panel
Working with two strands of Yarn A, chain 35. In Row 1 you will work your first st into the second ch from your hook when you turn. Each row will have 34 stitches across. Stop after Row 34.
Assembly
Face the “right sides” (the sides you ultimately want to show on the outside) of the pillow together. Using one strand of Yarn A, SC around 3 edges of the squares while working through both layers to seam them together. Start to crochet along the 4th side of the squares but stop halfway. Turn your pillow inside out. Insert your pillow form and hand sew the remaining section of the last edge together. Tie off and weave in any visible ends.
And voila! You’ve made yourself a chic and modern pillow that you won’t want to stop snuggling!
More Free Crochet Patterns You'll Love
Find all FREE CROCHET PATTERNS here
Now the legal stuff...You may sell items made from this pattern, but please credit me as the original designer. Also, please do not share the written pattern in print or electronically. The photos on this webpage belong to Megan Meyer of Left in Knots and may not be used for product sales/product listings. You may share a link back to my blog if you would like someone else to see or work with this pattern. Thank you for your cooperation and if you have any questions please feel free to contact me!
This post contains affiliate links. I receive a small commission for any purchases made through these links at no additional charge to you.