Make a Waffle Stitch Throw Pillow with this free crochet pattern and bring your decor up a notch! Crocheting with bulky yarn means that this pillow is fast to make, and there is also a video tutorial to help you learn the waffle stitch. Keep reading for the free pattern.
Learn How to Crochet the Waffle Stitch to Make this Modern Throw Pillow
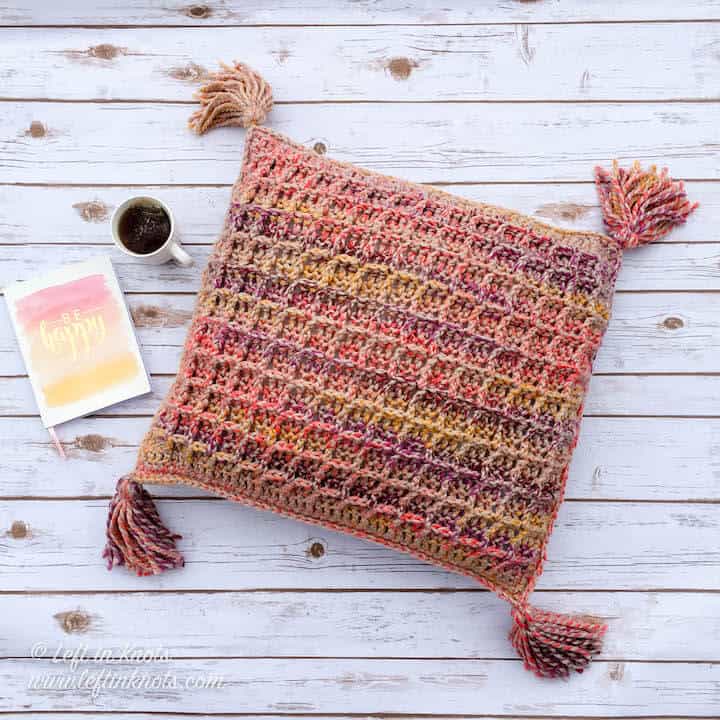
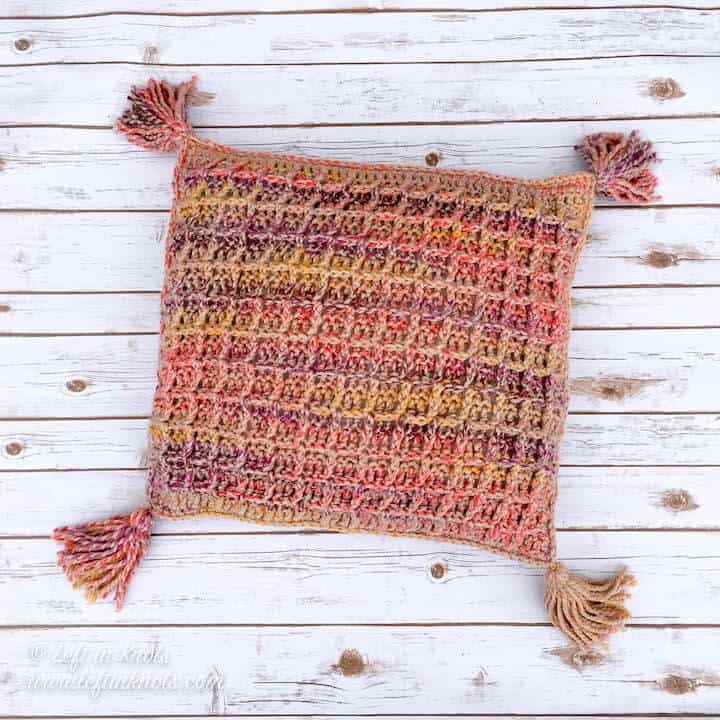
Do you ever see that yarn at the store that you absolutely fall in love with but have no idea what you are going to make with it? But then somehow, it just ends up in your shopping cart anyway? That was this Lion Brand Wool Ease Thick and Quick 'Spice Market' for me! By now you all know that I am a lover of color, and the bright, variegated colors on neutral just called to me. Finally after some long and hard thought, I decided to make a classic crocheted throw pillow with this lovely yarn. I am so glad that I did! I think these colors can be worked into spring, summer AND fall decor, and the texture of the waffle stitch makes it so visually appealing. The tassel accents are obviously optional, but I think they give this pillow an awesome, modern touch.
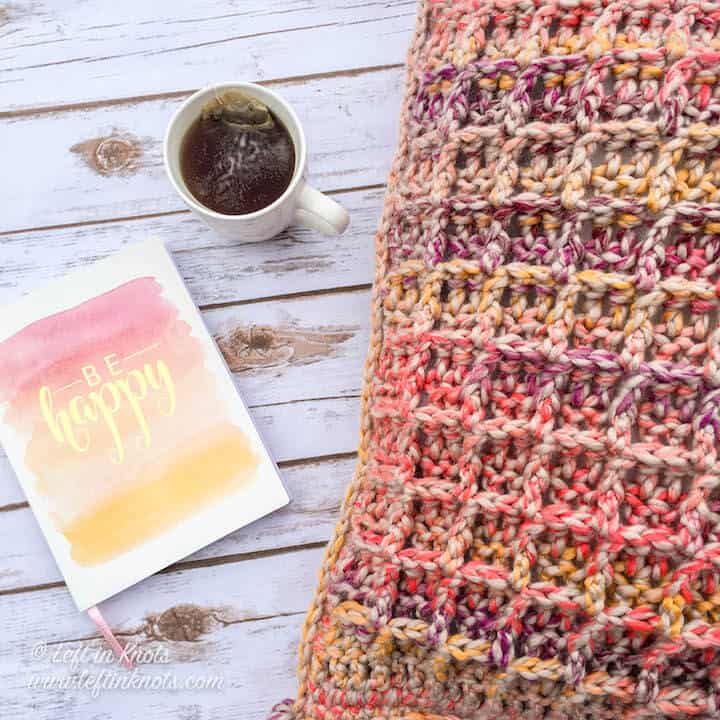
Have you ever tried the crochet waffle stitch before? It was a new one for me, and I'm so glad I gave it a shot! It makes a lovely, sturdy fabric that I think works particularly well for something like this throw pillow. It also has a fun way of "blending" color changes in variegated or self striping yarn. I think it would also be a great stitch to use with the popular cake style yarns like Caron Cakes or Lion Brand Mandala for this reason.
Lion Brand Wool Ease Thick and Quick
If these 'Spice Market' colors don't call to you like they did to me (really??? they are so lovely!!) have no fear! Lion Brand Wool Ease Thick and Quick comes in TONS of different colors, neutrals and other variegated varieties. So if you are loving this pillow, you can certainly find something to match your decor. They sell this yarn in both regular sized skeins along with 'Bonus Bundle' sizes. The 'Spice Market' colorway is only available in the Bonus Bundle skein
Show off Your Crochet Projects
Don’t forget to share pictures of your projects with me in my Facebook Group or by tagging @leftinknots on Instagram. I can’t wait to see what you make!
Waffle Stitch Throw Pillow - Free Crochet Pattern
Supplies:
- Lion Brand Wool Ease Thick and Quick (‘Spice Market’ pictured) or 435 yards of a comparable Category 6 Super Bulky yarn.
- 8.0mm crochet hook
- Scissors - I always keep these travel scissors in my hook case
- Yarn needle
- 20” pillow form or polyfil stuffing
- (optional) tassel maker
Abbreviations (written in U.S. terms):
- ch: chain
- sl st: slip stitch
- SC: single crochet
- DC: double crochet
- FPDC: front post double crochet
Special Stitch
Front Post Double Crochet: Yarn over, insert your hook front to back at the post of your next stitch (so that the post is sticking out toward you and your hook is behind the post). Yarn over, pull through the post, yarn over, pull through 2 loops, yarn over, pull through 2 loops.
Video Tutorials to Help You Out
Gauge
9 sts x 5 rows = 4" square in DC
Finished Size:
- Length = 18"
- Width = 18"
Pattern Notes
- ch sts at the beginning of rows do not count as a stitch
- The panels end up smaller than the recommended size of pillow form. This is intentional.
Instructions
Waffle Stitch Panel
ch 48
Row 1: DC into the third ch st from the hook and DC across (46). Turn
Row 2: ch 2, DC into the first 3 sts, *FPDC, DC in next 2 sts, repeat from * across. DC in the last st of the row. Turn (46
Row 3: ch 2, DC in the first st, FPDC in the next two sts, *DC in next st, FPDC in the next 2 sts, repeat from * across, end with a DC in the last st of the row. Turn (46)
Row 4-24: repeat Row 2 (on even rows) and Row 3 (on odd rows)
At the end of Row 24, ch 1 and work a SC border evenly around the outside edge of this panel. ch 2 at each corner to turn the corner.
Double Crochet Panel
ch 48
Row 1: DC into the third ch st from the hook and DC across (46). Turn
Row 2-24: ch 2, DC in each stitch across. Turn. (46) Do not cut yarn
**I did not add a SC border to this panel because it was slightly larger than my Waffle Stitch Panel. You may choose to add one or not**
Connecting the panels
Continuing from where you ended the Double Crochet Panel, lay panels so that the right sides are facing out. ch 1 and SC through 3 edges of BOTH panels (SC, ch 2, SC in each corner to turn). Before continuing to crochet along the fourth edge, insert your pillow form. Add extra polyfil to corners if needed. Continue to SC along the fourth edge until you reach the beginning. Sl st into the first st of the round. Tie off and weave in ends.
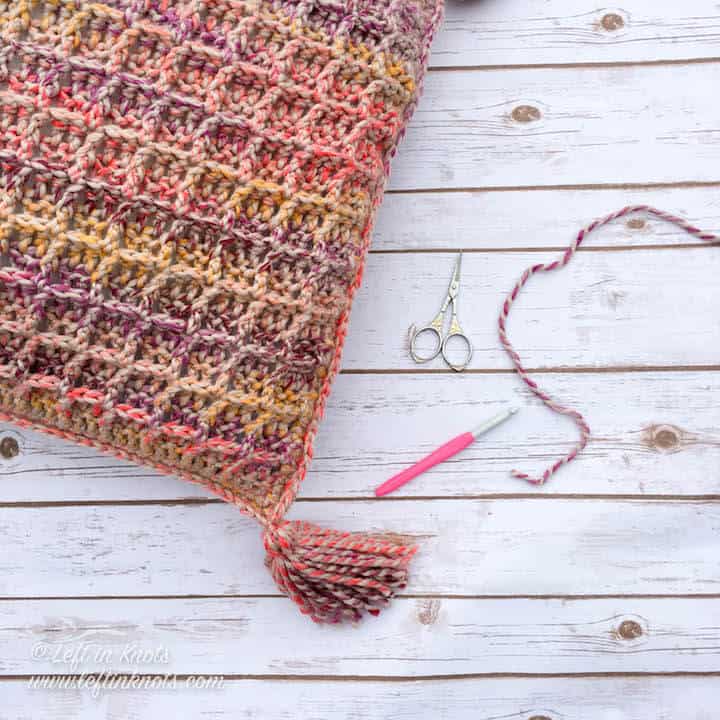
(optional) Make four tassels. Tie one tassel to each corner of the pillow.
More Free Crochet Patterns You'll Love
Find all FREE CROCHET PATTERNS here
Now the legal stuff...You may sell items made from this pattern, but please credit me as the original designer. Also, please do not share the written pattern in print or electronically. The photos on this webpage belong to Megan Meyer of Left in Knots and may not be used for product sales/product listings. You may share a link back to my blog if you would like someone else to see or work with this pattern. Thank you for your cooperation and if you have any questions please feel free to contact me!
This post contains affiliate links. I receive a small commission for any purchases made through these links at no additional charge to you.