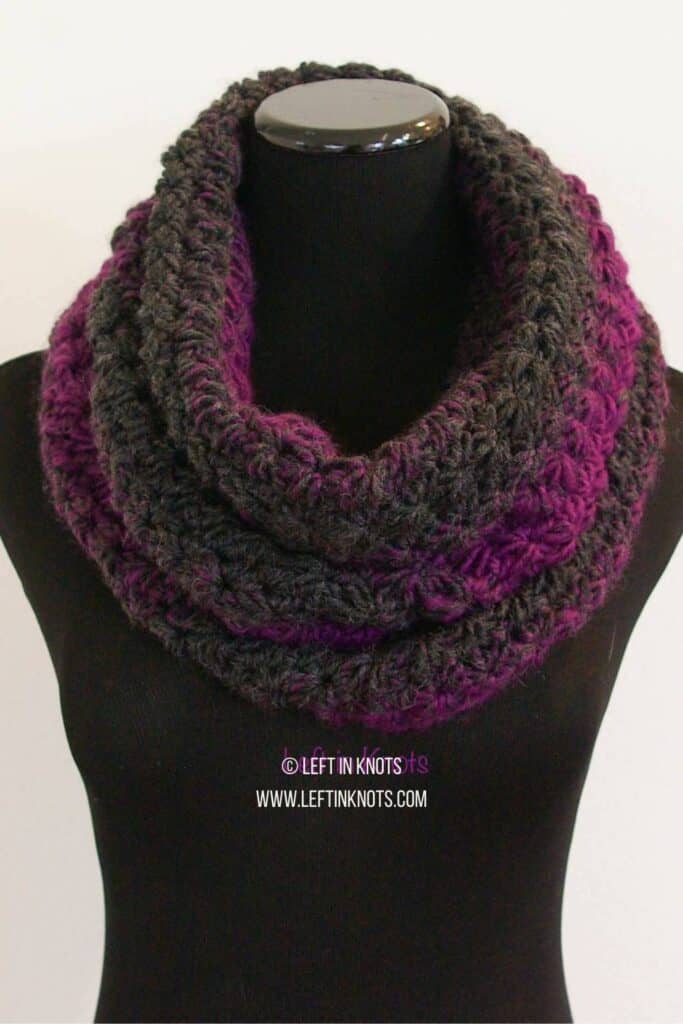
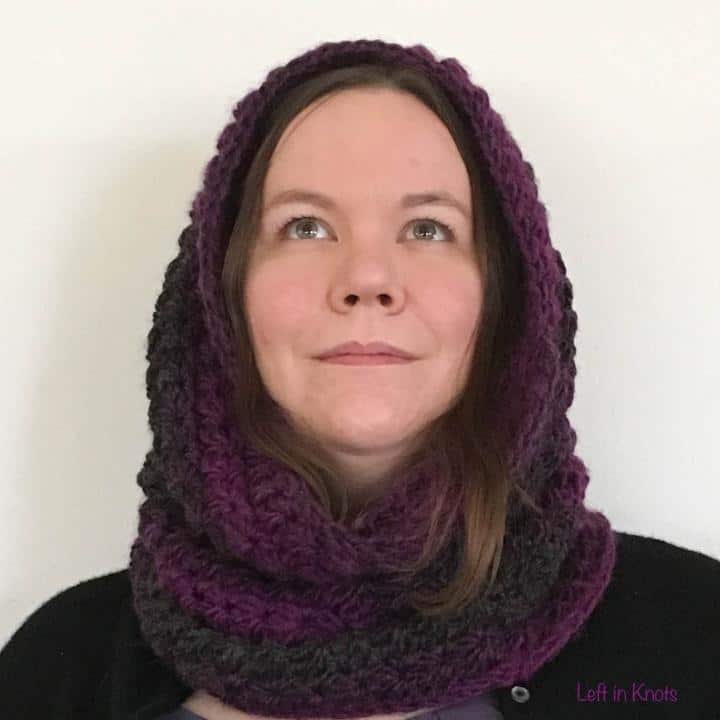
The Star Gazer's Cowl Hood crochet pattern uses one skein of Lion Brand Scarfie yarn combined with the star stitch to make a pillow soft cowl.
Seven Days of Scarfie Crochet Pattern Collection #1
This pattern is part of my Seven Days of Scarfie pattern collections. Whether you are new to Seven Days of Scarfie or you have been making along with me every single year; I am so happy you are joining in the fun! Seven Days of Scarfie started on a total whim in 2016, and I have gotten so much positive feedback on the patterns that I just keep going with it every year.
I hope that you love each of these pattern collections as much as I do!
- START HERE: This will give you all the information you need about the supplies you will need, you can find the patterns I have released so far in this year’s collection along with the patterns from previous Seven Days of Scarfie pattern collections.
- If you want to interact with others participating in Seven Days of Scarfie, I urge you to join my Facebook Community.
- If you want to be notified of each new Seven Days of Scarfie pattern directly – please sign up for my Newsletter
- If you are on Instagram I would LOVE to see your work! Use @leftinknots and #sevendaysofscarfie so I can see it!
Show off Your Crochet Projects
Don’t forget to share pictures of your projects with me in my Facebook Group or by tagging @leftinknots on Instagram. I can’t wait to see what you make!
Star Gazer’s Cowl - Free Crochet Pattern
Supplies
- One skein of Lion Brand Scarfie or approx. 312 yds of a comparable Category 5 yarn
- M/N/9.0mm crochet hook (I use Clover Amour)
- Yarn needle
- Scissors (I always keep these travel scissors in my hook case)
Abbreviations
- ch: chain
- sl st: slip stitch
- SC: single crochet
- HDC: half-double crochet
- YO: yarn over hook
- LOH: loops on hook
Special Stitch
First start stitch of a round: Ch 2, Insert hook into back loop of the second ch from the hook and pull up a loop (2 LOH), insert hook into front loop of the same ch stitch and pull up a loop (3 LOH), insert into the next 3 sts and pull up a loop through each one (6 LOH). YO and pull through all 6 loops, ch 1 to make the "eye" of the star.
Star stitch: Insert hook into the "eye" of the previous star and pull up a loop (2 LOH), insert hook into the last post of the previous star and pull up a loop (3 LOH), insert your hook into the last stitch of the previous star and pull up a loop (4 LOH), insert hook into the next 2 sts and pull up a loop in each one (6 LOH). YO and pull through all 6 loops, ch 1 to make the "eye of the star.
Helpful Video Tutorials
How to Crochet the Star Stitch in the Round (find the left handed video here)
Finished Size:
17" long x 14.5" wide
Gauge:
10 sts x 9 rows = 4x4" square in SC
Pattern Notes
- Chain stitches at the beginning of rounds do not count as a stitch
- The shape of this finished project is an elongated tube. The yarn is squishy enough for this to fit as a cowl, but the piece can also be pulled up over the head as pictured above.
- The end of each round is attached to the first stitch of that round with a slip stitch
- The tension in this project is very loose and it makes a perfectly squishy finished project
Matching Patterns
Instructions:
Ch 73, join to first ch st with a sl st. Make sure there are no twists in the chain.
Round 1: Ch 1, SC around (73).
Round 2: Ch 2, make the first star stitch of the round and continue with star stitches around (instructions and video tutorial above). When you reach the end of the round, HDC in the last st of the round (this will have already been worked into by the previous star stitch). (36 stars and 1 HDC).
Round 3: Ch 1, work 2 SC into each "eye" of the star stitches from the previous round and SC in the last HDC st from the previous round. (73 SC)
Rounds 4-33: Repeat rounds 2 and 3 respectively. Round 33 will be a round of SC sts. Tie off yarn and weave in ends.
More Free Crochet Patterns You'll Love
Find all FREE CROCHET PATTERNS here
Now the legal stuff...You may sell items made from this pattern, but please credit me as the original designer. Also, please do not share the written pattern in print or electronically. The photos on this webpage belong to Megan Meyer of Left in Knots and may not be used for product sales/product listings. You may share a link back to my blog if you would like someone else to see or work with this pattern. Thank you for your cooperation and if you have any questions please feel free to contact me!
This post contains affiliate links. Thank you for supporting free patterns and yarn deals from Left in Knots!

