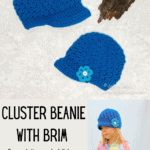
The Cluster Beanie with brim is a free crochet pattern that features a stylish hat written in sizes for adults and children. Learn how to add a brim to your crocheted beanies with this easy hat pattern. Keep reading for the free crochet pattern.

Free Crochet Beanie Pattern in Two Sizes
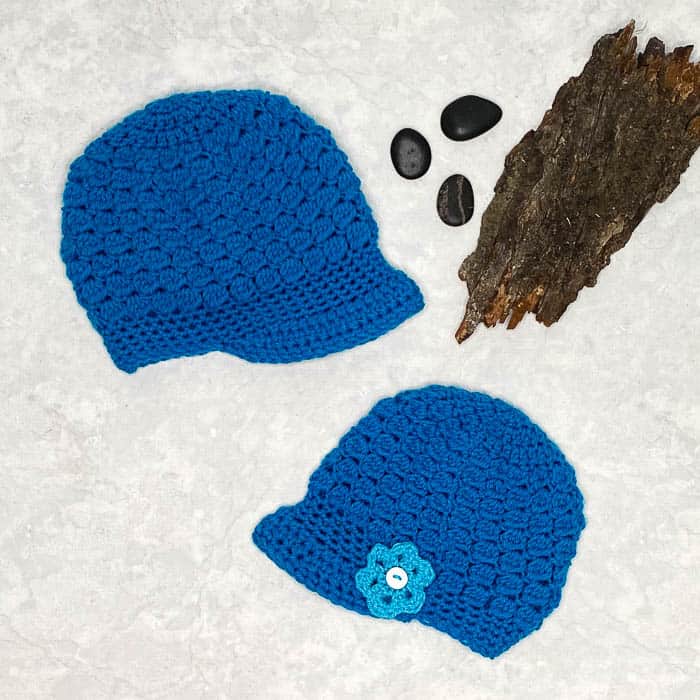
Sometimes certain patterns that I design are special to me, and this is one of those times! I designed this pattern years ago when I was selling my crochet projects, but I never actually wrote it down. It's been on my list of things to make and recreate and I finally did it! This crochet beanie with a small brim is written in both child and adult sizes.
Add a Brim to Your Crochet Beanie
Adding a brim to your beanies is easier than it looks and it is a fun way to elevate your crochet projects! Brims can easily be added onto any top down beanie, and I especially love it paired with the cluster stitch.
A Hat in Children and Adult Sizes
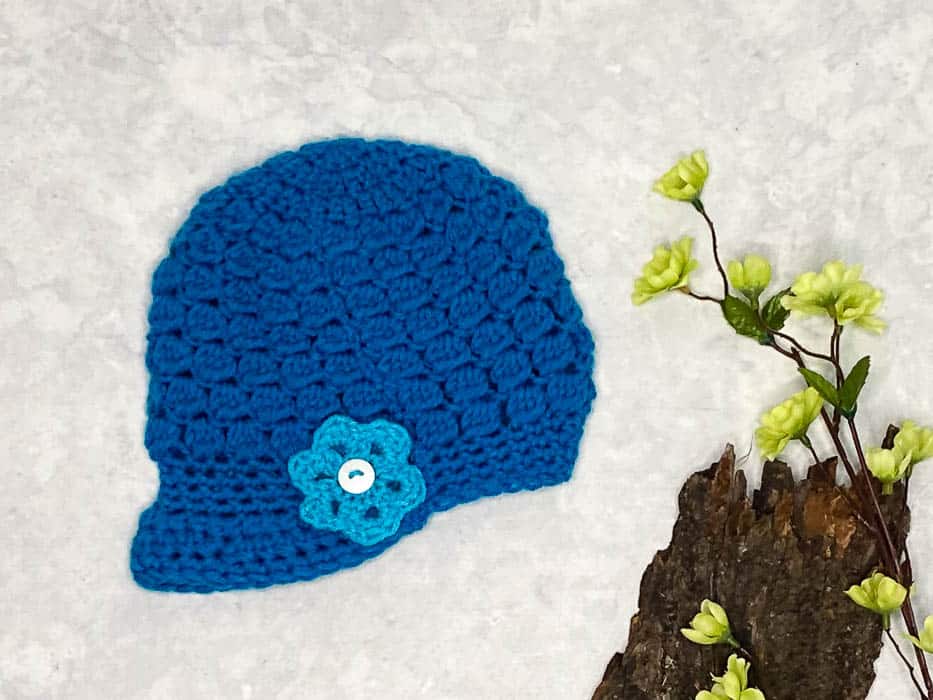
I crocheted the Cluster Beanie with a brim for both myself and my daughter, so I wrote the pattern in child and adult sizes. I chose to add a flower to the side of her beanie for a cute extra touch. You can find the pattern and video tutorial for the flower here.

Show off Your Crochet Projects
I can’t wait to see your finished pieces! Come share pictures with me in my Facebook group or tag me on Instagram with @leftinknots.
Crinkle Beanie - Free Crochet Pattern
Supplies:
- Approx. 115 yards (child) or 145 yards (adult) of worsted weight yarn
- I/5.5mm crochet hook - I love Clover Amour
- Scissors - I always keep these travel scissors in my hook case
- Yarn needle
- Optional - worsted weight yarn and button to make flower
Abbreviations (written in U.S. terms):
ch: chain
yo: yarn over
sl st: slip stitch
SC: single crochet
HDC: half double crochet
DC: double crochet
Special Stitch
Cluster: *(yo, insert hook into next st, yo, pull up a loop, yo, pull through 2 loops) repeat from * 3 more times, yo, pull through all 5 loops
Related Video Tutorials
How to Crochet the Magic Cirlce - the right handed video loads with the page
Find the left handed tutorial here
Gauge
Diameter of first 3 rounds = 3.5”
Finished Size:
- Adult Width = 9”
- Adult Height = 8”
- Child Width = 8”
- Child Height = 7”
Pattern Notes
- The chain stitches at the beginning of each row do not count as a stitch.
- The end of each round is attached to the first stitch of the round with a sl st.
- The flower pattern used in the sample photo can be found here
Instructions
Adult
Beanie - Working in rounds
Start with a magic circle
Round 1: ch 2, work 10 DC into the magic circle. Pull tight. (10)
Round 2: ch 2, 2 DC in each st around (20)
Round 3: ch 2, *2 DC, DC, repeat from * around (30).
Round 4: ch 2, *cluster, ch 1, cluster, ch 1, sk 1, cluster, ch 1, sk 1, repeat from * around (36).
Round 5: ch 2, *cluster, ch 1, cluster, ch 1, sk 1, repeat from * around (48).
Round 6-11: ch 2, *cluster, ch 1, sk 1, repeat from * around.
Round 12-16: ch 1, SC around.
Brim (optional)- Working in rows
Attach 2 strands of yarn with a sl st to the last round approximately 1/4 of the circumference away from the seam. Pull tight. You will be crocheting with both strands of yarn to make the hat brim.
Row 1: skip the stitch you connected your yarn to, sl st in next 2, SC in 2, HDC in 2, *2 HDC (HDC Inc.), HDC, repeat from * 7 more times, HDC, SC in 2, sl st in 2. (35) Turn
Row 2: do NOT ch, sk 1, sl st, SC in 2, HDC in 28, SC in 2, sl st in 2 (35) Turn.
Row 3: do NOT ch, sk 1, sl st, SC in next 32, sl st in next 2 (the second will be worked into a stitch in the last round of the hat (35).
Child
Beanie - Working in rounds
Start with a magic circle
Round 1: ch 2, work 10 DC into the magic circle. Pull tight. (10)
Round 2: ch 2, 2 DC in each st around (20)
Round 3: ch 2, *2 DC, DC, repeat from * around (30).
Round 4: ch 2, *cluster, ch 1, cluster, ch 1, sk 1, cluster, ch 1, sk 1, repeat from * around (36).
Round 5: ch 2, *cluster, ch 1, cluster, ch 1, sk 1, cluster, ch 1, sk 1, cluster, ch 1, sk 1, cluster, ch 1, sk 1, repeat from * around (40).
Round 6-10: ch 2, *cluster, ch 1, sk 1, repeat from * around.
Round 11-14: ch 1, SC around.
Brim (optional)- Working in rows
Attach 2 strands of yarn with a sl st to the last round approximately 1/4 of the circumference away from the seam. Pull tight. You will be crocheting with both strands of yarn to make the hat brim.
Row 1: skip the stitch you connected your yarn to, sl st in next 2, SC in 2, HDC in 2, *2 HDC (HDC Inc.), HDC, repeat from * 5 more times, HDC, SC in 2, sl st in 2. (29) Turn
Row 2: do NOT ch, sk 1, sl st, SC in 2, HDC in 22, SC in 2, sl st in 2 (29) Turn.
Row 3: do NOT ch, sk 1, sl st, SC in next 26, sl st in next 2 (the second will be worked into a stitch in the last round of the hat (29).
Tie off yarn and weave in ends.
More Free Crochet Patterns You'll Love


Find all FREE CROCHET PATTERNS here
Now the legal stuff...You may sell items made from this pattern, but please credit me as the original designer. Also, please do not share the written pattern in print or electronically. The photos on this webpage belong to Megan Meyer of Left in Knots and may not be used for product sales/product listings. You may share a link back to my blog if you would like someone else to see or work with this pattern. Thank you for your cooperation and if you have any questions please feel free to contact me!
This post contains affiliate links. I receive a small commission for any purchases made through these links at no additional charge to you.