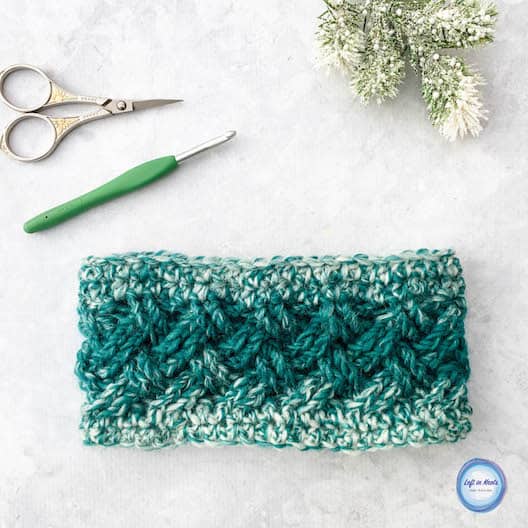
Crochet an easy ear warmer using one of three different crochet stitches for beginners. Embellish the ear warmer with a bow or flower and a button closure. Keep reading for the free crochet pattern.
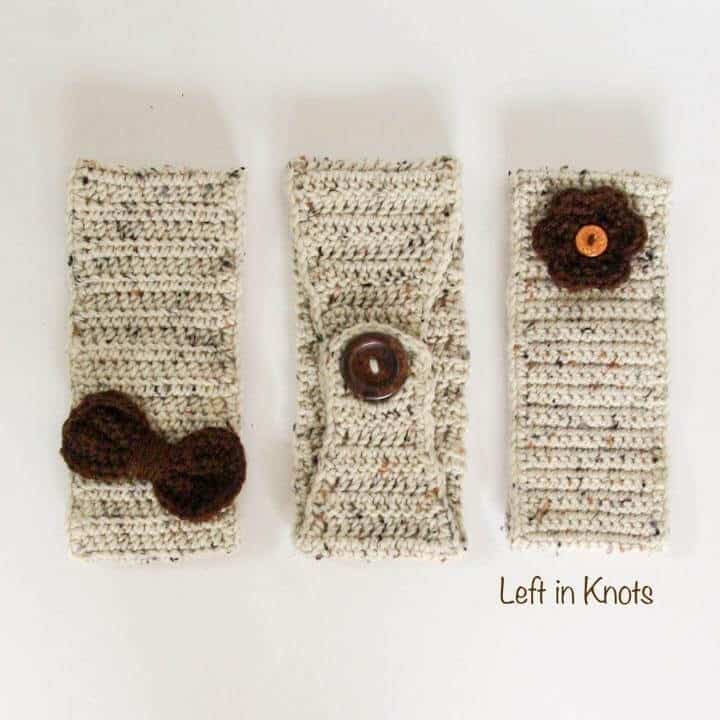
Today I have a fast, free, and customizable pattern for you. A crochet ear warmer 3-ways. I have this pattern written in single, half-double, and double crochet stitches. So YOU can pick whichever works best for you! This pattern is great for customizing and makes a great gift or craft sale item.
Crochet an Easy Ear Warmer
Have I ever mentioned that I teach crochet through my local Community Education? I've been doing it for about a year now, and this is one of the patterns that I use to teach crocheting in rows. It is a great pattern for teaching crochet or learning to crochet because it is basic, but still a lot of fun to make! This pattern and my Double Crochet Hat in 10 sizes are the two patterns that I have used to teach my classes, and I plan to add more Crochet Basics patterns soon. It is just so nice to have a basic "go-to" pattern for everything.
Show off Your Crochet Projects
Don’t forget to share pictures of your projects with me in my Facebook Group or by tagging @leftinknots on Instagram. I can’t wait to see what you make!
Supplies:
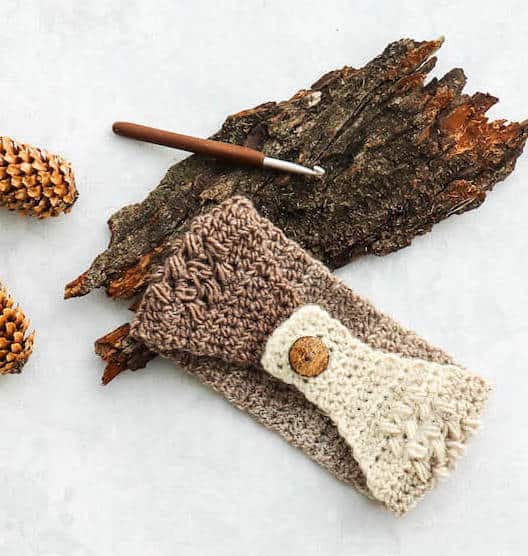
- Worsted weight yarn (I used Red Heart Super Saver in Aran Fleck and Coffee )
- I/5.5mm crochet hook (I used Clover Amour)
- 1” button
- 1/2” button (if making a flower embellishment)
- Yarn needle
- Scissors
Abbreviations:
- Ch: chain
- Sl st: slip stitch
- SC: single crochet
- SC2tog: single crochet two together
- HDC: half-double crochet
- HDC2tog: half-double crochet two together
- DC: double crochet
- DC2tog: double crochet two together
Gauge:
15 sts x 7 DC rows = 4" square
Special Notes:
- The chain stitches at the beginning of each row do not count as a stitch
- This pattern is written to fit an average adult. The size can easily be adjusted by adding or subtracting rows
Instructions
Single Crochet Ear Warmer
Ch 8
Row 1: SC in second ch from the hook and SC across (7)
Row 2: Ch 1, SC across (7)
Row 3: Ch 1, SC in first two sts, ch 3, skip 3 sts, SC in last two sts of the row. (7)
Row 4-8: Ch 1, SC across (7)
Row 9: Ch 1, 2 SC in first st, SC in next 5, 2 SC in last st (9)
Row 10: Ch 1, SC across (9)
Row 11: Ch 1, 2 SC in first st, SC in next 7, 2 SC in last st (11)
Row 12: Ch 1, SC across (11)
Row 13: Ch 1, 2 SC in first st, SC in next 9, 2 SC in last st (13)
Row 14-62: Ch 1, SC across (13)
Row 63: Ch 1, SC2tog, SC in 9, SC2tog (11)
Row 64: Ch 1, SC across (11)
Row 65: Ch 1, SC2tog, SC in 7, SC2tog (9)
Row 66: Ch 1, SC across (9)
Row 67: Ch 1, SC2tog, SC in 5, SC2tog (7)
Row 68-75: Ch 1, SC across (7)
At the end of row 75, ch 1 and SC around the edge of the ear warmer. Sew a button on the right side of the ear warmer between rows 68-75. Add embellishment if desired (scroll down for flower or bow pattern)
Half Double Crochet Ear Warmer
Ch 9
Row 1: HDC in third ch from the hook and HDC across (7)
Row 2: Ch 2, HDC across (7)
Row 3: Ch 2, HDC in 2, ch 3, skip 3 sts, HDC in last 2 sts (7)
Row 4-6: Ch 2, HDC across (7)
Row 7: Ch 2, 2 HDC in first st, HDC in next 5, 2 HDC in last st (9)
Row 8: Ch 2, HDC across (9)
Row 9: Ch 2, 2 HDC in first st, HDC in next 7, 2 HDC in last st (11)
Row 10: Ch 2, HDC across (11)
Row 11: Ch 2, 2 HDC in first st, HDC in next 9, 2 HDC in last st (13)
Row 12-38: Ch 2, HDC across (13)
Row 39: Ch 2, HDC2tog, HDC in 9, HDC2tog (11)
Row 40: Ch 2, HDC across (11)
Row 41: Ch 2, HDC2tog, HDC in 7, HDC2tog (9)
Row 42: Ch 2, HDC across (9)
Row 43: Ch 2, HDC2tog, HDC in 5, HDC2tog (7)
Row 44-48: Ch 2, HDC across (7)
At the end of row 48, ch 1 and SC around the edge of the ear warmer. Sew a button on the right side of the ear warmer between rows 44-48. Add embellishment if desired (scroll down for flower or bow pattern)
Double Crochet Ear Warmer
Ch 9
Row 1: DC in third ch from the hook and DC across (7)
Row 2: Ch 2, DC in 2, ch 3, skip 3 sts, DC in last 2 sts (7)
Row 3-4: Ch 2, DC across (7)
Row 5: Ch 2, 2 DC in first st, DC in next 5, 2 DC in last st (9)
Row 6: Ch 2, DC across (9)
Row 7: Ch 2, 2 DC in first st, DC in next 7, 2 DC in last st (11)
Row 8: Ch 2, DC across (11)
Row 9: Ch 2, 2 DC in first st, DC in next 9, 2 DC in last st (13)
Row 10-30: Ch 2, DC across (13)
Row 31: Ch 2, DC2tog, DC in 9, DC2tog (11)
Row 32: Ch 2, DC across (11)
Row 33: Ch 2, DC2tog, DC in 7, DC2tog (9)
Row 34: Ch 2, DC across (9)
Row 35: Ch 2, DC2tog, DC in 5, DC2tog (7)
Row 36-39: Ch 2, DC across (7)
At the end of row 39, ch 1 and SC around the edge of the ear warmer. Sew a button on the right side of the ear warmer between rows 36-39. Add embellishment if desired (scroll down for flower or bow pattern)
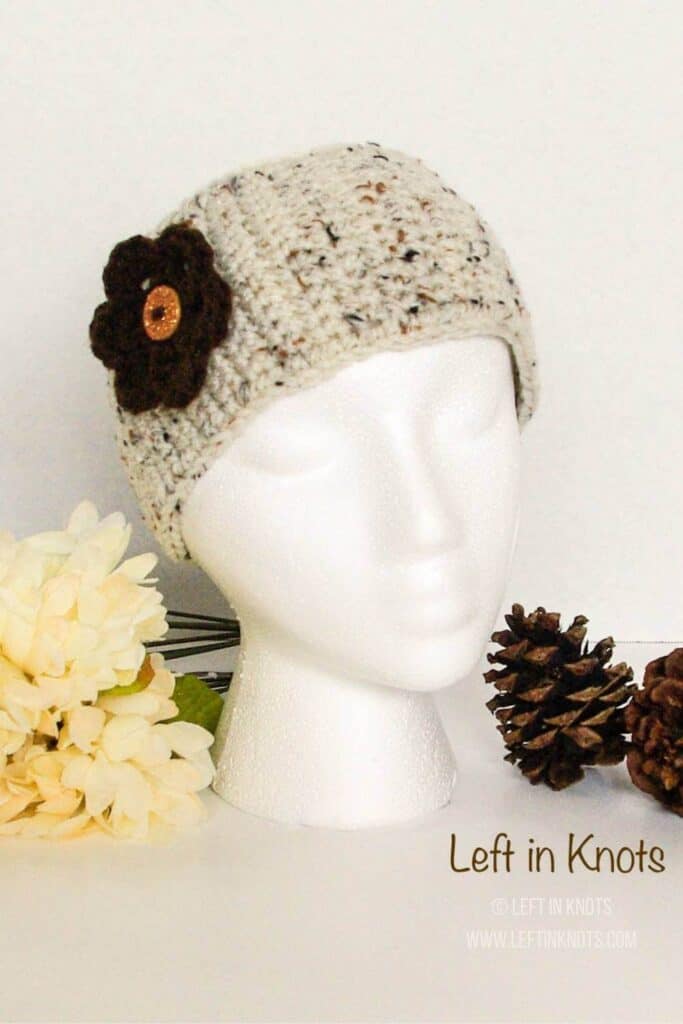
Flower Embellishment
Start with magic circle
Round 1: Ch 1 and work 12 SC into the magic circle. Pull tight and join with a sl st to the first SC
Round 2: Ch 1, *SC, ch 3, SC in next stitch. Repeat from * around. You should have 6 ch 3 spaces. Join with sl st to first SC
Round 3: Ch 1, *SC, HDC, DC, HDC, SC in each ch 3 space. Repeat from * around. Attach with sl st to first SC. Fasten off and weave in ends. Attach to headband in desired location by sewing a button over the center of the flower.
Bow Embellishment
Ch 14
Row 1: HDC in second ch from the hook, HDC in 5, ch 1, skip 1, HDC in 6. (12)
Row 2-5: Ch 2, HDC in 6, ch 1, skip 1, HDC in 6 (12)
At the end of row 5, ch 1 and SC around the outer edges of the bow. Fasten off and weave in ends. Cinch the middle the bow (the ch stitches) with your fingers and wrap yarn around the center. Tie the yarn leaving a long tail. Use the tail to sew the bow to your ear warmer in desired location.
More Free Crochet Patterns You'll Love
Find all FREE CROCHET PATTERNS here
Now the legal stuff...You may sell items made from this pattern, but please credit me as the original designer. Also, please do not share the written pattern in print or electronically. The photos on this webpage belong to Megan Meyer of Left in Knots and may not be used for product sales/product listings. You may share a link back to my blog if you would like someone else to see or work with this pattern. Thank you for your cooperation and if you have any questions please feel free to contact me!
This post contains affiliate links. Thank you for supporting free patterns and yarn deals from Left in Knots!