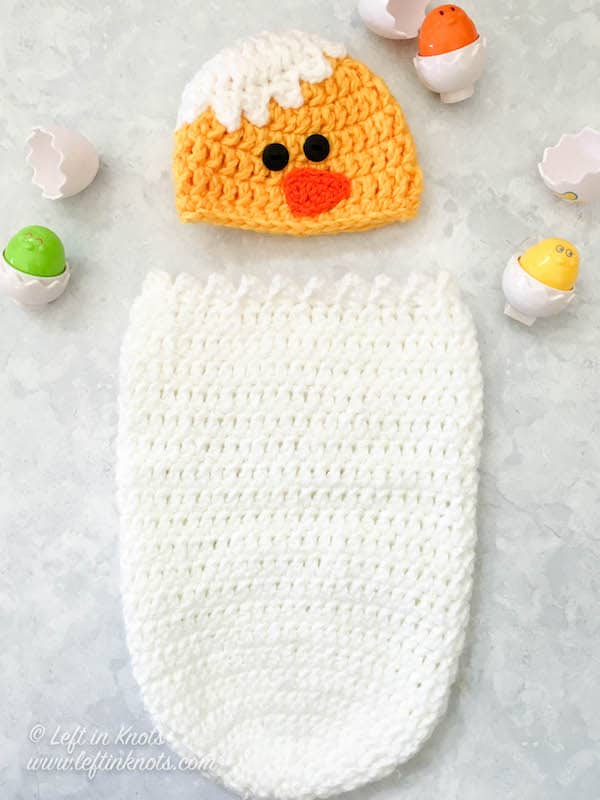
Make this crochet baby chick cocoon set for a springtime newborn photo prop. This free crochet pattern uses bulky yarn and is quick to make. Keep reading for the free crochet pattern.
Crochet Cocoon Make the Best Newborn Photo Props!
When my daughter was due in December, I made her a Snowman Cocoon and Hat set from a pattern by Repeat Crafter Me (see a photo of her in it here). When I found out I was having another baby, but this time due in spring, I knew I would have to design another cocoon for him! Inspired by one of my daughter's Easter toys from last year, I decided to go with a baby chick hatching out of an egg. It's gender neutral, totally adorable and screams "spring" to me.
I used Loops and Threads Charisma for this pattern and it worked up so quickly! Any bulky (category 5) yarn should work for this pattern if you can't get your hands on the Charisma. Just make sure to check your gauge if you substitute! I also recommend 100% acrylic yarn so that there is no concern of wool irritation (plus easy washing!). Do you have a new baby coming into your life who needs this for newborn pictures?
Show off Your Crochet Projects
Don’t forget to share pictures of your projects with me in my Facebook Group or by tagging @leftinknots on Instagram. I can’t wait to see what you make!
Baby Chick Cocoon and Newborn Hat - Free Pattern
Supplies:
- Loops and Threads Charisma in ‘White’ (2 skeins or 136 yards of a compareble Category 5 yarn), Loops and Threads Charisma in ‘Yellow’ (or 40 yards of a comparable Category 5 yarn), small amount of orange worsted weight yarn for the beak.
- H/5.0mm crochet hook and I/5.5mm crochet hook
- Scissors
- Yarn needle
- 2- black 3/4” buttons
Abbreviations (written in U.S. terms):
- st/sts: stitch/stitches
- sl st: slip stitch
- ch: chain
- SC: single crochet
- HDC: half double crochet
- DC: double crochet
- DC2Tog: double crochet two together
Gauge
11 sts x 6 rows = 4” square in DC
Finished Size:
- Hat: Length = 5"
- Hat: Width = 6.5"
- Cocoon: Length = 14"
- Cocoon: Width = 9.25"
Pattern Notes
- This project is recommended as a photo prop only. This is not in any way suggested for infant sleep. If you want to make the hat safe for the baby to wear unsupervised please crochet they eyes instead of using buttons.
- chain stitches at the beginning of rows or rounds do not count as a stitch
- when working in rounds, the last st of each round is attached to the first st of the round with a sl st.
- 5.5mm crochet hook is used when working with the bulky yarn; 5.0mm hook is used when making the beak
Instructions
Cocoon
Start by making a magic circle
Round 1: ch 2, 10 DC in magic circle (10)
Round 2: ch 2, 2 DC in each st around (20)
Round 3: ch 2, *2 DC, DC in next st, repeat from * around (30)
Round 4: ch 2, *2 DC, DC in next two sts, repeat from * around (40)
Round 5: ch 2, *2 DC, DC in next three sts, repeat from * around (50)
Round 6-20: ch 2, DC in each st around (50)
Round 21: ch 2, *DC2Tog, DC in next 3 sts, repeat from * around (40)
Round 22: ch 3, SC in second ch from the hook, HDC in the next ch, sl st into the second st of the round, *sl st into the next st, ch 3, SC in second ch from the hook, HDC in next ch st, sl st into the next st of the round, repeat from * around (20 points). Attach to the beginning of the round with a sl st. Tie off yarn and weave in ends.
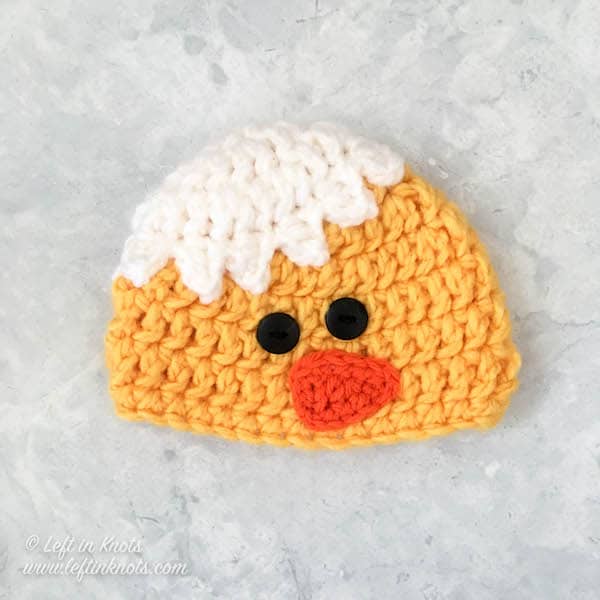
Hat
Start by making a magic circle
Round 1: ch 2, 8 DC in magic circle (8)
Round 2: ch 2, 2 DC in each st around (16)
Round 3: ch 2, *2 DC, DC in next st, repeat from * around (24)
Round 4: ch 2, *2 DC, DC in next two sts, repeat from * around (32)
Round 5-7: ch 2, DC in each st around (32)
Round 8: ch 1, SC in each st around (32) Attach to the beginning of the round with a sl st. Tie off yarn and weave in ends.
Top Eggshell
Start by making a magic circle
Round 1: ch 2, 8 DC in magic circle (8)
Round 2: ch 2, 2 DC in each st around (16)
Round 3: ch 2, *2 DC, DC in next st, repeat from * around (24)
Round 4: ch 3, SC in second ch from the hook, HDC in the next ch, sl st into the second st of the round, *sl st into the next st, ch 3, SC in second ch from the hook, HDC in next ch st, sl st into the next st of the round, repeat from * around (12 points). Attach to the beginning of the round with a sl st. Tie off yarn and leave a long tail (24”) for sewing
Beak (use 5.0mm crochet hook)
ch 5
sl st into 2nd ch from the hook, SC in next st, HDC in next st, DC in next st.
ch 1 and SC around the entire edge of the beak. Tie off yarn and leave a long (12”) tail for sewing.
Assembly
Place the Top Eggshell in your desired location on top of the hat. Secure in place with pins or stitch markers if desired. Using the long length of yarn attached to the Top Eggshell and a yarn needle, sew the eggshell to the top of the hat. Tie off yarn and weave in all ends.
Place your button eyes in desired location. Using a yarn needle and a small length of black yarn, sew your eyes in place (you may also use a regular needle and thread if your button holes are small)
Place your beak in desired location. Secure in place with pins or stitch markers if desired. Using the long length of yarn attached to the beak and a yarn needle, sew the beak to the top of the hat. Tie off yarn and weave in all ends.
More Free Crochet Patterns You'll Love
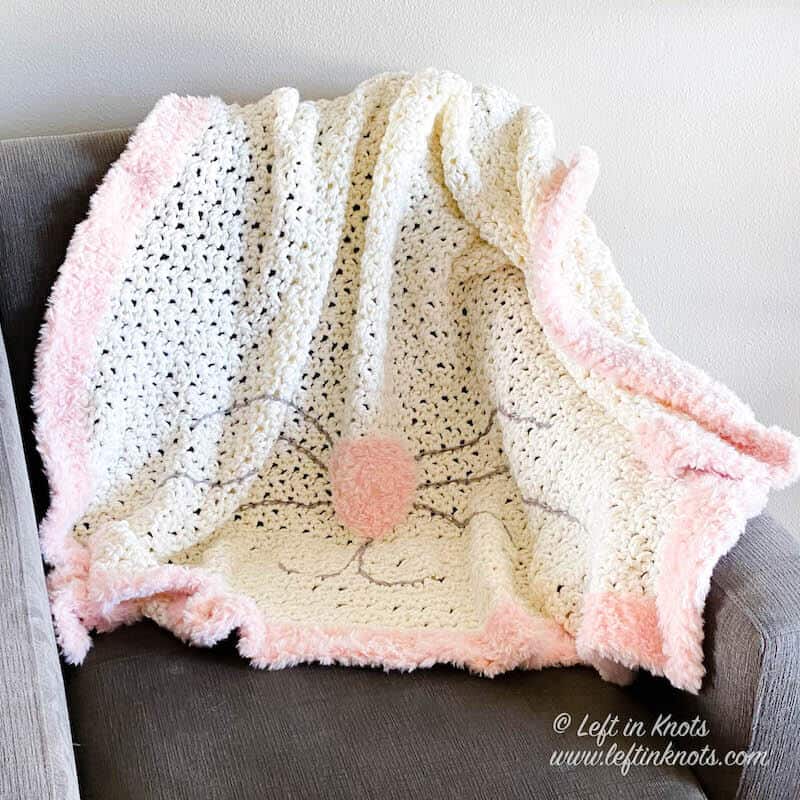
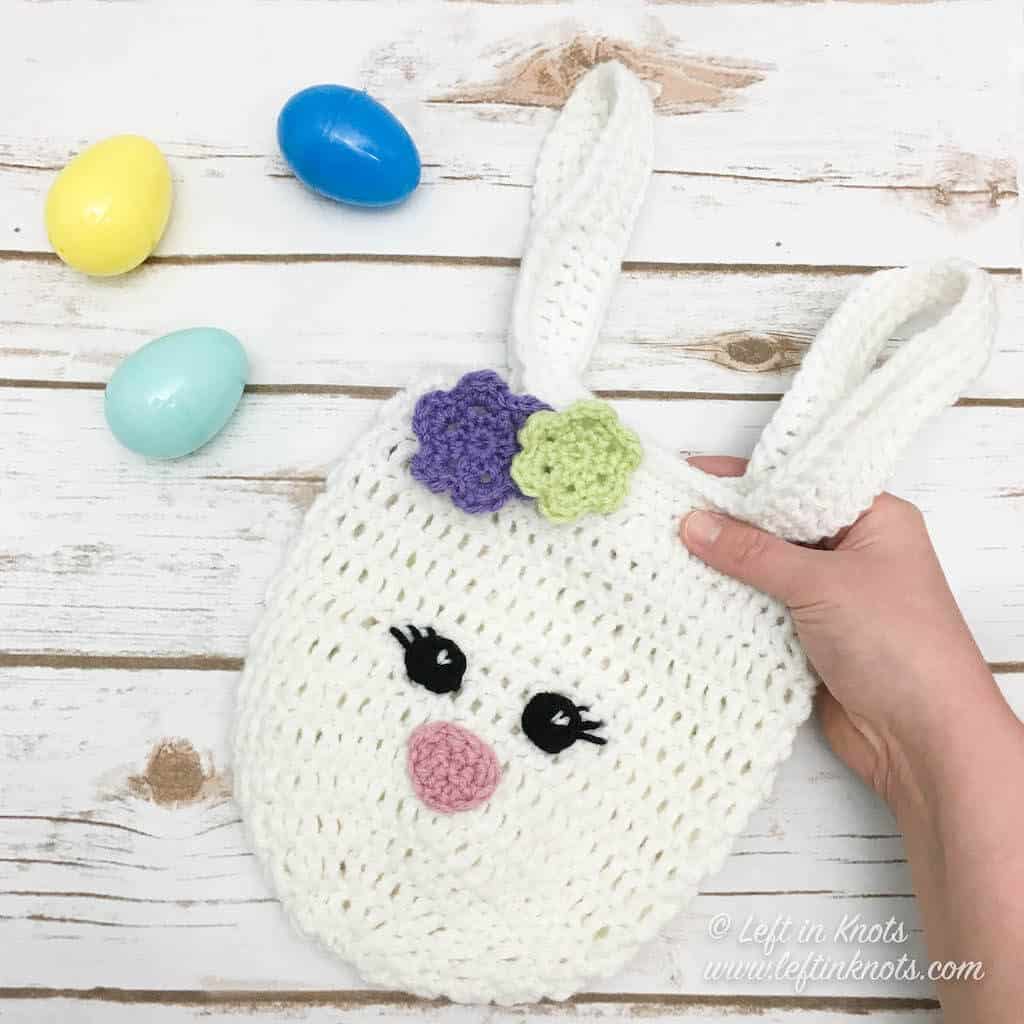
Find all FREE CROCHET PATTERNS here
Now the legal stuff...You may sell items made from this pattern, but please credit me as the original designer. Also, please do not share the written pattern in print or electronically. The photos on this webpage belong to Megan Meyer of Left in Knots and may not be used for product sales/product listings. You may share a link back to my blog if you would like someone else to see or work with this pattern. Thank you for your cooperation and if you have any questions please feel free to contact me!
This post contains affiliate links. I receive a small commission for any purchases made through these links at no additional charge to you.