This colorful crochet gingham hand towel is a perfect way to update your decor for spring and summer! Plus they are the perfect complement to my Spring Gingham Dishcloths that I designed a few weeks ago. I made this hand towel in pink, but really you can make it in any color combo you want using basic worsted weight cotton yarn. I even have a right AND left handed video tutorial to help you learn how to change colors seamlessly and carry your colors throughout the project. Keep reading for the free crochet pattern for the Spring Gingham Hand Towel.
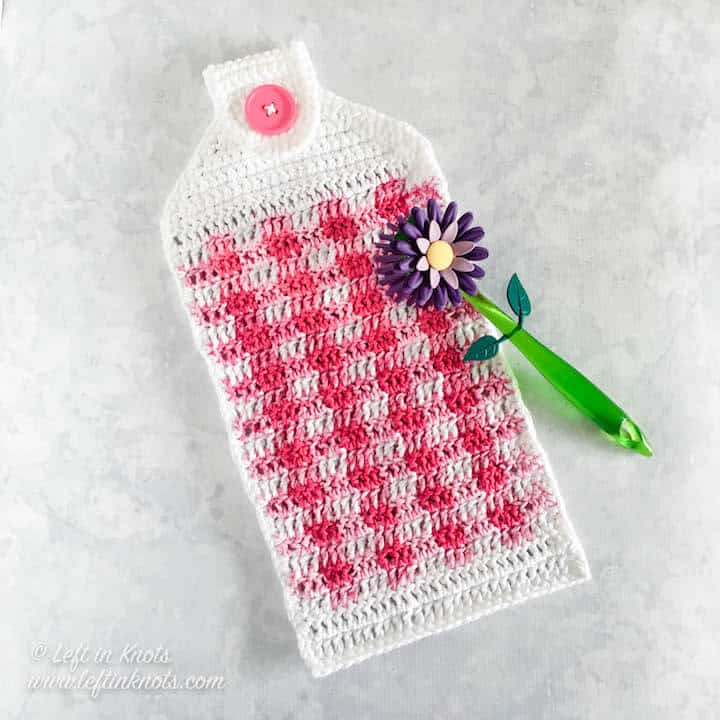
Crochet a Gingham Hand Towel and Matching Dishcloths
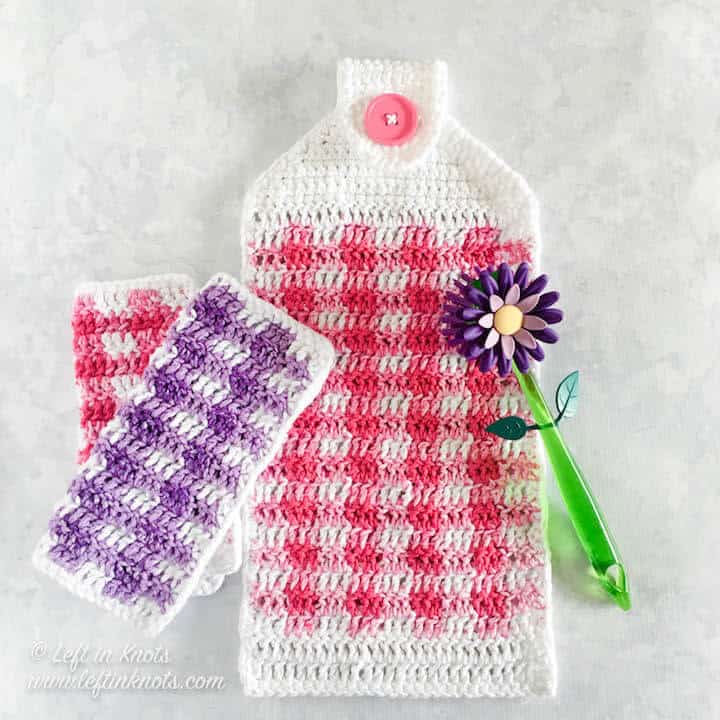
I loved the way that my Spring Gingham Dishcloths turned out so much, and honestly I love this hand towel even more! I think I will probably end up making myself two more in purple and green to match the dishcloths, but I wanted to get the pattern up on the blog so that you could make them as well. I think they would be great sellers at summer craft fairs, and I also think the set would be a beautiful DIY mother's day gift.
Show off Your Crochet Projects
Don’t forget to share pictures of your projects with me in my Facebook Group or by tagging @leftinknots on Instagram. I can’t wait to see what you make!
Spring Gingham Hand Towel - Free Crochet Pattern
Supplies:
- Premier Home Cotton Yarn (colors pictured are Fuchsia and Flamingo Splash) and Lily Sugar n Cream (White). Approx. 135 yards of worsted weight cotton or cotton blend yarn are needed *total* per hand towel.
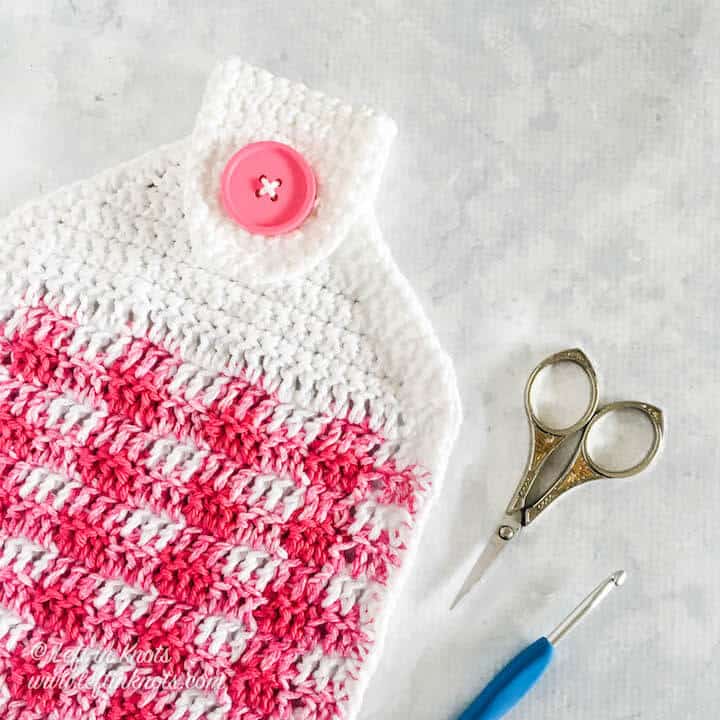
- One 1 1/2” button
- I/5.0mm crochet hook - I use Clover Amour
- Scissors - I always keep these travel scissors in my hook case
- Yarn needle
Abbreviations (written in U.S. terms):
- ch: chain
- sl st: slip stitch
- SC: single crochet
- SC2Tog: single crochet two together
- DC: double crochet
Helpful Video Tutorials
How to Crochet the Gingham Stitch (find the left handed video here)
Gauge
7 sts x 3 rows = 2" square in DC
Finished Size:
- Length (with button closure closed) = 17"
- Width = 8.5"
Pattern Notes
- ch stitches at the beginning of rows/rounds do not count as a stitch
- Yarn should be carried across each row. I carried Color B throughout the entire piece.
- If you want your button closure loop to be larger/longer, add rows of SC between Rows 33-44.
Matching Patterns
Instructions
Color A: White
Color B: Flamingo Splash
Color C: Fuchsia
Starting with ‘Color A’ ch 29
Row 1: (Color A) DC in the 3rd ch from the hook and DC across (27). Turn
Row 2: (Color A) ch 2, DC in each stitch across (27). Turn.
Row 3: (Color A) DC in the first 3 sts, *(Color B) change colors and DC into the next 3 ch sts, (Color A) change colors and DC into the next 3 ch sts, repeat from * across (27) Turn, carrying Color B to the next row.
Row 4: (Color B) ch 2, DC in next 3 sts, *(Color C) change colors and DC into the next 3 sts, (Color B) change colors and DC into the next 3 sts, repeat from * across (27). Turn, carrying Color B to the next row.
Row 5-21: repeat Row 3 (on odd rows) and Row 4 (on even rows).
**From this point on, the rest of the pattern will use ‘Color A’
Row 22: ch 2, DC in each st across (27). Turn.
Row 23: ch 1, SC in each st across (27). Turn.
Row 24: ch 1, SC2Tog, SC in next 23 sts, SC2Tog (25). Turn.
Row 25: ch 1, SC2Tog, SC in next 21 sts, SC2Tog (23). Turn.
Row 26: ch 1, SC2Tog, SC in next 19 sts, SC2Tog (21). Turn.
Row 27: ch 1, SC2Tog, SC in next 17 sts, SC2Tog (19). Turn.
Row 28: ch 1, SC2Tog, SC in next 15 sts, SC2Tog (17). Turn.
Row 29: ch 1, SC2Tog, SC in next 13 sts, SC2Tog (15). Turn.
Row 30: ch 1, SC2Tog, SC in next 11 sts, SC2Tog (13). Turn.
Row 31: ch 1, SC2Tog, SC in next 9 sts, SC2Tog (11). Turn.
Row 32: ch 1, SC2Tog, SC in next 7 sts, SC2Tog (9). Turn.
Row 33-44: ch 1, SC in each st across (9). Turn.
Row 45: ch 1, SC in 2 sts, ch 5, skip 5, SC in last 2 sts (9). Turn.
Row 46: ch 1, SC in each st across (9). Turn
Row 47: ch 1, SC2Tog, SC in 5 sts, SC2Tog (7). Turn.
Row 48: ch 1, SC2Tog, SC in 3 sts, SC2Tog (5). Turn.
Row 49: ch 1, SC2Tog, SC, SC2Tog (3).
Border: ch 1, SC evenly around the edge of the hand towel. Ch 2 at each corner before starting the next edge. Sl st to the first st of the round when you reach the point where you started
More Free Crochet Patterns You'll Love

Find all FREE CROCHET PATTERNS here
Now the legal stuff...You may sell items made from this pattern, but please credit me as the original designer. Also, please do not share the written pattern in print or electronically. The photos on this webpage belong to Megan Meyer of Left in Knots and may not be used for product sales/product listings. You may share a link back to my blog if you would like someone else to see or work with this pattern. Thank you for your cooperation and if you have any questions please feel free to contact me!
This post contains affiliate links. I receive a small commission for any purchases made through these links at no additional charge to you.