This crochet Car Seat Canopy can be made with any of my Grids for Kids Pixel Charts like this cute little C2C Owl. The assembly of this project is just like a C2C blanket, and if you need help with the stitch I have a whole video to teach you.
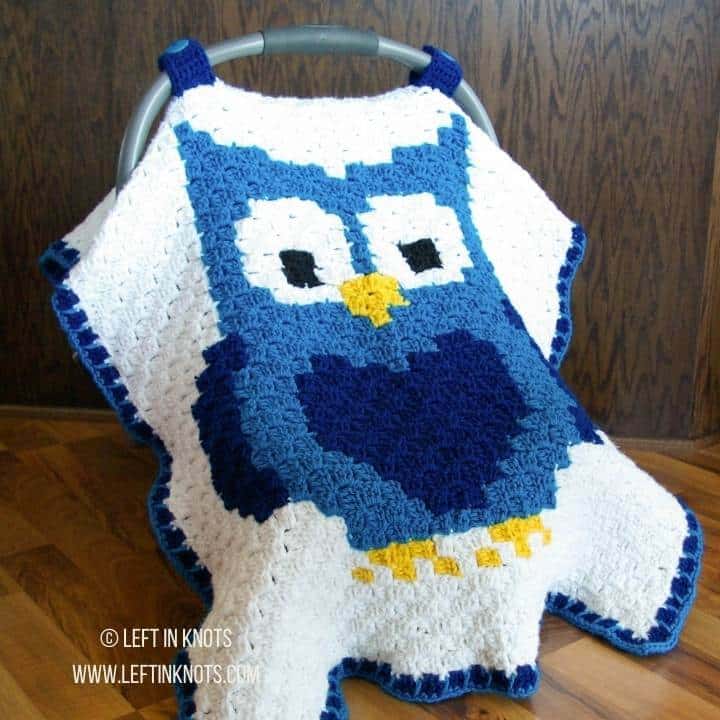
So let's talk about Car Seat Canopies for a moment. I used one All. The. Time. when my daughter was still an infant! Not only does it help keep wind and cold away from new baby, but it also acts as a cover while you are out shopping. When I had an infant I was aware of every cough and every sneeze and I'll be honest, while she was still a tiny baby, I didn't want strangers putting their face in her face let alone touch her! Maybe I was over protective, but regardless, it is nice to have a way to give your little one some privacy when you are out and about and in a pinch it can also double as a diaper changing mat (not that that ever happened...)
***PLEASE NOTE: I have heard some concerns about baby overheating. By no means do I recommend using this in hot weather or long term! This type of cover is meant for transport outside in cool weather or flipped up so that it just covers the backside of the carseat for some privacy. It should not cover the baby's face and not be used as a blanket.***
I think this would make an awesome and unique baby gift too if you have a summer baby shower coming up! I have given plenty of baby blankets - so I'm not knocking those as a gift idea at all - but I received a LOT of them as a first time mom. So if you think you need something a little bit different, a Car Seat Canopy would be a great way to make a personalized gift for a new mom.
Show off Your Crochet Projects
Don’t forget to share pictures of your projects with me in my Facebook Group or by tagging @leftinknots on Instagram. I can’t wait to see what you make!
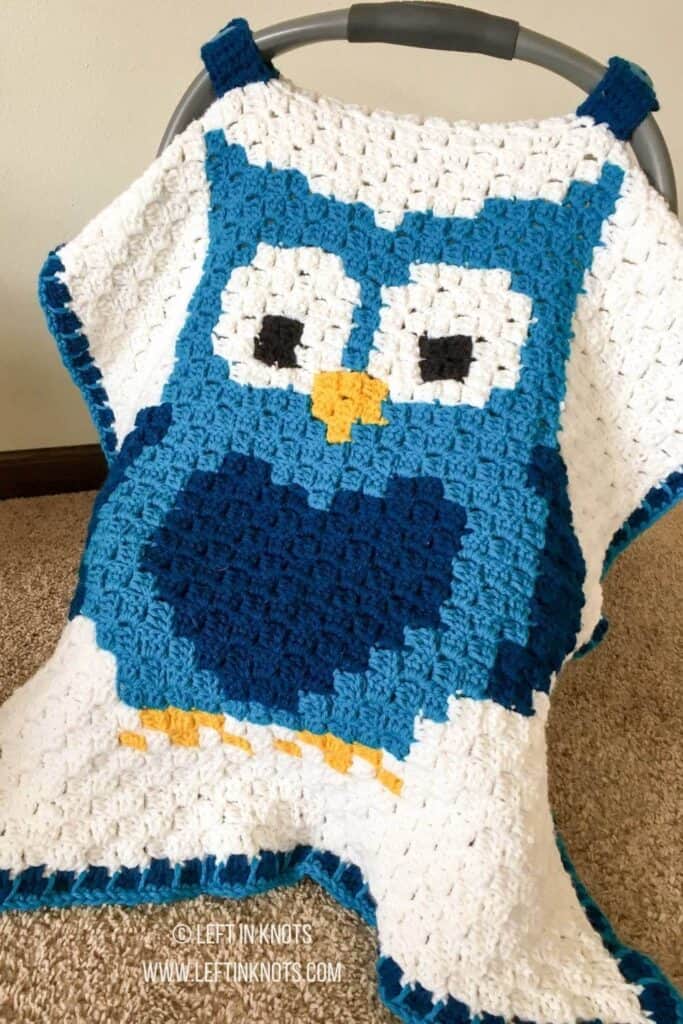
Owl Car Seat Canopy - Free Crochet Pattern
Supplies:
- Red Heart With Love (or any worsted weight yarn) - I used 'Blue Hawaii', 'Peacock' 'Black' and 'White'. To be honest, the yellow was an unidentified scrap from my yarn leftovers!
- I/5.5mm crochet hook (I used Clover Amour)
- Yarn Needle
- Scissors (I always keep these travel scissors in my hook case)
- 2- 1" buttons
Abbreviations:
- Ch: Chain
- sl st: Slip stitch
- SC: single crochet
- DC: double crochet
- SC spike: single crochet spike stitch
Special Stitches
- SC Spike: work a SC stitch like usual, except you will insert your hook one row below the space you would normally work into.
Helpful Video Tutorials:
Complete C2C Crochet Tutorial (find the left handed video here)
Gauge
5 square x 5 squares = 4" in C2C (using DC)
Finished Size:
Length: approx. 50"
Width: approx. 26"
Pattern Notes:
- You can choose to work with multiple skeins/bobbins (as I have pictured) or you can opt to "carry" your yarn throughout your project. It is a personal preference and I demonstrate both methods in my video tutorials.
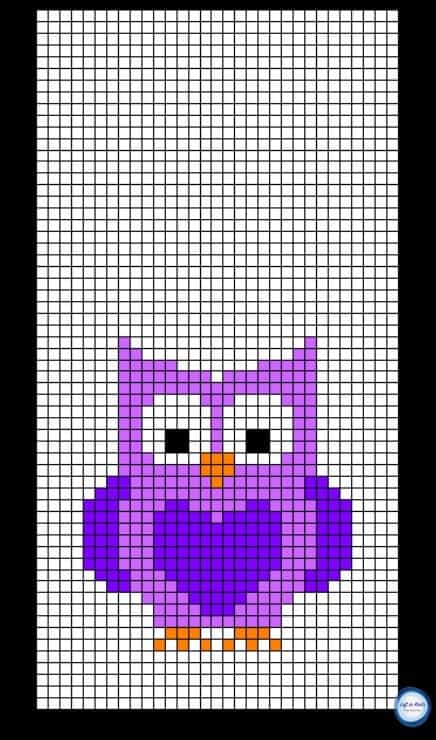
- For this pattern I have only included the chart for the C2C portion and written instructions for the border and straps for attaching to the car seat.
- The pixel chart is 31 squares wide x 60 squares long. You could substitute any of my other Grids for Kids pixel charts in place of the owl as well since they are all sized to this proportion 🙂
Instructions
Use the C2C stitch to create the following:
After completing the C2C portion you can start the border:
Round 1 (white): SC in the space between two of your C2C squares (it doesn't really matter where you start), ch 2, SC in the space between the next two squares, ch 2, repeat from * until you reach a corner. (SC, ch 2, SC) in the corner, ch 2, SC in the space between the next two squares, ch 2, repeat from * to the next corner. Continue this around the blanket. When you reach your first SC, attach with a sl st and tie off your yarn.
Round 2 (Peacock): Attach your yarn in one of the ch 2 spaces from the previous round (again, it doesn't really matter where), ch 2 and work 3 DC into the ch 2 space, continue to work 3 DC into each ch 2 space around. (DC, ch 2, DC) when you get to each corner. When you reach your first DC, attach with a sl st and tie off your yarn.
Round 3 (Blue Hawaii): Attach your yarn in a corner, (SC, ch 2, SC) in the corner, SC in next 5, *SC spike, skip 1, SC in next two sts, repeat from * across, SC in the last 5 sts of that side, (SC, ch 2, SC) to turn the corner, repeat the same instructions for the remaining sides.
Making the Straps (make 2):
ch 6
Row 1: SC in the second ch from the hook and SC across (5) turn
Row 2: ch 1, SC across (5). Turn
Row 3: ch 1, SC, ch 3, skip 3, SC (5). Turn
Row 4-20: ch 1, SC across (5). Turn
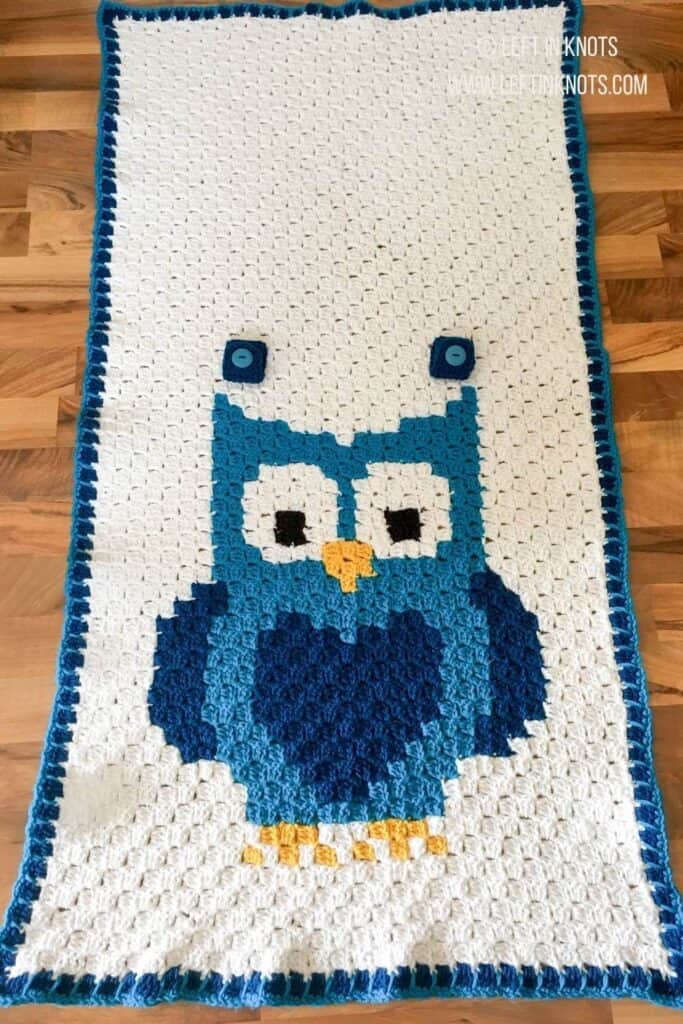
At the end of Row 20, do not turn. Instead, ch 1 and SC around the outside of the strap. Sew your button onto the strap at approx. row 17. Use a yarn needle to sew the straps to the car seat canopy. I attached mine approx. 34 squares ("rows") up from the bottom and about 9 squares ("columns") in from each side.
If you haven't already, weave in all your ends and you have yourself an extremely adorable and highly functional baby gift! Which pixel chart will you use to make your car seat canopy?!
More Free Crochet Patterns You'll Love
Find all FREE CROCHET PATTERNS here
Now the legal stuff...You may sell items made from this pattern, but please credit me as the original designer. Also, please do not share the written pattern in print or electronically. The photos on this webpage belong to Megan Meyer of Left in Knots and may not be used for product sales/product listings. You may share a link back to my blog if you would like someone else to see or work with this pattern. Thank you for your cooperation and if you have any questions please feel free to contact me!
This post contains affiliate links. Thank you for supporting free patterns and yarn deals from Left in Knots!