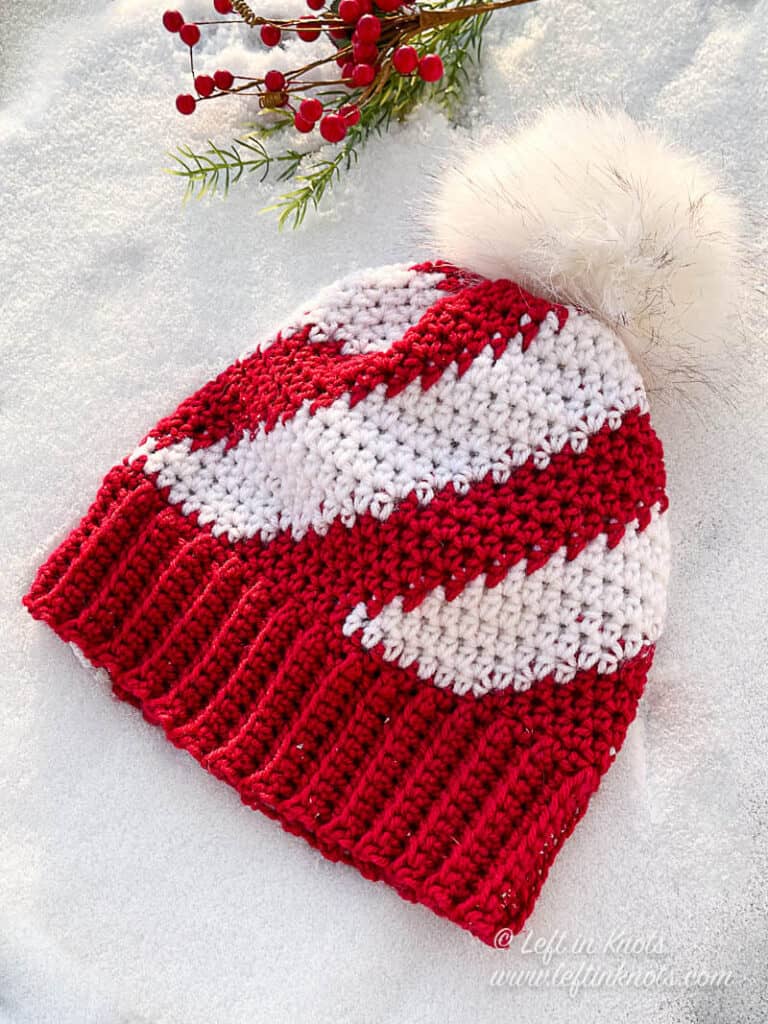
Crochet the Sweet Swirl Beanie in red and white to rock your peppermint vibes! You can also get creative with your color combination and use neutrals to make a warm and chic winter hat. Keep reading for the free crochet pattern.
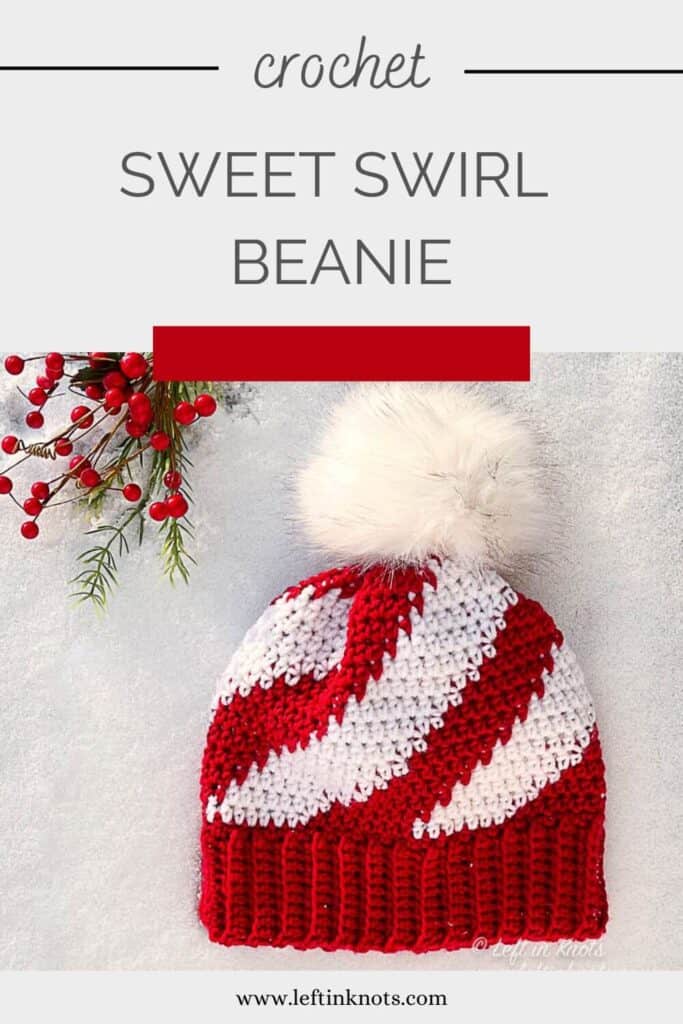
Crochet a Swirl Beanie for Peppermint Vibes
Whether you are headed to an office party or just plain feeling festive - the Sweet Swirl Beanie will give you all the peppermint candy cane feels! This would make a nice complement to wear to a Christmas sweater party or when you take the kids to Santa's Village.

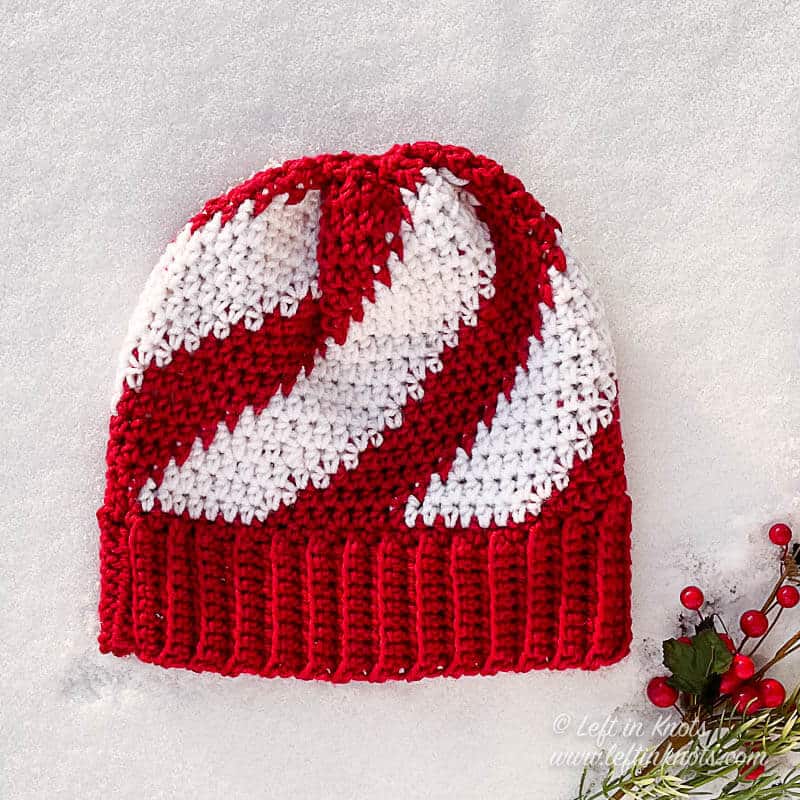
Crochet Your Swirl Beanie with Neutral Colors Instead
Not feeling festive? You don't have to to enjoy this swirl beanie crochet pattern! It would look beautiful in neutrals or other fun color combinations. Sports team colors would also be perfect! It's a great project for using up small amount of yarn and you can definitely shop your stash to make this hat.
Make a Beanie with a Swirl Using Tapestry Crochet
So you're ready to make a Sweet Swirl Beanie? Time to brush up on your tapestry crochet skills! No worries though, this is super simple to make and I have a video tutorial that will show you how to carry your yarn.
Show off Your Crochet Projects
Don’t forget to share pictures of your projects with me in my Facebook Group or by tagging @leftinknots on Instagram. I can’t wait to see what you make!
Sweet Swirl Beanie - Free Crochet Pattern
Supplies:
- Approx. 90 yards of red worsted weight yarn and 70 yards of white worsted weight yarn
- I/5.5mm crochet hook - I love Clover Amour
- Scissors - I always keep these travel scissors in my hook case
- Yarn needle
- (optional) - faux fur pom pom or pom pom maker
Abbreviations (written in U.S. terms):
- ch: chain
- sl st: slip stitch
- sk: skip
- BLO: back loop only
- SC: single crochet
- SC2Tog: single crochet two together
- HDC: half double crochet
- HDC2Tog: half double crochet two together
- (A): color A
- (B): color B
Related Video Tutorials:
How to Crochet the Gingham Stitch (this will show you how to carry yarn in your project)
Gauge:
13 sts x 9 rows = 4” square in HDC
Finished Size:
Height = 9.5"
Width = 9.5"
Pattern Notes:
- The chain stitches at the beginning of each row/round do not count as a stitch.
- The end of each round is attached to the first st of the round with a sl st.
- You can carry your yarn or use bobbins to change colors. I carried color A and used bobbins for color B.
- In the sample, Color A is red and Color B is white
Instructions
Bottom Ribbing - Working in rows
ch 11 (A)
Row 1: SC in the second ch from the hook and SC across (10). Turn
Row 2-60: ch 1, working in BLO, SC across. Turn.
When you finish the ribbed band, fold it so that Row 1 and 60 are on top of one another. Working through the back loop of Row 60 and the front loop of Row 1, seam the two rows together by slip stitching across. Do not cut your yarn. Continue on to work in rounds along the “raw” edge of ribbed band.
Top of Beanie
Round 1 (A): ch 1, SC around the top of the band working one stitch per row (60). Attach to first SC of the round with a sl st.
Round 2: (A) ch 2, HDC, *(B) HDC in 8 sts, (A) HDC in 7 stitches, repeat from * 2 more times, (B) HDC in 8 sts, (A) HDC in 6 sts.
Round 3: (A) ch 2, HDC in 3 sts, *(B) HDC in 8 sts, (A) HDC in 7 stitches, repeat from * 2 more times, (B) HDC in 8 sts, (A) HDC in 4 sts.
Round 4: (A) ch 2, HDC in 5 sts, *(B) HDC in 8 sts, (A) HDC in 7 stitches, repeat from * 2 more times, (B) HDC in 8 sts, (A) HDC in 1 st.
Round 5: *(A) ch 2, HDC in 7 sts, (B) HDC in 8 sts, repeat from * 3 more times
Round 6: (B) ch 2, HDC in 2 sts, *(A) HDC in 7 sts, (B) HDC in 8 stitches, repeat from * 2 more times, (A) HDC in 7 sts, (B) HDC in 6 sts.
Round 7: (B) ch 2, HDC in 4 sts, *(A) HDC in 7 sts, (B) HDC in 8 stitches, repeat from * 2 more times, (A) HDC in 7 sts, (B) HDC in 4 sts.
Round 8: (B) ch 2, HDC in 6 sts, *(A) HDC in 7 sts, (B) HDC in 8 stitches, repeat from * 2 more times, (A) HDC in 7 sts, (B) HDC in 2 sts.
Round 9: *(B) ch 2, HDC in 8 sts, (A) HDC in 7 sts, repeat from * 3 more times
Round 10: (A) ch 2, HDC in 2 sts, *(B) HDC in 8 sts, (A) HDC in 7 stitches, repeat from * 2 more times, (B) HDC in 8 sts, (A) HDC in 5 sts.
Round 11: (A) ch 2, HDC in 4 sts, *(B) HDC in 8 sts, (A) HDC in 7 stitches, repeat from * 2 more times, (B) HDC in 8 sts, (A) HDC in 3 sts.
Round 12: (A) ch 2, HDC in 6 sts, *(B) HDC in 8 sts, (A) HDC in 7 stitches, repeat from * 2 more times, (B) HDC in 8 sts, (A) HDC in last st.
Round 13: (B) ch 2, HDC in 1 sts, *(A) HDC in 7 sts, (B) HDC in 8 stitches, repeat from * 2 more times, (A) HDC in 7 sts, (B) HDC in 7 sts.
Round 14: (B) ch 2, HDC in 3 sts, *(A) HDC in 7 sts, (B) HDC in 8 stitches, repeat from * 2 more times, (A) HDC in 7 sts, (B) HDC in 5 sts.
Round 15: (B) ch 2, HDC in 5 sts, *(A) HDC in 7 sts, (B) HDC in 8 stitches, repeat from * 2 more times, (A) HDC in 7 sts, (B) HDC in 3 sts.
Round 16: (B) ch 2, HDC in 7 sts, *(A) HDC in 7 sts, (B) HDC in 8 stitches, repeat from * 2 more times, (A) HDC in 7 sts, (B) HDC in last st.
Round 17: (A) ch 2, *HDC2Tog, HDC, repeat from * around (40)
Round 18: (A) ch 1, SC2Tog around (20)
Tie off leaving a long (approx. 12”) tail of yarn. Using a yarn needle, weave the yarn back and forth through the stitches of Round 18. Pull tight to cinch the top of the hat closed. Make and attach a pom pom if desired. Weave in all ends
More Free Crochet Patterns You'll Love
Find all FREE CROCHET PATTERNS here
Now the legal stuff...You may sell items made from this pattern, but please credit me as the original designer. Also, please do not share the written pattern in print or electronically. The photos on this webpage belong to Megan Meyer of Left in Knots and may not be used for product sales/product listings. You may share a link back to my blog if you would like someone else to see or work with this pattern. Thank you for your cooperation and if you have any questions please feel free to contact me!
This post contains affiliate links. I receive a small commission for any purchases made through these links at no additional charge to you.