This easy crochet pattern uses worsted weight yarn, along with Red Heart Boutique Sassy Fabric or Sassy Lace to make an easy, adjustable, and adorable diaper cover that would be great as a shower gift or photo prop for any baby girl. Keep reading for the free crochet pattern.
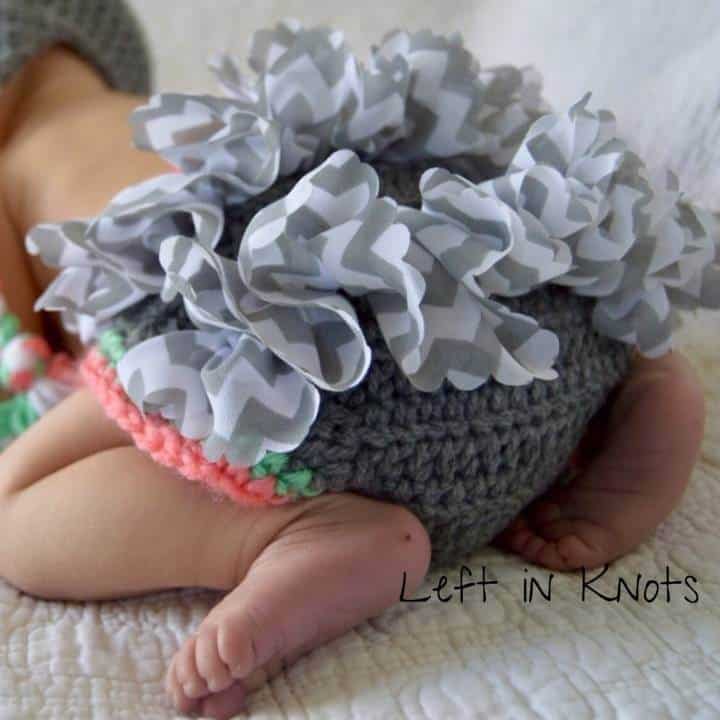
Ruffle Diaper Cover Without Ruffles?
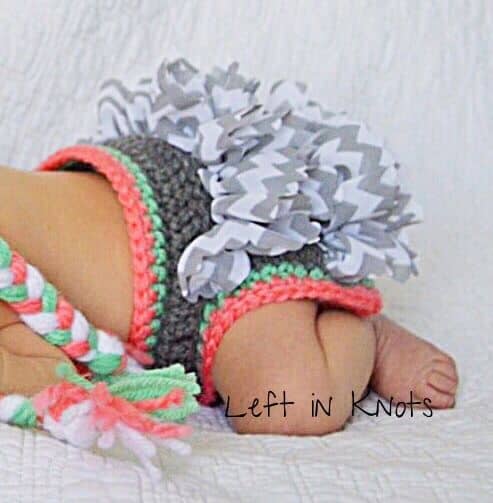
This was my first pattern I ever published on my blog, and since then the yarn that I used for ruffles may be harder to find. But have no fear! This ruffle diaper cover is just as cute without ruffles. You can get creative with stripes and color changes to customize it however you want.
Show Me Your Projects
Don’t forget to share pictures of your projects with me in my Facebook Group or by tagging @leftinknots on Instagram. I can’t wait to see what you make!
Make Your Own Ruffle Diaper Cover
Supplies:
- Worsted Weight Yarn-I used Big Twist Value in Dark Teal and White
- Red Heart Boutique Sassy Fabric or Sassy Lace- I used Sassy Fabric in Teal Chevron
- H (5.0) Hook- I used Clover Amour
- Yarn Needle
- 1” Button
Abbreviations:
- SC: Single crochet
- HDC: Half-double crochet
- HDC2TOG: Half-double crochet two together (i.e. HDC decrease)
- Tr: Triple crochet
- Ch: Chain
- Sl St: Slip Stitch
Gauge:
15 HDC x 10 Rows = 4"
Notes:
- This diaper cover has a completely adjustable waist band. If you want a larger waist band, add to the beginning chain in increments of two and adjust the starting location of row 4 accordingly.
- If you prefer to Ch 2 before starting a row of HDC that's fine. I find that it leaves gaps and so I prefer Ch 1.
Instructions
0-6 Months
Chain 55
Row 1: SC into second Ch from the hook. SC across. Ch 3 and turn. (54)
Row 2: Tr across. Ch 1 and turn (54).
Row 3: SC across. Fasten off (54).
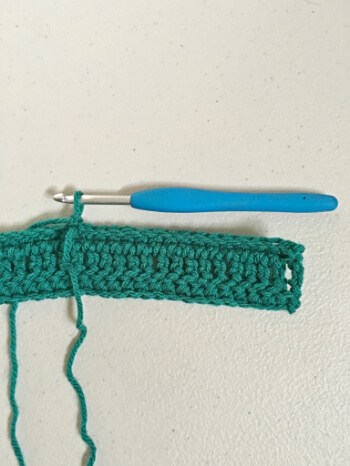
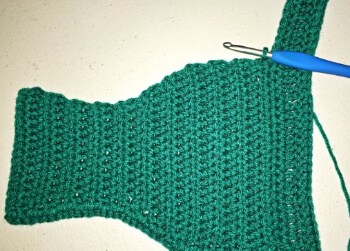
Row 4: Skip the first 16 stitches of Row 3 and sl st into the 17th stitch. Ch 1 and HDC in the same stitch. HDC in the next 21 stitches leaving the last 16 unworked. Ch 1 and turn (22). (Fig. 1)
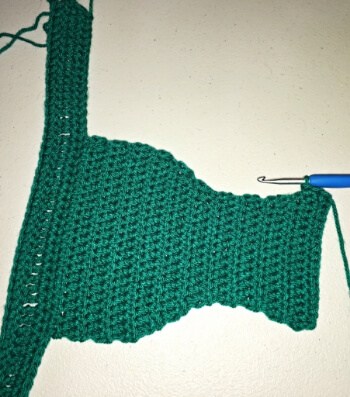
Rows 5-10: HDC across. Ch 1 and turn. (22)
Row 11: HDC2TOG, HDC in next 18, HDC 2 TOG. Ch 1 and turn (20).
Row 12: HDC2TOG, HDC in next 16, HDC 2 TOG. Ch 1 and turn (18).
Row 13: HDC2TOG, HDC in next 14, HDC 2 TOG. Ch 1 and turn (16).
Row 14: HDC2TOG, HDC in next 12, HDC 2 TOG. Ch 1 and turn (14).
Row 15: HDC2TOG, HDC in next 10, HDC 2 TOG. Ch 1 and turn (12).
Row 16-20: HDC across. Ch 1 and turn (12)
Row 21: HDC inc, HDC in next 10, HDC inc. Ch 1 and turn (14).
Row 22: HDC across. Ch 1 and turn (14).
Row 23: HDC inc, HDC in next 12, HDC inc. Ch 1 and turn (16).
Row 24: HDC across. Do not fasten off (16).
Follow instructions below for edging and adding ruffles.
6-12 Months
Chain 57
Row 1: SC into second Ch from the hook. SC across. Ch 3 and turn. (56)
Row 2: Tr across. Ch 1 and turn (56).
Row 3: SC across. Fasten off (56).
Row 4: Skip the first 16 stitches of Row 3 and sl st into the 17th stitch. Ch 1 and HDC in the same stitch. HDC in the next 23 stitches leaving the last 16 unworked. Ch 1 and turn (24). (Fig. 1)
Rows 5-10: HDC across. Ch 1 and turn. (24)
Row 11: HDC2TOG, HDC in next 20, HDC 2 TOG. Ch 1 and turn (22).
Row 12: HDC2TOG, HDC in next 18, HDC 2 TOG. Ch 1 and turn (20).
Row 13: HDC2TOG, HDC in next 16, HDC 2 TOG. Ch 1 and turn (18).
Row 14: HDC2TOG, HDC in next 14, HDC 2 TOG. Ch 1 and turn (16).
Row 15: HDC2TOG, HDC in next 12, HDC 2 TOG. Ch 1 and turn (14).
Row 16-22: HDC across. Ch 1 and turn (14)
Row 23: HDC inc, HDC in next 12, HDC inc. Ch 1 and turn (16).
Row 24: HDC across. Ch 1 and turn (16).
Row 25: HDC inc, HDC in next 14, HDC inc. Ch 1 and turn (18).
Row 26: HDC across. Do not fasten off (18).
Follow instructions below for edging and adding ruffles.
Edging
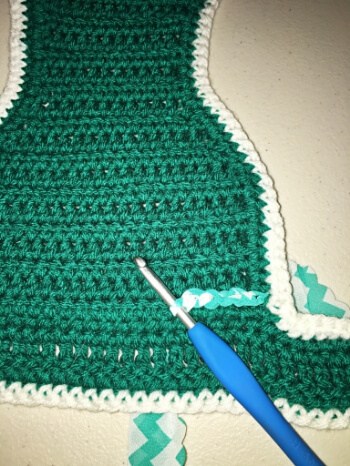
Ch 1 and SC along the side of the diaper cover, working one SC into each row, and stopping at the band (Fig. 2). Cut and fasten off yarn.
Attach the yarn with a sl st to the other side of the diaper cover and SC along the edge (Fig. 3), working one stitch into each row, and stopping when you reach the corner. Cut and fasten off yarn.
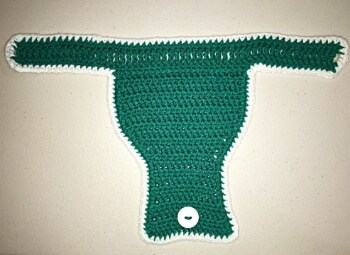
With accent color (white in my example), attach the yarn with a sl st to the side of the diaper cover below the belt and SC around the entire piece, working 2 SC into each corner (Fig. 4). Fasten off and weave in all ends.
Adding Ruffles on the Butt: With Red Heart Boutique Sassy Fabric (or Lace), sl st in each stitch between rows 4 and 5 (Fig. 5).
Ensure the ruffles are forming on the outside of the diaper cover (Fig. 6). Fasten off and weave in ends. Sl st in each stitch between rows 8 and 9. Fasten off and weave in ends
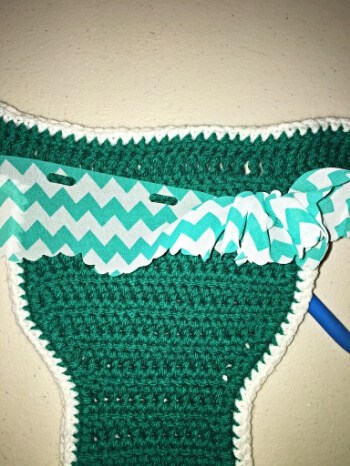
Adding a Ruffle Skirt: With Red Heart Boutique Sassy Fabric (or Lace), sl st in each stitch between rows 2 and 3 (along the entire link of the waist band). Ensure the ruffles are forming on the right side of the diaper cover. Fasten off and weave in ends.
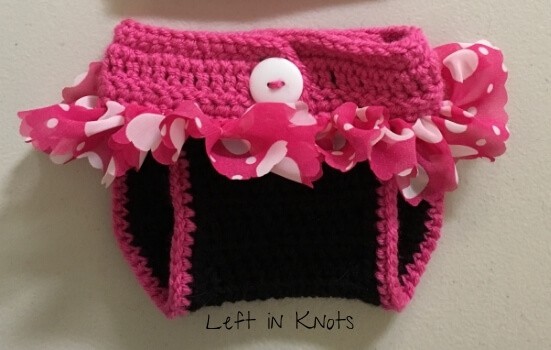
Add a 1” button on the front of the diaper cover. This waist band will be adjustable throughout all the Tr stitches.
More Free Crochet Patterns You'll Love
Find all FREE CROCHET PATTERNS here
Now the legal stuff...You may sell items made from this pattern, but please credit me as the original designer. Also, please do not share the written pattern in print or electronically. The photos on this webpage belong to Megan Meyer of Left in Knots and may not be used for product sales/product listings. You may share a link back to my blog if you would like someone else to see or work with this pattern. Thank you for your cooperation and if you have any questions please feel free to contact me!
This post contains affiliate links. Thank you for supporting free patterns and yarn deals from Left in Knots!