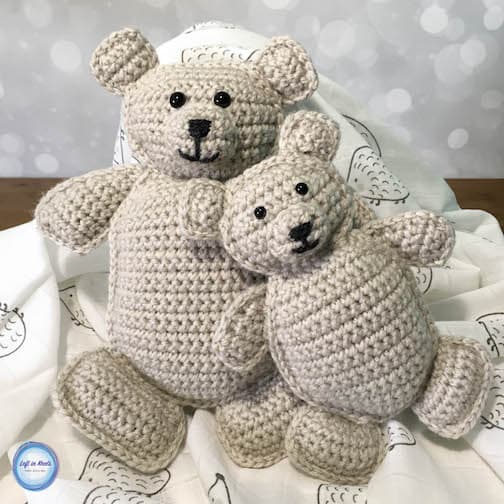
Crochet a ragdoll bear in two different sizes with this free crochet pattern. These bears make a special baby gift and are a fun matching set for older siblings, too. Keep reading for the free crochet pattern.
A Special Crochet Teddy Bear Baby Gift
I will try not to ramble too much about these bears, but the recipients are so very special to me that I do have to share some back story!
My oldest (in length of time...not age!) friend and I shared the awesome experience a few years ago of being pregnant at the same time. And I really mean the same time! We were about a week apart in due dates, and we got to celebrate and commiserate all the ups and downs of pregnancy together. When our girls were born just a few hours apart from each other that was really special for me, and going through first time parenting with her has been an experience I wouldn't trade for anything. Even though we are far apart, I feel like we have seen each other's daughters grow up over the last few years through our shared conversations and pictures. So when my friend told me that she was pregnant with her second child, I knew I wanted to make a very special gift for both her daughter and the new baby!
I thought that matching rag doll teddy bears would be a perfect, simple gift that both a toddler and baby could enjoy! My friend's daughter will be able to give the little bear to her new sibling, and I think most 2-3 year olds kind of love the concept of matching. Of course, I made hers a little bit bigger than baby's, but either of these sizes would be appropriate for a baby and they work up very quickly with very little yarn! So if you can't muster up making another baby blanket (or perhaps mom already has too many!) consider making this sweet bear for the next special baby in your life. Or if there are older siblings, make them a matching set as I have
Show off Your Crochet Projects
Don’t forget to share pictures of your projects with me in my Facebook Group or by tagging @leftinknots on Instagram. I can’t wait to see what you make!
Baby and Me Ragdoll Bear - Free Crochet Pattern
Supplies:
- Vanna's Choice yarn or a similar worsted weight yarn - I used just less than two skeins (approx. 340 yards) for BOTH bears. The color I used was 'Linen'
- Small amount of black or dark grey yarn for nose/mouth
- 4.5mm crochet hook (I use Clover Amour)
- Scissors (I like to keep these in my hook case)
- Yarn needle
- Safety eyes (6mm for the small bear, 10mm for the large bear). You could also stitch eyes on with yarn if you prefer.
- Polyfil
Abbreviations (written in U.S. terms):
- ch: chain
- st/sts: stitch/stitches
- SC: single crochet
- SC2Tog: single crochet two together
Gauge
8 sts x 8 rows = 2" square in SC
Finished Size:
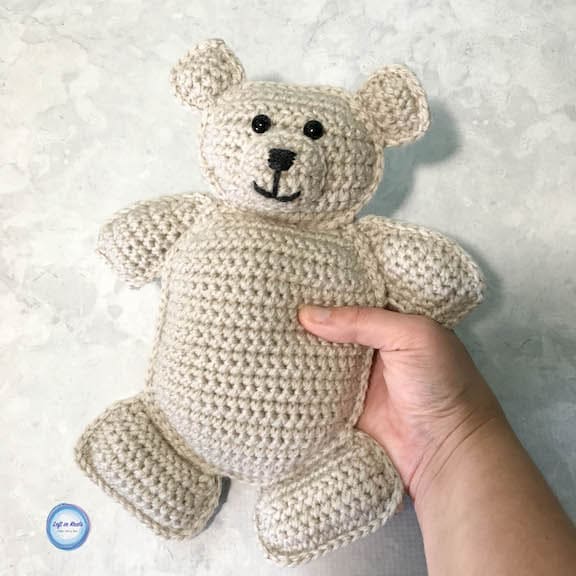
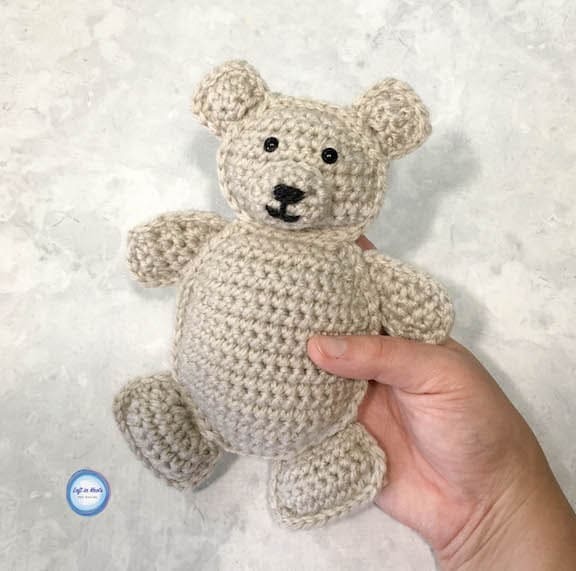
Small Bear = 8" tall
Big Bear = 12" tall
Pattern Notes
- Chain stitches at the beginning of a row do not count as a stitch.
- Assembly photos are taken from a left handed perspective
Instructions - Small Bear
Main Body (make 2)
ch 10
Row 1: SC in the second ch from the st and SC across (9). Turn.
Row 2: ch 1, 2 SC in the first st, SC in next 7, 2 SC in the last st (11). Turn.
Row 3: ch 1, 2 SC in the first st, SC in next 9, 2 SC in the last st (13). Turn.
Row 4: ch 1, 2 SC in the first st, SC in next 11, 2 SC in the last st (15). Turn.
Row 5: ch 1, 2 SC in the first st, SC in next 13, 2 SC in the last st (17). Turn.
Row 6-14: ch 1, SC across (17). Turn
Row 15: ch 1, SC2Tog, SC in next 13, SC2Tog (15). Turn
Row 16: ch 1, SC2Tog, SC in next 11, SC2Tog (13). Turn
Row 17: ch 1, SC2Tog, SC in next 9, SC2Tog (11). Turn
Row 18: ch 1, SC2Tog, SC in next 7, SC2Tog (9). Turn
Row 19: ch 1, SC2Tog, SC in next 5, SC2Tog (7). Turn
Row 20: ch 1, 2 SC in first st, SC in next 5, 2 SC in the last st (9). Turn.
Row 21: ch 1, 2 SC in first st, SC in next 7, 2 SC in the last st (11). Turn.
Row 22: ch 1, 2 SC in first st, SC in next 9, 2 SC in the last st (13). Turn.
Row 23-25: ch 1, SC across (13). Turn.
Row 26: ch 1, SC2Tog, SC in next 9, SC2Tog (11). Turn.
Row 27: ch 1, SC2Tog, SC in next 7, SC2Tog (9). Turn.
Row 28: ch 1, SC2Tog, SC in next 5, SC2Tog (7). Turn.
Arms (make 4)
ch 2
Row 1: SC in second ch from the hook (1). Turn.
Row 2: ch 1, 2 SC in st from previous row (2). Turn.
Row 3: ch 1, 2 SC in first st, SC in last st (3). Turn.
Row 4: ch 1, SC in first 2 sts, 2 SC in last st (4). Turn.
Row 5-6: ch 1, SC across (4). Turn.
Row 7: ch 1, SC2Tog across (2).
When you make your first arm panel, tie off yarn and weave in ends. When you make your second arm panel do not tie off the yarn. Instead, holding the two panels together, SC around the outside edge of the arm panels working through both layers. When you have about 1” of space left, stuff with a small amount of polyfil and then finish crocheting around the outer edge. Tie off and leave a long tail. This makes one of the arms for your bear. Repeat this process when you make your third and fourth panels to make your second arm.
Ears (make 4)
ch 5
Row 1: SC in second ch from the hook and SC across (4). Turn.
Row 2-3: ch 1, SC across (4). Turn.
Row 4: ch 1, SC, SC2Tog, SC (3).
When you make your first ear panel, tie off yarn and weave in ends. When you make your second ear panel do not tie off the yarn. Instead, holding the two panels together, SC around the outside edge of the ear panels working through both layers. When you have about 1/2” of space left, stuff with a small amount of polyfil and then finish crocheting around the outer edge. Tie off and leave a long tail. This makes one of the ears for your bear. Repeat this process when you make your third and fourth panels to make your second ear.
Feet (make 4)
ch 10
Row 1: SC in second ch from the hook, SC across (9). Turn.
Row 2-4: ch 1, SC across (9). Turn.
Row 5: ch 1, SC2Tog 2 times, SC in next st, SC2Tog 2 more times (5).
When you make your first foot panel, tie off yarn and weave in ends. When you make your second foot panel do not tie off the yarn. Instead, holding the two panels together, SC around the outside edge of the foot panels working through both layers. When you have about 1/2” of space left, stuff with a small amount of polyfil and then finish crocheting around the outer edge. Tie off and leave a long tail. This makes one of the feet for your bear. Repeat this process when you make your third and fourth panels to make your second foot.
Muzzle (make 1)
ch 5
Row 1: SC in second ch from the hook, SC across (4). Turn.
Row 2: ch 1, 2 SC in the first st, SC in the next two, 2 SC in the last st (6). Turn.
Row 3: ch 1, SC across (6). Turn.
Row 4: ch 1, SC2Tog, SC in next 2, SC2Tog (4).
ch 1 and continue to SC around the outer edge of the muzzle. It is ok if it curls in a little bit. When you finish SC around the outer edge, tie off yarn and cut leaving a long tail for sewing it to the face (at least 12”). Using black yarn, embellish the muzzle with a nose and mouth.
*Continue on to assembly instructions*
Instructions - Large Bear
Main Body (make 2)
ch 14
Row 1: SC in the second ch from the hook and SC across (13). Turn.
Row 2: ch 1, 2 SC in the first st, SC in next 11, 2 SC in the last st (15). Turn.
Row 3: ch 1, 2 SC in the first st, SC in next 13, 2 SC in the last st (17). Turn.
Row 4: ch 1, 2 SC in the first st, SC in next 15, 2 SC in the last st (19). Turn.
Row 5: ch 1, 2 SC in the first st, SC in next 17, 2 SC in the last st (21). Turn.
Row 6-21: ch 1, SC across (21). Turn.
Row 22: ch 1, SC2Tog, SC in next 17, SC2Tog (19). Turn.
Row 23: ch 1, SC2Tog, SC in next 15, SC2Tog (17). Turn.
Row 24: ch 1, SC2Tog, SC in next 13, SC2Tog (15). Turn.
Row 25: ch 1, SC2Tog, SC in next 11, SC2Tog (13). Turn.
Row 26: ch 1, SC2Tog, SC in next 9, SC2Tog (11). Turn.
Row 27: ch 1, 2 SC in the first st, SC in next 9, 2 SC in the last st (13). Turn.
Row 28: ch 1, 2 SC in the first st, SC in next 11, 2 SC in the last st (15). Turn.
Row 29: ch 1, 2 SC in the first st, SC in next 13, 2 SC in the last st (17). Turn.
Row 30-34: ch 1, SC across (17). Turn.
Row 35: ch 1, SC2Tog, SC in next 13, SC2Tog (15). Turn.
Row 36: ch 1, SC2Tog, SC in next 11, SC2Tog (13). Turn.
Row 37: ch 1, SC2Tog, SC in next 9, SC2Tog (11). Tie off yarn and weave in ends.
Arms (make 4)
ch 3
Row 1: SC in second ch from the hook and SC across (2). Turn
Row 2: ch 1, 2 SC in first st, SC across (3). Turn.
Row 3: ch 1, SC in 2, 2 SC in last st (4). Turn.
Row 4: ch 1, 2 SC in first st, SC across (5). Turn.
Row 5: ch 1, SC in 4, 2 SC in last st (6). Turn.
Row 6: ch 1, 2 SC in first st, SC across (7). Turn.
Row 7-9: ch 1, SC across (7). Turn.
Row 10: ch 1, SC2Tog, SC in next 3, SC2Tog (5).
When you make your first arm panel, tie off yarn and weave in ends. When you make your second arm panel do not tie off the yarn. Instead, holding the two panels together, SC around the outside edge of the arm panels working through both layers. When you have about 1” of space left, stuff with a small amount of polyfil and then finish crocheting around the outer edge. Tie off and leave a long tail. This makes one of the arms for your bear. Repeat this process when you make your third and fourth panels to make your second arm.
Ears (make 4)
ch 5
Row 1: SC in second ch from the hook and SC across (4). Turn.
Row 2: ch 1, 2 SC in first st, SC in next 2, 2 SC in last st (6). Turn.
Row 3: ch 1, SC across (6). Turn.
Row 4: ch 1, SC2Tog, SC in next 2, SC2Tog (4).
When you make your first ear panel, tie off yarn and weave in ends. When you make your second ear panel do not tie off the yarn. Instead, holding the two panels together, SC around the outside edge of the ear panels working through both layers. When you have about 1/2” of space left, stuff with a small amount of polyfil and then finish crocheting around the outer edge. Tie off and leave a long tail. This makes one of the ears for your bear. Repeat this process when you make your third and fourth panels to make your second ear.
Feet (make 4)
ch 14
Row 1: SC in second ch from the hook and SC across (13). Turn.
Row 2-5: ch 1, SC across (13). Turn.
Row 6: ch1, SC2Tog, SC in next 9, SC2Tog (11). Turn.
Row 7: ch 1, SC2Tog, SC in next 7, SC2Tog (9).
When you make your first foot panel, tie off yarn and weave in ends. When you make your second foot panel do not tie off the yarn. Instead, holding the two panels together, SC around the outside edge of the foot panels working through both layers. When you have about 1/2” of space left, stuff with a small amount of polyfil and then finish crocheting around the outer edge. Tie off and leave a long tail. This makes one of the feet for your bear. Repeat this process when you make your third and fourth panels to make your second foot.
Muzzle (make 1)
ch 6
Row 1: SC in second ch from the hook and SC across (5). Turn.
Row 2: ch 1, 2 SC in the first st, SC in the next 3, 2 SC in last st (7). Turn.
Row 3-4: ch 1, SC across (7). Turn.
Row 5: ch 1, SC2Tog, SC in next 3, SC2Tog (5).
ch 1 and continue to SC around the outer edge of the muzzle. It is ok if it curls in a little bit. When you finish SC around the outer edge, tie off yarn and cut leaving a long tail for sewing it to the face (at least 12”). Using black yarn, embellish the muzzle with a nose and mouth.
*Continue on to assembly instructions*
Assembly Instructions
- Sew muzzle onto one of the body panels in desired location. Add a small amount of stuffing in the muzzle before closing it completely. Tie off and weave in end of sewing yarn.
- Attach safety eyes in desired location (or sew eyes in desired location)
- Working through both layers of the main body, attach yarn somewhere on the bear’s head (see photo - I recommend at the neck or cheek). Start SC through both layers around the face.
- Decide where you want to attach the ears. Place the ear between the layers of the main body. When you reach that point, instead of SC you will surface sl st through all three layers together. Continue around, working SC stitches when working through the main body panels and surface sl st when working through all three, until both ears are attached.
- When you reach the bear’s neck, work across the main body panels with a surface sl st until you reach the other side of the face. Continue to SC around until you have about 1” of space left. Stuff the head section that you just created, and then continue SC sts until you reach the point where you started. Sl st to your first SC, tie off yarn and weave in ends.
- Now attached your yarn to the main body panels at the bear’s neck again with a sl st, but this time to work around the torso of the bear.
- Place your arms and legs where desired between the two main body panels. Start to SC through both layers around as you did for the head/face.
- When you reach arms/legs, surface sl st through all three layers to secure them as you did the ears on the bears head. Stuff the body when you have a 1” opening left. Once you reach the other side of the bears neck, tie off the yarn and weave in ends.
More Free Crochet Patterns You'll Love

Find all FREE CROCHET PATTERNS here
Now the legal stuff...You may sell items made from this pattern, but please credit me as the original designer. Also, please do not share the written pattern in print or electronically. The photos on this webpage belong to Megan Meyer of Left in Knots and may not be used for product sales/product listings. You may share a link back to my blog if you would like someone else to see or work with this pattern. Thank you for your cooperation and if you have any questions please feel free to contact me!
This post contains affiliate links. Thank you for supporting free patterns and yarn deals from Left in Knots!