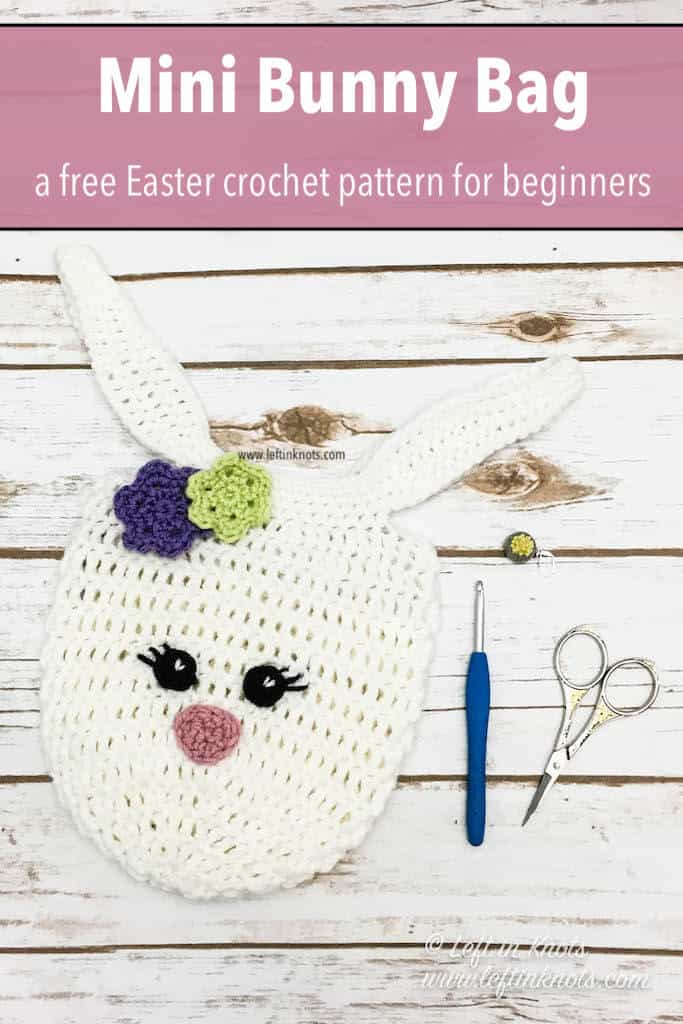
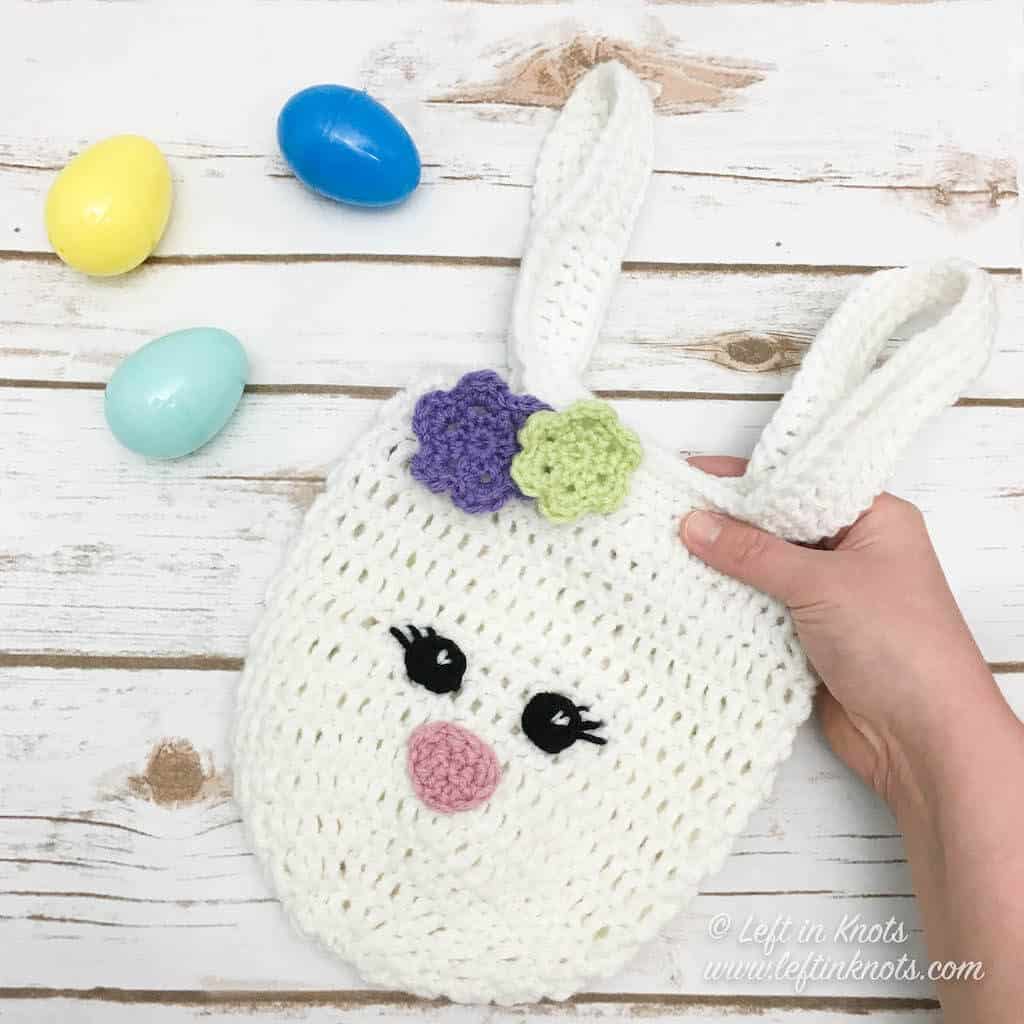
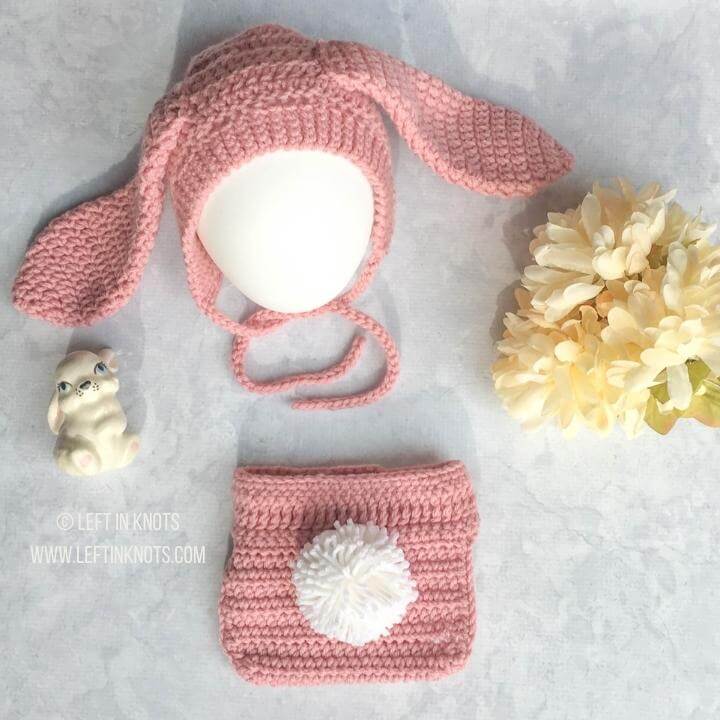
This sweet Crochet Mini Bunny Bag is the perfect size for your preschoolers to collect their eggs in, or it would also be a super cute alternative to an Easter basket. This easy crochet bag is embellished with a few simple accents to make a sweet Easter Bunny bag perfect for any skill level! Keep reading for the free crochet pattern.
A Mini Version of the Original Crochet Bunny Bag
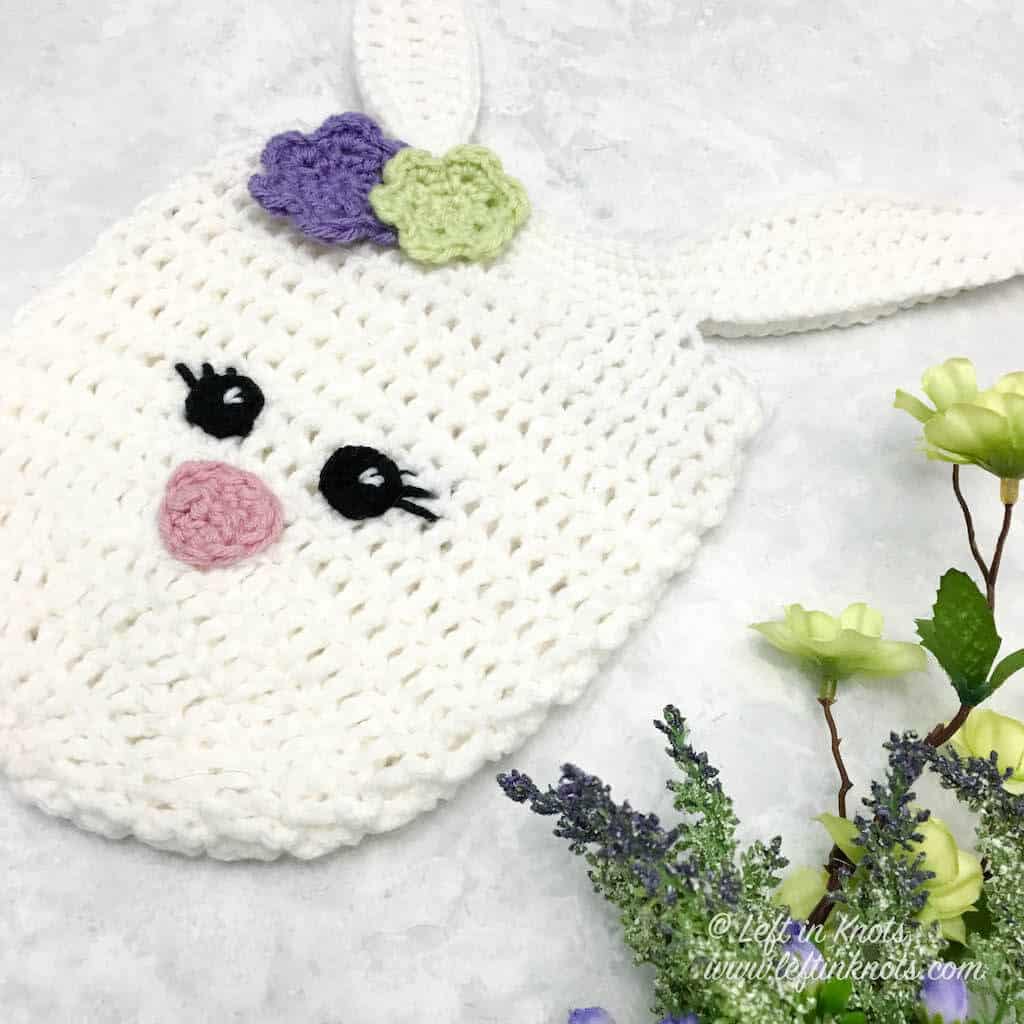
If you have been with me for some time now, you may remember that I published another bunny bag pattern a few years ago. I love the original, but it turned out to be just a bit too big for my preschooler to carry around for gathering eggs. So this time I made the bag a bit smaller and I also gave Mrs. Bunny some new crocheted eyes, nose and flowers for her hair. The being said, I love the original bow embellishment also and that, too, could be used with the Mini Bunny Bag.
A Simple Crochet Pattern for Beginners
One of the things I loved most about making this pattern is that I was able to use yarn that was in my stash for all of it! Just a skein of white worsted weight acrylic is required, and then small scraps of your desired colors for the embellishments. The bag pattern is perfect for any level of crocheter and works up quickly, so you will have time to make them for all your egg hunters before Easter!
Show off Your Crochet Projects
Don’t forget to share pictures of your projects with me in my Facebook Group or by tagging @leftinknots on Instagram. I can’t wait to see what you make!
Supplies:
- Approx. 150 yards of a worsted weight acrylic yarn (Red Heart Super Saver pictured)
- Small amounts of black, pink, purple and green worsted weight yarn for embellishments
- H/5.0mm crochet hook
- Scissors - I always keep these travel scissors in my hook case
- Yarn needle
Abbreviations (written in U.S. terms):
- st/sts: stitch/stitches
- ch: chain
- sl st: slip stitch
- SC: single crochet
- SC2Tog: single crochet two together
- HDC: half double crochet
- DC: double crochet
Gauge
6 sts x 4 rows = 2” square in DC
Finished Size:
Height (including straps)= 15”
Width = 8.5”
Related Video Tutorials
- How to Crochet the Magic Circle (left handed tutorial here)
- How to Crochet a Simple Flower (Right Handed or Left Handed)
Pattern Notes
- Chain stitches at the beginning of rounds do not count as a stitch
- The end of each round is joined to the first stitch of the round with a sl st.
- Round 17 will work stitched into the previous round including into the chain stitches
Instructions for the Crochet Mini Bunny Bag
Bag
Start with a magic circle
Round 1: ch 2, DC 10 into the magic circle (10)
Round 2: ch 2, 2 DC in each stitch around (20)
Round 3: ch 2, *2 DC, DC in the next st, repeat from * around (30)
Round 4: ch 2, *2 DC, DC in the next 2 sts, repeat from * around (40)
Round 5: ch 2, *2 DC, DC in the next 3 sts, repeat from * around (50)
Round 6-14: ch 2, DC in each st around (50)
Round 15: ch 2, *DC2Tog, DC in next 3 sts, repeat around (40)
Round 16: ch 1, SC in 7, ch 40, skip 6, SC in 14, ch 40, skip 6, SC in 7 (108)
Round 17-19: ch 1, SC in 8, HDC, DC in 8, HDC in 5, SC in 10, HDC in 5, DC in 8, HDC, SC in 16, HDC, DC in 8, HDC in 5, SC in 10, HDC in 5, DC in 8, HDC, SC in 8 (108)
Eyes (Make 2)
Using black yarn start with a magic circle. Work 8 SC into the magic circle. Tighten and attach the last st to the first st with. Tie off yarn leaving a long tail to use for sewing, weave in the other end.
Using a yarn needle and white yarn, stitch a small v-shape near the edge of each eye.
Nose
Using pink yarn, ch 5
Row 1: SC in the second ch from the hook and SC across (4). Turn
Row 2: ch 1, SC2Tog across (2). Turn
Row 3: ch 1, SC2Tog (1)
SC around the edge. Tie off yarn leaving a long tail for sewing. Weave in other end.
Flower (Make one with a 5mm hook and one with a 4mm hook)
Start with magic circle
Round 1: ch 1 and work 12 SC into the magic circle. Pull tight and join with a sl st to the first SC
Round 2: ch 1, *SC, ch 3, SC in next stitch. Repeat from * around. You should have 6 ch 3 spaces. Join with sl st to first SC
Round 3: ch 1, *SC, HDC, DC, HDC, SC in each ch 3 space. Repeat from * around. Attach with sl st to first SC. Fasten off and weave in ends.
Assembly
Place your embellishments in the desired location on your bag. I recommend pinning them in place.
Using the long tails and a yarn needle, sew each embellishment onto the bag. After sewing the eyes in to place I used the same tail to create the eyelashes. Tie off and weave in any additional ends.
More Free Crochet Patterns You'll Love
Find all FREE CROCHET PATTERNS here
Now the legal stuff...You may sell items made from this pattern, but please credit me as the original designer. Also, please do not share the written pattern in print or electronically. The photos on this webpage belong to Megan Meyer of Left in Knots and may not be used for product sales/product listings. You may share a link back to my blog if you would like someone else to see or work with this pattern. Thank you for your cooperation and if you have any questions please feel free to contact me!
This post contains affiliate links. Thank you for supporting free patterns and yarn deals from Left in Knots!