This free crochet pattern uses only one skein of the Lion Brand "Heartland" yarn to make a soft, squishy beanie with an optional pom pom. The crown is worked with half double crochet and the body uses the Ladders stitch with a one-row repeat. This is my go-to pattern whenever I want a hat or a quick gift to make. The single crochet ribbing makes for a wonderfully elastic ribbing. Keep reading for the free crochet pattern.

This lovely pattern was originally designed by Stacy of Handmade by Stacy J. As of December 2024 - Left in Knots owns this intellectual property.
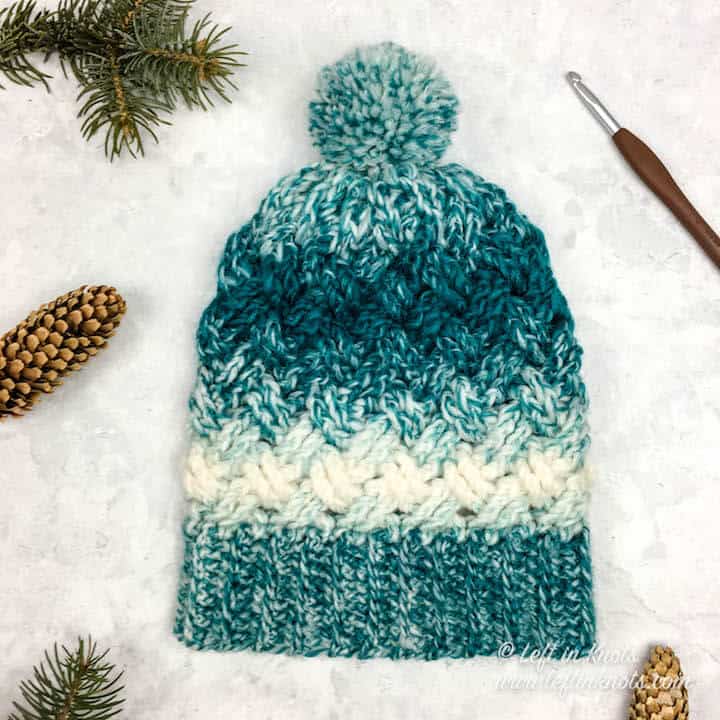
A Perfectly Squishy Crochet Beanie Pattern
The Squishtastic Beanie is a perfect crochet project when you want a hat that is quick to make and has a fun texture. It offers lots of warmth, is fun to make and, as it's name implies, is so squishy! This beanie is a great project to finish in a weekend.

A Crochet Hat Easy to Customize
It's really easy to work and to customize this beanie, as the crown works with half double crochet increases until you reach the measurement that you need. For a beanie, you'll need to measure the size of the recipients head and then subtract 2" / 5 cm. That gives it a nice fit that doesn't fall off easily. If you aren't able to measure the recipient, that's okay! I have a graphic below and a free hat sizing template for you work off of that uses the most common sizes.

Crochet Market Bags Have So Many Uses
One of the fun things about this hat is that you don't have to use the recommended yarn, or even the recommended weight of yarn - you can totally go rogue and use whatever you like. Since you work from the top down, all you do is continue working the increase rounds until you reach the circumference needed. So, go ahead - have some fun with it!

Show off Your Crochet Projects
Don’t forget to share pictures of your projects with me in my Facebook Group or by tagging @leftinknots on Instagram. I can’t wait to see what you make!
Squishy Crochet Beanie - Free Pattern
Supplies:
- Lion Brand “Heartland” yarn (100% acrylic; 5 oz / 142 g; 251 yd / 230 m) in color “Grand Canyon” - 1 skein or 251 yds / 230 m in any other #4 medium worsted weight yarn
- Size I / 5.5 mm crochet hook
- Size G+ / 4.5 mm crochet hook
- 2.5 “ / 65 mm pom pom maker or faux pom (optional)
- Locking stitch marker (optional)
- Tapestry needle
- Scissors
- Measuring tape
- Hat template (available on my website - optional)
Abbreviations (written in U.S. terms):
- Beg: Beginning
- Blo: Back loop only
- Bpdc: Back post double crochet
- Ch: Chain
- Ea: Each
- Fpdc: Front post double crochet
- Hdc: Half double crochet
- Rep: Repeat
- Sc: Single crochet
- Sk: Skip
- Sl st: Slip stitch
- St (s): Stitch (es)
Video Tutorial
Gauge is not critical in this project, as the hat can be measured as you go along, but gauge will affect yarn usage
Preemie to 2T-3T in #3 DK yarn with G / 4 mm crochet hook, 7 reps of pattern = 2” / 5 cm
Kid to Large Adult in #4 worsted weight yarn with I / 5.5 mm crochet hook, 11 reps of pattern = 4” / 10 cm
Finished Size:
(Sm Adult) 11.5” tall x 20” circumference / 29 cm x 51 cm circumference
Pattern Notes
- I used all of my skein for the “Sm Adult” size except for 3” when I made a pom pom with the hat yarn, so you may want to purchase another skein to be on the safe side if you plan on making your own pom pom
- This project is worked in rounds; do not turn the project until instructed to do so.
- This project is completely customizable to the size needed, but 2” / 5 cm of negative ease is recommended. Simply measure the circumference of the recipient’s head and subtract 2” / 5 cm and then measure the circumference of the project as you are working the top part of the hat. Stop when you reach the correct measurement and move on to the body of the hat.
- To make the measuring of circumference a little easier, please visit this link for a free hat sizing template: https://handmadebystacyj.com/2022/07/11/hat-template/
- To keep track of your rounds easier, use a locking stitch marker to mark the first stitch of each round.
Instructions
Note: Only work rounds 1 - 10 until you reach the circumference needed. For my hat, I stopped after completing round 8.
Round 1: Using the larger hook, ch 3; in third ch from hook work 8 hdc, join with sl st to top of first hdc (8 hdc)
Round 2: Ch 2 (does not count as hdc here and throughout), 2 hdc in ea st around, join with sl st to top of first hdc (16 hdc)
Round 3: Ch 2, *2 hdc in next st, 1 hdc in next st; rep * around, join with sl st to top of first hdc (24 hdc)
Round 4: Ch 2, *2 hdc in next st, 1 hdc in ea of next 2 sts; rep * around, join with sl st to top of first hdc (32 hdc)
Round 5: Ch 2, *2 hdc in next st, 1 hdc in ea of next 3 sts; rep * around, join with sl st to top of first hdc (40 hdc)
Round 6: Ch 2, *2 hdc in next st, 1 hdc in ea of next 4 sts; rep * around, join with sl st to top of first hdc (48 hdc)
Round 7: Ch 2, *2 hdc in next st, 1 hdc in ea of next 5 sts; rep * around, join with sl st to top of first hdc (56 hdc)
Round 8: Ch 2, *2 hdc in next st, 1 hdc in ea of next 6 sts; rep * around, join with sl st to top of first hdc (64 hdc)
Round 9: Ch 2, *2 hdc in next st, 1 hdc in ea of next 7 sts; rep * around, join with sl st to top of first hdc (72 hdc)
Round 10: Ch 2, *2 hdc in next st, 1 hdc in ea of next 8 sts; rep * around, join with sl st to top of first hdc (80 hdc)
Round 11 (or whichever your next round is after increases): Ch 2, *1 FpDc around ea of next 4 sts, 1 BpDc around ea of next 4 sts; rep * around and join with sl st in top of first FpDc
Rep pattern until hat measures 6.5” or desired length from beg of Pattern (allow 3” / 7.6 cm more for ribbing for “Kid to Adult” sizes and 1” / 2.5 cm for “Preemie” to “2T - 3T” sizes); do not cut yarn
With smaller hook, ch 12 (ch 6 for sizes “Preemie” to “2T - 3T”)
- Sc in BLO in second ch from hook and ea ch across - 11 sc (5 sc)
- Sl st in ea of next 2 sts on hat brim, turn; sk 2 sl sts, 1 sc in BLO in ea st across
- Ch 1, turn; 1 sc in BLO in ea st across - 11 sc (5 sc)
Rep rows 2-3 around brim of hat until only 2 sts rem
Rep row 2 once more
Turn the hat inside out so that the right sides are facing. Then join ribbing by working sl st in two edges to join the sides or your preferred method of seaming
Optional: Make pom pom or attach faux pom
Tie off yarn and weave in all ends.
Find all FREE CROCHET PATTERNS here


Now the legal stuff...You may sell items made from this pattern, but please credit me as the original designer. Also, please do not share the written pattern in print or electronically. The photos on this webpage belong to Megan Meyer of Left in Knots and may not be used for product sales/product listings. You may share a link back to my blog if you would like someone else to see or work with this pattern. Thank you for your cooperation and if you have any questions please feel free to contact me!
This post contains affiliate links. Thank you for supporting free patterns and yarn deals from Left in Knots!
